
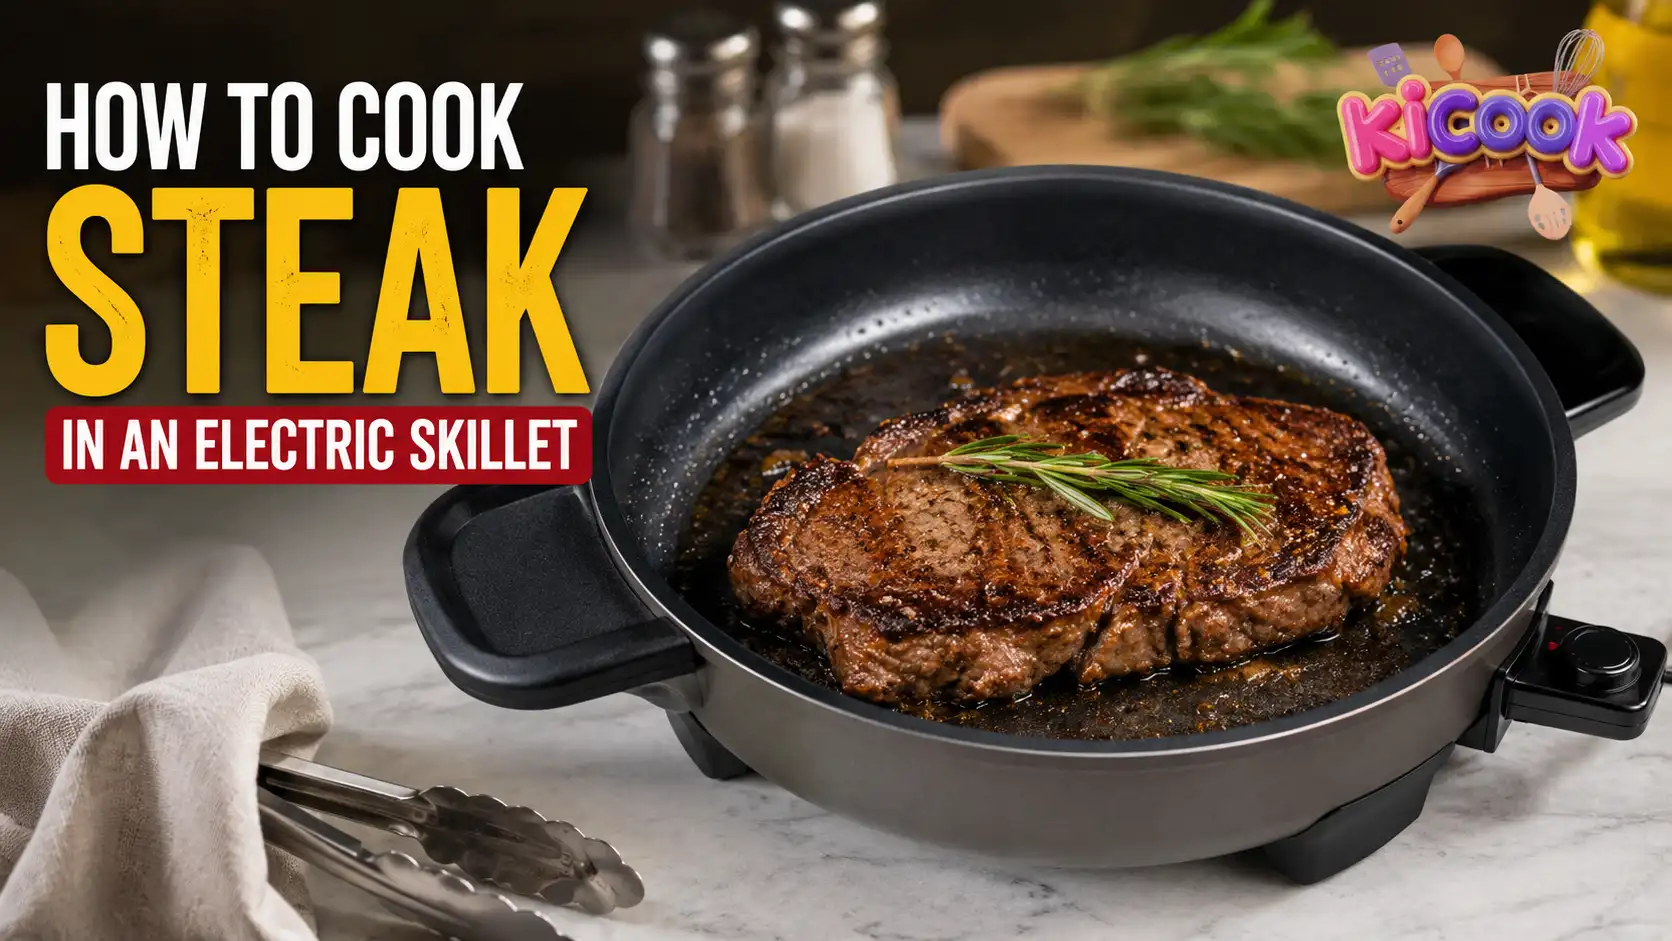
Cooking a juicy, well-browned steak does not require an outdoor grill or a heavy cast-iron pan. An electric skillet, also called an electric frying pan or electric frypan, gives you direct control over the cooking temperature and provides enough surface area to sear one or more steaks comfortably.
The key is knowing how hot to preheat the skillet, when to reduce the temperature and how to check the centre of the steak without overcooking it.
In this guide, you will learn how to cook steak in an electric skillet step by step, including the best temperature, estimated cooking times, doneness levels, seasoning options and solutions to common problems.
Quick Answer: How Do You Cook Steak in an Electric Skillet?
Preheat the electric skillet to approximately 375–400°F or 190–205°C, provided that temperature is suitable for your appliance. Pat the steak dry, season it and coat it lightly with a high-heat cooking oil.
Sear the steak uncovered for approximately 2–4 minutes per side. Reduce the temperature if the outside is browning faster than the centre is cooking. Check the thickest part with an instant-read thermometer, remove the steak at your preferred temperature and let it rest before slicing.
Cooking time varies according to the steak’s thickness, cut, starting temperature and desired level of doneness.
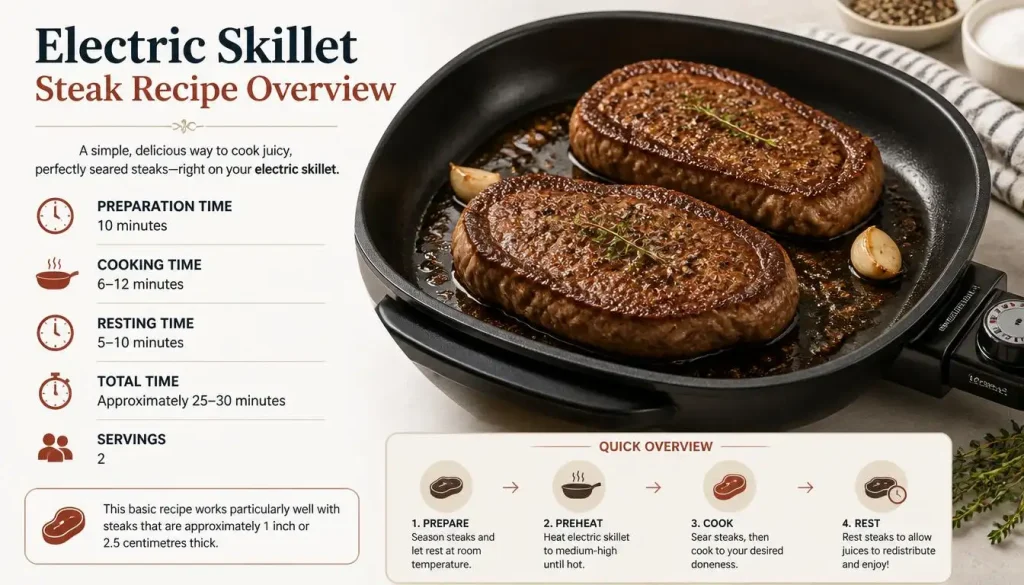
Electric Skillet Steak Recipe Overview
Preparation time: 10 minutes
Cooking time: 6–12 minutes
Resting time: 5–10 minutes
Total time: Approximately 25–30 minutes
Servings: 2
This basic recipe works particularly well with steaks that are approximately 1 inch or 2.5 centimetres thick.
Can You Cook a Good Steak in an Electric Skillet?
You can cook an excellent steak in an electric skillet when you manage moisture, temperature and timing correctly.
An electric skillet offers several practical advantages:
- The temperature dial is easier to control than many stovetop burners.
- The large, flat surface can accommodate multiple steaks.
- Raised sides help contain oil and cooking juices.
- The appliance can be used in kitchens without a traditional cooker.
- It is suitable for apartments, holiday accommodation and small kitchens.
However, an electric skillet may not retain heat as aggressively as a heavy cast-iron pan. Its thermostat can also cycle the heating element on and off. That means the surface may lose some heat when a cold steak is added.
You can compensate by preheating thoroughly, avoiding overcrowding and giving the skillet time to recover between batches.
Check Your Electric Skillet Before Cooking
Electric skillets vary in maximum temperature, wattage, cooking-surface material and preheating instructions. Before using the highest setting, check the manufacturer’s manual for your specific model.
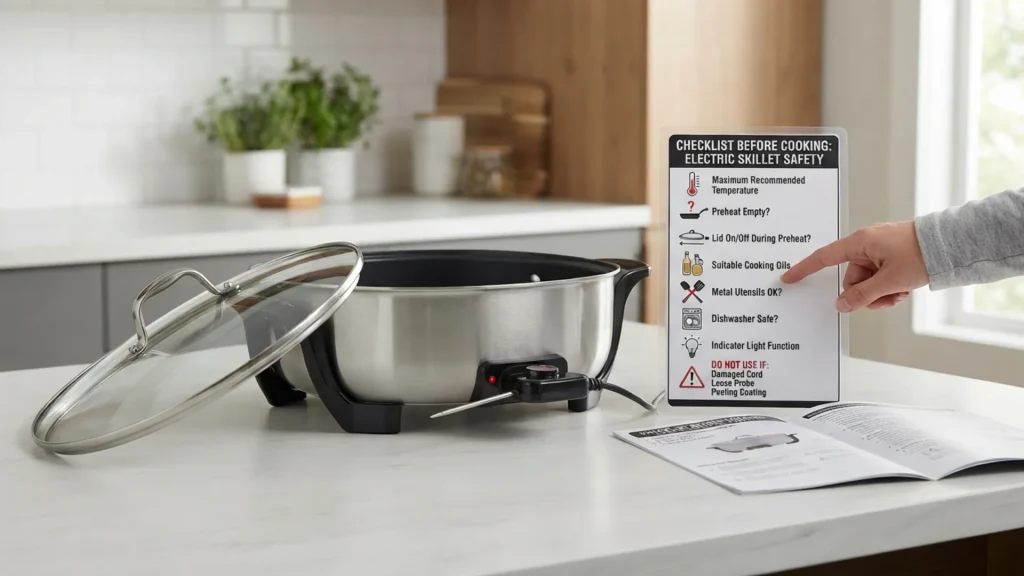
Confirm the following:
- The maximum recommended temperature
- Whether the skillet can be preheated empty
- Whether the lid should be removed during preheating
- Which cooking oils are suitable
- Whether metal utensils can damage the surface
- Whether the skillet or lid is dishwasher safe
- How the temperature indicator light works
Do not use an electric skillet with a damaged power cord, loose temperature-control probe or badly peeling nonstick coating.
Place the appliance on a stable, dry and heat-resistant surface. Keep the cord away from hot surfaces and never allow water to splash into hot oil.
What Temperature Should You Cook Steak in an Electric Skillet?
For most electric skillet steak recipes, a setting between 375°F and 400°F or 190°C and 205°C provides a useful starting point for searing.
The exact setting depends on your appliance. Some electric skillets reach 400°F, while others have different temperature limits or heat-distribution patterns.
Best Temperature for Searing Steak
Use approximately 375–400°F or 190–205°C for the initial sear, as long as your manufacturer allows it.
The high initial temperature helps moisture evaporate quickly and encourages browning. If the skillet is not hot enough, the steak may release liquid and steam instead of developing a crust.
When to Reduce the Temperature
After both sides have developed a brown crust, you may need to reduce the skillet to approximately 250–300°F or 120–150°C.
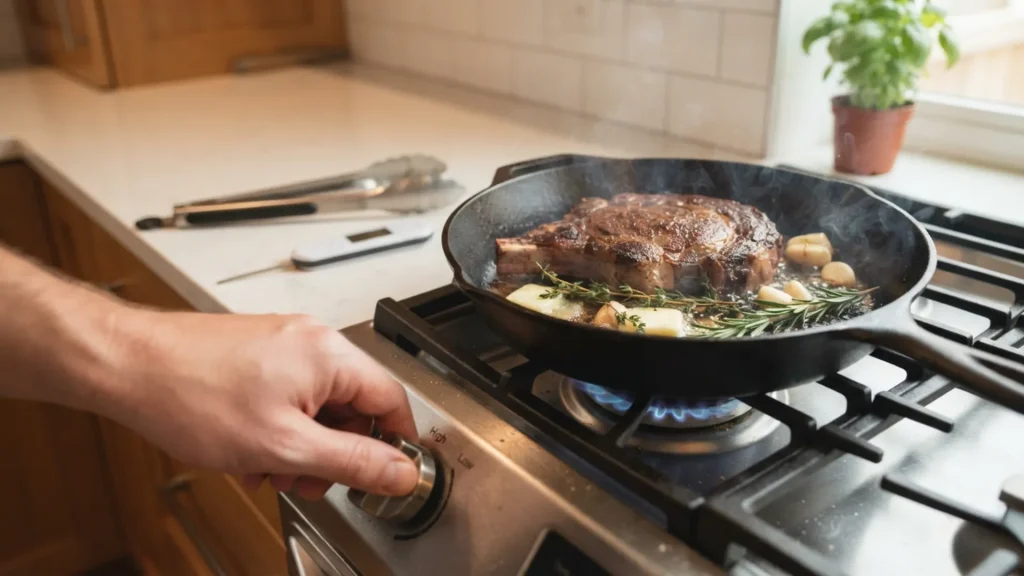
Reducing the heat is especially helpful when cooking:
- Steaks thicker than 1 inch
- Bone-in steaks
- Filet mignon or eye fillet
- Steaks that are browning too quickly
- Steak with butter, garlic or fresh herbs
Butter can burn at the initial searing temperature, so add it after the heat has been reduced.
Electric Skillet Temperature Guide
| Cooking stage | Suggested temperature | Purpose |
|---|---|---|
| Preheating | 375–400°F / 190–205°C | Prepare the surface for browning |
| Initial searing | 375–400°F / 190–205°C | Develop colour and crust |
| Gentle finishing | 250–300°F / 120–150°C | Cook the centre without burning the exterior |
| Resting | Heat turned off | Allow the steak to finish settling |
These settings are general starting points rather than universal rules. Follow the instructions supplied with your electric skillet.
How Long to Cook Steak in an Electric Skillet
A 1-inch steak generally takes approximately 6–12 minutes in a properly preheated electric skillet. The exact time depends on the cut, thickness and desired doneness.
Do not rely on cooking time alone. A thinner steak may overcook before the suggested time has passed, while a thick or bone-in steak may require several additional minutes.
Approximate Cooking Time by Thickness
| Steak thickness | Rare | Medium-rare | Medium | Medium-well |
|---|---|---|---|---|
| ½ inch / 1.3 cm | 3–4 minutes | 4–5 minutes | 5–6 minutes | 6–8 minutes |
| 1 inch / 2.5 cm | 5–6 minutes | 6–8 minutes | 8–10 minutes | 10–12 minutes |
| 1½ inches / 3.8 cm | 7–9 minutes | 9–11 minutes | 11–13 minutes | 13–15 minutes |
These are approximate total cooking times after the skillet has been preheated. Flip the steak during cooking and begin checking the internal temperature early.
A large electric skillet, a cold steak, an uneven heating surface or multiple steaks may increase the cooking time.
Steak Doneness and Internal Temperature Chart
The following temperatures describe common culinary doneness levels. Insert the thermometer through the side or into the thickest part of the steak, keeping the tip away from bone and large pockets of fat.
| Doneness | Centre appearance | Common final temperature |
|---|---|---|
| Rare | Cool, red centre | 120–125°F / 49–52°C |
| Medium-rare | Warm, red-to-pink centre | 130–135°F / 54–57°C |
| Medium | Warm pink centre | 140–145°F / 60–63°C |
| Medium-well | Slightly pink centre | 150–155°F / 66–68°C |
| Well-done | Little or no pink | 160°F / 71°C or higher |
Important Food-Safety Note
Culinary doneness preferences are not the same as official food-safety recommendations.
The USDA advises cooking whole beef steaks to a minimum internal temperature of 145°F or 63°C, followed by a rest of at least three minutes.
Health Canada also lists 63°C or 145°F for beef, veal and lamb steaks. Mechanically tenderised steaks require particular care and should be cooked according to the package instructions.
The UK Food Standards Agency explains that intact whole cuts such as beef steaks generally have contamination on the exterior surface. This distinction does not necessarily apply to minced, rolled, stuffed or mechanically tenderised meat.
People who are pregnant, older, very young or immunocompromised should follow appropriate official food-safety guidance and avoid undercooked meat.
When Should You Remove the Steak From the Skillet?
A steak can continue warming slightly after it leaves the skillet. This is called carryover cooking.
For a thick steak, you may choose to remove it a few degrees before your preferred final temperature. The internal temperature may continue rising while it rests.
Carryover cooking is less noticeable with a very thin steak, so start checking thin cuts early and avoid assuming that they will rise significantly after removal.
Best Steak Cuts for an Electric Skillet
Most tender steak cuts can be cooked in an electric skillet, but some are easier for beginners than others.
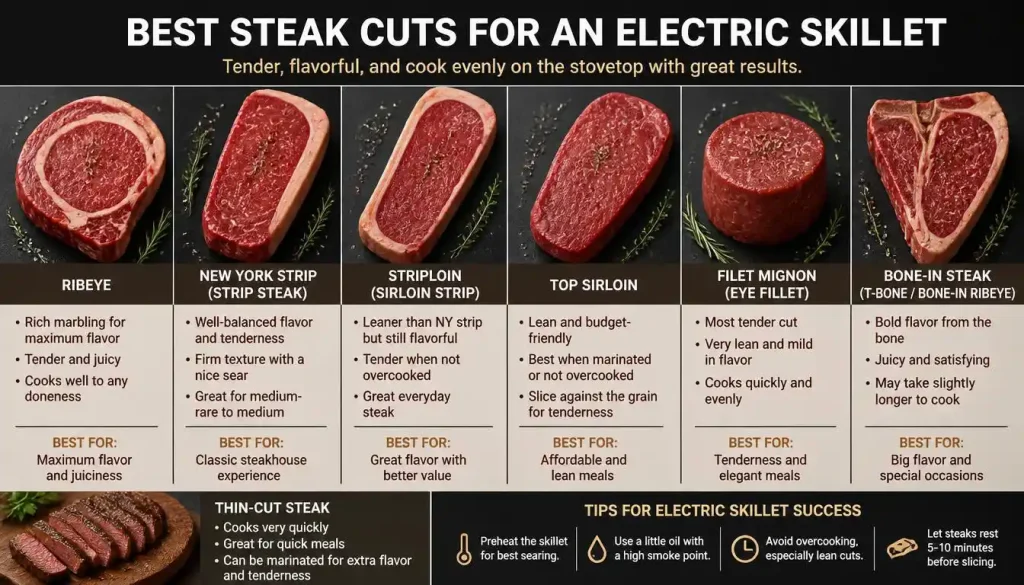
Ribeye
Ribeye is rich, tender and heavily marbled. Its internal fat provides flavour and helps the meat remain juicy.
Because ribeye contains more fat, it can produce extra smoke and grease. Use only a small amount of added oil and be prepared to reduce the temperature if the rendered fat begins smoking.
New York Strip, Striploin or Sirloin Strip
This cut has a relatively even shape and a firm texture. It usually makes good contact with the skillet, helping it brown evenly.
A strip steak may have a thick fat cap along one edge. Hold that edge against the skillet with tongs to render and brown it.
Top Sirloin
Top sirloin is leaner and often more affordable than ribeye or strip steak. It can still be tender, but it becomes dry more quickly when overcooked.
Use a thermometer and avoid taking it far beyond medium unless that is your preference.
Filet Mignon or Eye Fillet
Filet mignon is tender and relatively lean. These steaks are often thick, so they benefit from high-temperature searing followed by lower-temperature finishing.
Because the cut contains less fat, butter basting can add flavour and richness.
Bone-In Steak
Bone-in ribeye, T-bone and porterhouse steaks can be cooked in an electric skillet if they fit flat against the surface.
The meat near the bone may cook more slowly. Check the temperature in more than one area without touching the bone with the thermometer.
Thin-Cut Steak
Thin steaks cook very quickly and can become well-done before a deep crust forms.
Use high heat, cook uncovered and check the steak after one or two minutes per side.
Ingredients for Electric Skillet Steak
For two steaks, you will need:
- 2 steaks, approximately 1 inch or 2.5 centimetres thick
- 1–2 teaspoons kosher salt, sea salt or cooking salt
- ½–1 teaspoon freshly ground black pepper
- 1 tablespoon high-heat cooking oil
- 1 tablespoon unsalted butter, optional
- 2 garlic cloves, lightly crushed, optional
- 2 sprigs of rosemary or thyme, optional
Seasoning quantities can be adjusted according to the size of the steaks and personal preference.
Equipment You Will Need
- Electric skillet or electric frying pan
- Temperature-control probe
- Tongs
- Instant-read meat thermometer
- Paper towels
- Small plate or tray
- Cutting board
- Sharp knife
- Splatter screen, optional
Avoid using a fork to turn the steak because it can puncture the surface and release juices.
What Is the Best Oil for Electric Skillet Steak?
Choose an oil that can tolerate the skillet’s searing temperature.
Suitable options include:
- Refined avocado oil
- Canola oil
- Grapeseed oil
- Sunflower oil
- Vegetable oil
- Peanut oil, where allergies are not a concern
- Beef tallow
You only need enough oil to create a thin coating. Adding too much can increase smoke and grease splatter.
You can brush the oil directly onto the steak or spread a small amount across the cooking surface.
Extra-virgin olive oil can be used at moderate temperatures, but it may smoke sooner than more refined high-heat oils. Butter also browns and burns quickly, so it is better added during the lower-temperature finishing stage.
How to Prepare Steak Before Cooking
Good preparation has a major effect on browning, texture and cooking consistency.
Thaw the Steak Safely
For the standard method in this article, use a fully thawed steak.
Thaw frozen steak in the refrigerator rather than leaving it on the kitchen counter. A partially frozen centre may cook unevenly and make doneness more difficult to control.
Choose the Right Thickness
A steak between ¾ inch and 1¼ inches, or approximately 2–3 centimetres, is beginner-friendly.
Very thin steaks cook quickly, while steaks thicker than 1½ inches may need a longer lower-temperature finishing stage.
Pat the Steak Completely Dry
Blot every side of the steak with paper towels.
Surface moisture absorbs heat and creates steam. A dry surface begins browning more quickly and reduces the chance of the steak becoming grey or wet.
Season the Steak
For a simple steak, salt and freshly ground black pepper are enough.
Season both sides and the edges. Avoid heavily coating the steak with a seasoning blend containing sugar because sugar can burn at searing temperatures.
Should You Dry-Brine the Steak?
Dry brining means salting the steak in advance and leaving it uncovered in the refrigerator.
You have two practical options:
Cook immediately: Season the steak just before it enters the skillet.
Season in advance: Salt the steak and refrigerate it uncovered for several hours or overnight. Before cooking, pat away any visible moisture.
Do not leave raw steak sitting at room temperature for an extended period.
Should Steak Reach Room Temperature?
You do not need to leave steak on the counter until the centre becomes fully room temperature.
Take it from the refrigerator while you prepare the ingredients and preheat the skillet. The steak’s thickness and internal temperature reading matter more than following an exact counter-resting time.
How to Cook Steak in an Electric Skillet Step by Step
This method is designed for steaks approximately 1 inch or 2.5 centimetres thick.
Step 1: Read the Appliance Instructions
Check the maximum temperature, preheating directions and utensil restrictions for your electric skillet.
Make sure the temperature-control probe is inserted correctly and the skillet is sitting securely on a heat-resistant surface.
Step 2: Preheat the Electric Skillet
Set the skillet to approximately 375–400°F or 190–205°C, provided that setting is recommended for your appliance.
Allow it to preheat fully. Depending on the model, an indicator light may switch off or change when the selected temperature is reached.
Keep the skillet uncovered during searing unless the manufacturer gives different instructions.
Step 3: Dry and Season the Steak
Blot the steaks thoroughly with paper towels.
Season the top, bottom and edges with salt and pepper. Add other dry seasonings sparingly.
Step 4: Apply a Thin Layer of Oil
Brush the steaks with a small amount of high-heat oil or add approximately one tablespoon to the skillet.
Spread the oil into a thin, even layer. It should not form a deep pool around the steak.
Step 5: Sear the First Side
Place the steak flat in the preheated electric skillet. You should hear an immediate, active sizzle.
Leave the steak undisturbed for approximately 2–4 minutes, depending on its thickness. Moving it continuously can interfere with browning.
Do not press down on the steak with a spatula.
Step 6: Flip and Sear the Second Side
Use tongs to turn the steak.
Cook the second side for another 2–4 minutes. You may flip the steak more than once during the overall cooking process, particularly when trying to cook the centre evenly.
Step 7: Sear the Fat Cap and Edges
When the steak has a thick strip of fat along one side, hold it upright with tongs.
Press the fat edge gently against the skillet for approximately 30–60 seconds, or until it begins to brown and render.
Briefly brown any other pale edges.
Step 8: Reduce the Heat if Necessary
For a thick steak, reduce the skillet to approximately 250–300°F or 120–150°C after searing both sides.
Continue turning the steak occasionally until it approaches the desired internal temperature.
Thin steaks may not require this lower-temperature stage.
Step 9: Add Butter, Garlic and Herbs
Once the temperature has been reduced, add the butter, garlic and rosemary or thyme.
As the butter melts, tilt the skillet only if the appliance design allows it safely. Otherwise, use a spoon to collect the melted butter and pour it over the steak.
Cook for approximately 30–60 seconds without allowing the butter or garlic to burn.
Step 10: Check the Internal Temperature
Insert an instant-read thermometer into the thickest part of the steak.
For a thin steak, insert the thermometer from the side so the probe reaches the centre. Avoid touching bone, the skillet surface or a large section of fat.
Check more than one location when cooking a bone-in or unevenly shaped steak.
Step 11: Rest Before Slicing
Transfer the steak to a clean plate or cutting board.
Rest it for approximately:
- 5 minutes for a thin steak
- 5–7 minutes for a 1-inch steak
- 7–10 minutes for a thick steak
Do not tightly wrap the steak in foil because trapped steam can soften the crust.
Slice against the grain for a more tender bite.
How to Get a Steakhouse-Style Crust
A deep brown crust requires high heat, direct contact and a dry surface.
Dry the Surface Thoroughly
Even a small amount of moisture can delay browning. Pat the steak dry before seasoning and again before cooking if moisture has reappeared.
Preheat the Skillet Fully
Do not add the steak immediately after turning the appliance on. The skillet needs time to reach the selected temperature across the cooking surface.
Use Only a Thin Layer of Oil
Too much oil can encourage splashing and make the surface feel greasy. A thin film is usually enough.
Avoid Overcrowding
Leave space around each steak.
When several cold steaks are placed close together, they can lower the surface temperature and release enough moisture to create steam.
Let the Steak Release Naturally
A steak may initially stick to the cooking surface. Once a crust develops, it often releases more easily.
Do not repeatedly pull at the meat during the first minute.
Reheat Between Batches
After removing the first batch, allow the skillet to return to the selected temperature before adding more steak.
Wipe away burnt garlic, butter or seasoning before beginning another batch.
How to Adjust the Method for Steak Thickness
Thin Steak Under ¾ Inch
Use a fully preheated skillet and cook the steak quickly.
Sear for approximately 1–2 minutes per side, then begin checking the centre. Lower-temperature finishing is usually unnecessary.
Add butter only near the end.
One-Inch Steak
A 1-inch steak works well with the standard sear-and-finish method.
Sear both sides, check the temperature and reduce the heat only when additional centre cooking is needed.
Thick Steak Over 1½ Inches
A thick steak needs enough time for heat to reach the centre.
After browning both sides, lower the temperature and continue cooking more gently. Turn the steak regularly and monitor it with a thermometer.
A lid may be used briefly during the lower-temperature stage if permitted by the appliance manufacturer, but covering the steak can soften its crust.
Should You Cook Steak With the Lid On or Off?
Cook steak with the lid off during the initial sear.
Leaving the skillet uncovered allows moisture to escape, helping the exterior brown instead of steam.
For a very thick steak, you can briefly cover the skillet after both sides have been seared and the temperature has been reduced. This can help heat reach the centre, but it is not always necessary.
Remove the lid if condensation begins dripping onto the steak or the crust starts becoming soft.
How to Cook Multiple Steaks in an Electric Skillet
A large electric skillet may hold two or more steaks, but available space is more important than the total number.
Keep at least a small gap between each piece. The steaks should not overlap or press tightly against one another.
When cooking multiple steaks:
- Choose steaks with similar thicknesses.
- Check each steak separately with a thermometer.
- Remove individual steaks as they reach the desired temperature.
- Work in batches if the skillet looks crowded.
- Let the surface reheat before starting the next batch.
- Wipe away burnt butter and seasoning between batches.
Do not use a previously used raw-meat plate to hold the cooked steaks unless it has been washed thoroughly.
How to Tell When Steak Is Done Without a Thermometer
A thermometer is the most reliable method, but you can make a rough estimate using time, colour and firmness.
A rare steak generally feels soft, while a well-done steak feels firmer. However, the touch test is affected by steak thickness, cut and fat content.
You can also make a small cut into the thickest part, but this releases juices and only shows one area of the steak.
When accuracy and food safety matter, use a clean digital instant-read thermometer rather than relying on appearance alone.
How to Reduce Smoke and Grease Splatter
Indoor steak cooking naturally creates some aroma, smoke and splatter. You can reduce them by controlling moisture, fat and temperature.
- Pat the steak completely dry.
- Trim only unusually large, loose pieces of exterior fat.
- Use a small amount of oil.
- Add butter during finishing rather than initial searing.
- Avoid allowing garlic or dried herbs to burn.
- Turn on the extractor fan before cooking.
- Open a nearby window when appropriate.
- Use a splatter screen instead of a solid lid.
- Lower the temperature if the oil is producing heavy smoke.
- Keep water away from the hot skillet.
Never move a hot electric skillet while it contains oil or rendered fat.
Common Electric Skillet Steak Mistakes
Not Preheating the Skillet
A lukewarm cooking surface causes the steak to release moisture before it browns.
Give the appliance enough time to reach the selected temperature.
Cooking a Wet Steak
Wet steak is more likely to steam.
Pat every surface dry immediately before seasoning and cooking.
Overcrowding the Cooking Surface
Too many steaks reduce the skillet’s temperature and trap moisture.
Cook in batches when necessary.
Using Butter at the Beginning
Butter can burn during high-temperature searing.
Begin with a suitable cooking oil and add butter after reducing the heat.
Leaving the Temperature Too High
High heat is useful for browning, but a thick steak can burn outside before the centre is ready.
Reduce the heat after the crust has formed.
Cooking Only by Time
Cooking charts are estimates.
Use internal temperature to make the final decision.
Pressing Down on the Steak
Pressing the steak does not make it cook faster in a helpful way. It can squeeze moisture onto the cooking surface and interfere with browning.
Skipping the Rest
Slicing immediately allows more juice to escape onto the cutting board.
Rest the steak before cutting.
Slicing With the Grain
Long muscle fibres can make the meat seem tougher.
Look for the direction of the fibres and slice across them.
Troubleshooting Electric Skillet Steak
| Problem | Likely cause | Solution |
|---|---|---|
| Steak has no brown crust | Wet surface or insufficient preheating | Dry the steak and preheat the skillet fully |
| Steak looks grey | It steamed instead of searing | Remove excess liquid and avoid overcrowding |
| Outside burns before the centre cooks | Heat remained too high | Reduce the temperature after searing |
| Steak is tough | Overcooking or slicing with the grain | Use a thermometer and slice across the grain |
| Steak is dry | Lean cut or excessive cooking time | Check earlier and add butter during finishing |
| Steak sticks badly | It was moved before the crust formed | Let it cook undisturbed before turning |
| Butter turns black | It was added at searing temperature | Add butter after lowering the heat |
| Second steak does not brown | The skillet lost heat | Allow the surface to reheat between batches |
| Steak tastes steamed | Lid was used too early | Sear uncovered |
| Smoke alarm activates | Excess fat, oil or burnt butter | Improve ventilation and lower the heat slightly |
Electric Skillet Steak Flavour Variations
Garlic Butter Steak
Add butter, crushed garlic and thyme after searing. Spoon the melted butter over the steak during the final minute.
Black Pepper Steak
Press coarsely ground black pepper onto both sides before cooking. Watch carefully because loose pepper can burn.
Cajun-Style Steak
Use a Cajun seasoning blend without excessive sugar. Reduce added salt when the blend already contains salt.
Steak With Mushrooms and Onions
Cook the steak first and let it rest.
Reduce the skillet temperature, then cook sliced onions and mushrooms in the rendered fat. Add a little butter and season before serving them over the steak.
Dairy-Free Steak
Skip the butter and finish with a small amount of high-quality cooking oil, fresh herbs and garlic.
Low-Sodium Steak
Use less salt and add flavour with black pepper, garlic, rosemary, thyme, smoked paprika or a salt-free seasoning blend.
What to Serve With Electric Skillet Steak
Electric skillet steak pairs well with:
- Mashed potatoes
- Roasted potatoes
- Chips or French fries
- Green beans
- Asparagus
- Broccoli
- Sautéed mushrooms
- Caramelised onions
- Garden salad
- Coleslaw
- Rice
- Garlic bread
- Peppercorn sauce
- Chimichurri
For an efficient one-appliance meal, cook the steak first and let it rest while you prepare mushrooms, onions or vegetables in the skillet.
How to Store Leftover Steak
Allow leftover steak to cool only briefly before placing it in a shallow, airtight container.
Refrigerate cooked steak within two hours, or within one hour when it has been exposed to temperatures above 90°F or 32°C. Refrigerated cooked meat is generally best used within three to four days.
Freeze the steak when you do not plan to eat it within that period.
How to Reheat Steak in an Electric Skillet
Set the electric skillet to a low temperature, approximately 200–250°F or 95–120°C.
Add the steak with a small amount of butter, oil or beef stock. Cover briefly and warm it gently, turning once.
Remove it as soon as it is heated through. Prolonged reheating will continue cooking the centre and may make the steak dry.
Thinly sliced leftover steak can be reheated quickly with onions, vegetables or sauce.
How to Clean an Electric Skillet After Cooking Steak
Always follow the cleaning instructions for your specific model.
A typical cleaning process is:
- Turn the temperature control off.
- Unplug the appliance.
- Allow the skillet and fat to cool.
- Remove the temperature-control probe if the manufacturer instructs you to do so.
- Pour cooled grease into an appropriate container rather than down the drain.
- Wipe away residue with paper towels.
- Wash the approved parts with warm water, mild dishwashing liquid and a non-abrasive sponge.
- Dry the appliance completely before storage.
Do not immerse the electrical connector, temperature probe or power cord in water. Avoid steel wool, metal scrapers and abrasive cleaners on nonstick surfaces.
Frequently Asked Questions
What Temperature Do You Cook Steak in an Electric Skillet?
Approximately 375–400°F or 190–205°C is a useful starting range for searing, provided it is permitted by the appliance manufacturer. Reduce the temperature after browning when a thick steak requires additional cooking.
How Long Does a One-Inch Steak Take in an Electric Skillet?
A 1-inch steak usually takes approximately 6–12 minutes, depending on the cut, skillet temperature and preferred doneness. Start checking the internal temperature after approximately five or six minutes.
How Do You Cook Medium-Rare Steak in an Electric Skillet?
Preheat the skillet, dry and season the steak, then sear both sides. Check the centre with an instant-read thermometer and remember that official safe-temperature guidance may differ from personal culinary doneness preferences.
Do You Need Oil to Cook Steak in an Electric Skillet?
A thin layer of oil improves contact and helps prevent sticking. Fatty ribeye may need very little additional oil, while lean steak may need slightly more.
Can You Use Olive Oil?
You can use refined olive oil at suitable temperatures. Extra-virgin olive oil may smoke sooner during high-temperature searing, so avocado, canola, grapeseed or another high-heat oil may be more convenient.
Can You Use Butter?
Yes, but add butter after the initial sear and after reducing the skillet temperature. This reduces the risk of burnt milk solids.
Should You Cover Steak While Cooking?
Keep the lid off during searing. A thick steak may be covered briefly during lower-temperature finishing, but covering it for too long can soften the crust.
How Often Should You Flip Steak?
You can flip it once after the first side browns or turn it several times during finishing. Multiple turns can help an uneven or thick steak cook more consistently.
Can You Cook Two Steaks at the Same Time?
Yes, provided they fit without touching or overcrowding the skillet. Leave enough space for moisture to escape.
Can You Cook Frozen Steak in an Electric Skillet?
It is possible, but a frozen steak takes longer and is more difficult to cook evenly. For the method in this guide, thaw the steak safely in the refrigerator first.
Why Is My Electric Skillet Steak Tough?
Common reasons include overcooking, using a naturally firm cut, skipping the resting period or slicing with the grain.
Why Is My Steak Not Browning?
The skillet may not be fully preheated, the steak may be wet or the cooking surface may be overcrowded. Dry the steak, preheat thoroughly and cook in batches.
How Do You Cook Steak Without Smoking Up the House?
Use minimal oil, dry the steak, add butter later, operate the extractor fan and reduce the temperature if the fat begins producing heavy smoke.
Is an Electric Skillet the Same as an Electric Griddle?
No. An electric skillet usually has raised sides and often includes a lid. An electric griddle has a flatter, more open cooking surface. The cooking principles may be similar, but the appliances are not identical.
Can You Cook Steak in a Nonstick Electric Skillet?
Yes. Follow the manufacturer’s maximum temperature recommendation and use utensils that will not scratch the nonstick coating.
Final Tips for Juicy Electric Skillet Steak
The best electric skillet steak begins with a dry steak and a fully preheated cooking surface. Use a thin layer of high-heat oil, sear the meat uncovered and reduce the temperature when a thick steak needs more time in the centre.
Do not depend entirely on a clock or the colour of the meat. Check the thickest part with an instant-read thermometer, allow the steak to rest and slice it against the grain.
Once you understand the relationship between steak thickness, skillet temperature and internal doneness, learning how to cook steak in an electric skillet becomes simple, repeatable and reliable.

“I believe great cooking starts with the right tools, trusted advice, and a little confidence in the kitchen.”
Hi, I’m Emma Carter. My love for cooking began in my grandmother’s kitchen, where I learned that every great meal starts with simple ingredients and the right cookware. Over the years, I’ve spent countless hours researching, testing, and comparing kitchen appliances, cookware, coffee makers, air fryers, and other everyday kitchen essentials.
Here at KiCook, my goal is to make your buying decisions easier with honest product reviews, practical buying guides, and easy-to-follow cooking tips. Whether you’re upgrading your kitchen or searching for the best appliance for your home, I focus on providing clear, reliable, and research-backed information you can trust.
When I’m not testing new kitchen gadgets or writing in-depth guides, you’ll usually find me trying new recipes, visiting local farmers’ markets, or enjoying a quiet cup of coffee while planning my next kitchen project.