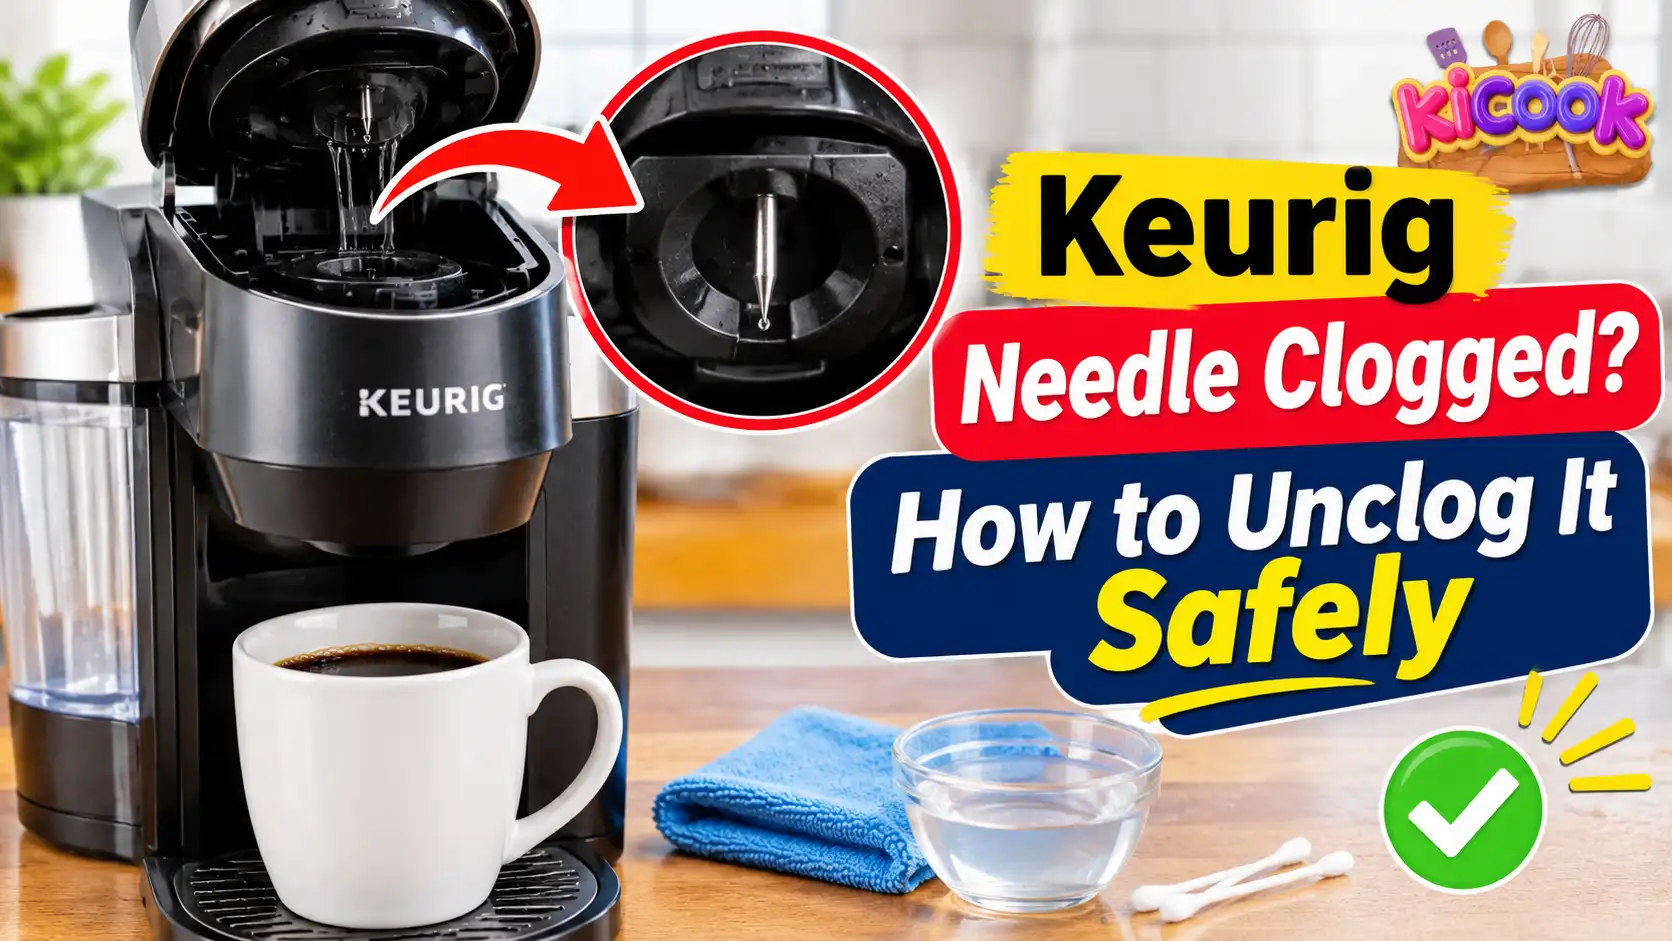
A Keurig needle clogged with coffee grounds can cause slow brewing, splashing, incomplete cups, or a machine that stops brewing altogether. Sometimes, you may also find loose coffee grounds floating in your cup.
The good news is that a blocked Keurig needle does not always mean your coffee maker is broken. In many cases, you can remove the blockage by cleaning the entrance needle, exit needle, or both.
The important thing is to identify the problem before cleaning. Your Keurig has two different needle areas, and each one needs the correct cleaning method. You also need to follow the instructions for your exact model because not every Keurig uses the same maintenance procedure.
In this guide, I will explain how to recognize a clogged needle, clean both needle areas safely, and deal with problems that remain after cleaning.
Quick Answer: How Do You Fix a Clogged Keurig Needle?
To fix a clogged Keurig needle, turn off and unplug the coffee maker. Let it cool completely. Then inspect the entrance needle underneath the brewer handle and the exit needle inside the bottom of the removable K-Cup pod holder.
Remove coffee grounds using the cleaning method recommended for your model. Some Keurig models allow you to use a straightened paper clip, while others use a Brewer Maintenance Accessory.
After cleaning, reinstall the removable parts and run the recommended water-only cleansing cycles without a K-Cup pod.
If your Keurig still does not brew properly, check for a damaged needle, an incorrectly installed pod holder, or mineral buildup inside the brewer.
What Are the Signs of a Clogged Keurig Needle?
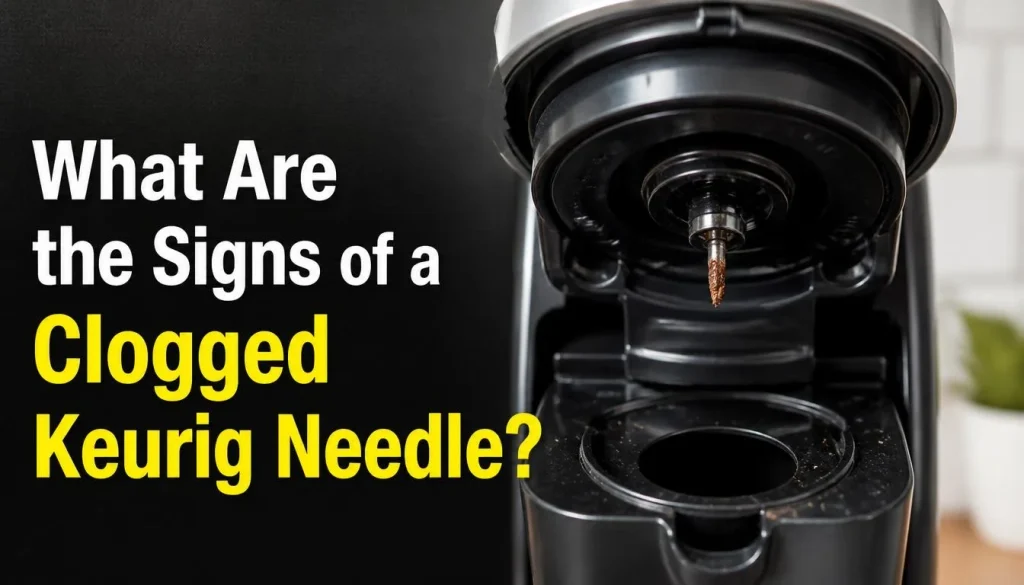
A Keurig needle can collect coffee grounds and other residue during regular use. You may not notice the blockage at first. However, the brewing process can become less consistent as debris builds up.
Here are some signs worth checking.
1. Coffee Grounds Appear in Your Cup
One common sign is finding small coffee particles in your brewed drink.
Some grounds may escape through the puncture holes in a K-Cup or collect around the entrance and exit needles.
If you regularly find more grounds than usual in your cup, inspect both needle areas and the removable pod holder.
2. Your Keurig Brews Coffee Very Slowly
Does your Keurig take longer than usual to fill your mug?
A blockage around the needle openings may interfere with the normal flow of water through the K-Cup.
However, slow brewing can also result from mineral buildup, a water-supply problem, or another internal restriction.
Do not assume the needle is the only possible cause.
3. Coffee Splashes Around the Pod Holder
Sometimes, coffee or water sprays unevenly during brewing instead of flowing smoothly into your mug.
This may happen when coffee grounds restrict the exit needle opening.
Check the pod holder and exit needle for visible debris. Also make sure the holder is installed correctly.
4. Keurig Stops Brewing Before Filling Your Cup
A blocked exit needle can contribute to a partial cup because brewed coffee cannot flow out properly.
You may notice that the machine stops before reaching your selected cup size.
Other problems, such as mineral buildup or an incorrectly seated water reservoir, can cause similar symptoms.
For more troubleshooting steps, read our guide on why a Keurig only brews half a cup.
5. Your Keurig Does Not Puncture the K-Cup Properly
A working Keurig uses its entrance and exit needle areas to create openings in the K-Cup.
If the top or bottom of the pod is not punctured properly, coffee may not brew as expected.
Coffee grounds can block an opening, but a bent or damaged needle may also be responsible.
Never force the handle down to make the pod puncture.
Entrance Needle vs. Exit Needle: What’s the Difference?
Before cleaning your Keurig, it helps to understand where both needle areas are located.
They have different jobs, so it is worth checking each one separately.
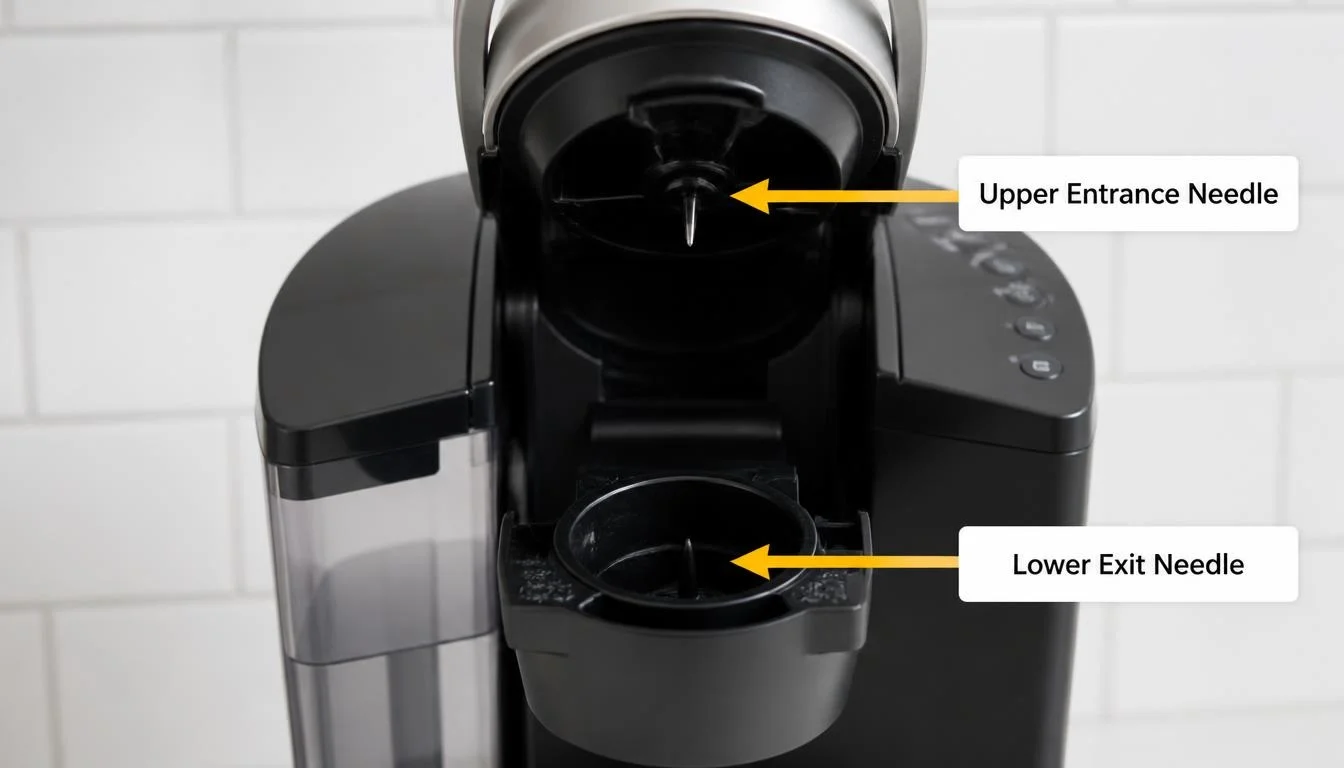
Where Is the Entrance Needle Located?
The entrance needle is underneath the brewer handle.
When you place a K-Cup inside the pod holder and lower the handle, this needle punctures the top of the pod.
Water then enters the K-Cup through the opening and passes through the coffee grounds.
If coffee particles collect around its openings, water may not enter the pod as expected.
Where Is the Exit Needle Located?
The exit needle is located inside the bottom of the K-Cup pod holder.
It creates the lower opening in the K-Cup and allows brewed coffee to flow into your mug.
Coffee grounds can collect around this area, especially when pods are damaged, reused, or do not work correctly with the holder.
How Do You Know Which Needle Is Clogged?
There is no guaranteed way to identify the blocked needle from one symptom alone.
However, these clues can help you decide what to inspect first.
| What You Notice | What to Check |
|---|---|
| K-Cup top is not punctured | Entrance needle |
| K-Cup bottom is not punctured | Exit needle |
| Coffee grounds in your cup | Both needle areas |
| Coffee sprays around the holder | Exit needle and pod holder |
| Slow or incomplete brewing | Both needles and water system |
| Needle looks bent or damaged | Stop using the brewer and contact support |
When you are unsure, inspect both needle areas instead of assuming only one is responsible.
What Causes a Keurig Needle to Become Clogged?
Understanding the cause can help prevent the same problem from happening again.
1. Coffee Grounds Build Up Around the Needle
Small coffee particles can escape from a K-Cup during brewing.
Over time, these particles may collect around the entrance or exit needle openings.
This is especially worth checking if you regularly notice coffee grounds in your cup.
2. Cocoa Mix and Other Beverage Residue
Some K-Cup-compatible pods contain cocoa, tea, or other beverage ingredients.
Their residue may collect inside the pod holder and around the needle areas.
Keurig recommends cleaning the entrance and exit needles when grounds collect in them, including when switching between certain coffee and non-coffee beverages.
3. Damaged or Already Punctured K-Cup Pods
A damaged K-Cup may allow coffee grounds to escape through an unwanted opening.
Using a pod that has already been punctured can also cause problems.
Always check that your pod is in good condition before placing it inside the brewer.
4. Mineral Buildup Inside the Brewer
Hard water can leave mineral deposits inside a coffee maker.
This buildup is called limescale.
Limescale is different from loose coffee grounds. Needle cleaning may remove coffee residue, but it does not replace the manufacturer’s descaling procedure.
5. Irregular Cleaning
If you rarely clean the removable pod holder or needle areas, coffee residue may remain around them for longer.
Regular maintenance helps prevent debris from collecting and affecting normal brewing.
What Do You Need to Clean a Clogged Keurig Needle?
You do not need a large collection of cleaning products.
The right tools depend on your Keurig model.
Here are the basic supplies worth having.
| Cleaning Item | Purpose |
|---|---|
| Straightened paper clip | Loosening coffee grounds when the model permits it |
| Keurig Brewer Maintenance Accessory | Cleaning models that require this accessory |
| Clean water | Rinsing removable parts |
| Soft cleaning cloth | Removing loose surface residue |
Important: Do not assume a paper clip is suitable for every Keurig model. Check your user guide before using one. Some models have specific maintenance tools and cleaning procedures.
How to Clean a Clogged Keurig Exit Needle
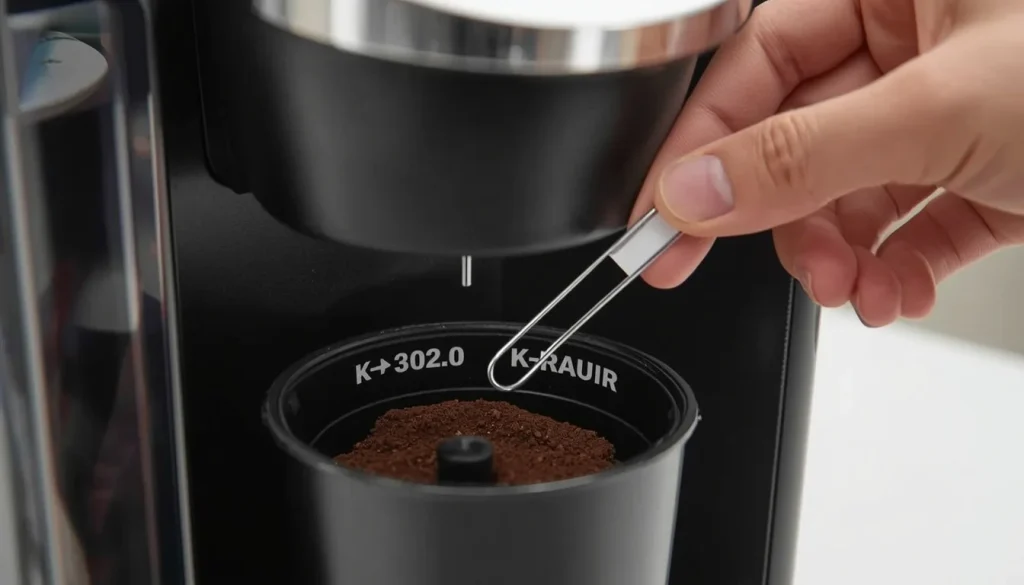
The exit needle is inside the bottom of the removable K-Cup pod holder.
Follow these steps if your Keurig model allows the pod holder to be removed and cleaned this way.
Step 1: Turn Off and Unplug Your Keurig
Press the power button to turn off your coffee maker.
Unplug it from the electrical outlet before cleaning.
Never work around the sharp needle openings while the brewer is connected to power.
Step 2: Let the Machine Cool Down
Wait until the brewer and pod holder have cooled completely.
Hot water can remain inside the brewing system after a cycle.
Do not rush this step. Your safety matters more than saving a few minutes.
Step 3: Remove the K-Cup Pod Holder
Lift the brewer handle.
Remove the K-Cup pod holder according to your model’s instructions.
Some Keurig models allow you to release the holder by pushing upward from underneath while holding its upper section.
Do not pull or force the assembly if it does not come out easily.
Step 4: Detach the Funnel if Your Model Allows It
Some removable K-Cup holders have a separate funnel attached to the bottom.
If your model allows it, carefully separate the funnel from the pod holder.
This gives you better access to the exit needle.
Keep the parts together so you can reinstall them correctly.
Step 5: Carefully Remove the Coffee Grounds
Look at the inside bottom of the pod holder.
You should be able to locate the exit needle opening.
If your Keurig’s official instructions recommend a straightened paper clip, use it gently to loosen trapped coffee grounds.
Do not push the clip forcefully or use it to enlarge the opening.
The goal is to loosen debris, not damage the needle.
Remember that the metal parts are sharp. Never place your fingers inside the holder.
Step 6: Rinse and Reassemble the Pod Holder
If the removable parts are washable according to your manual, rinse them with clean water.
Remove any loose grounds and allow the parts to drain.
Reattach the funnel correctly and reinstall the pod holder.
Make sure the assembly sits securely in its original position.
How to Clean a Clogged Keurig Entrance Needle
The entrance needle is underneath the brewer handle. It punctures the upper surface of the K-Cup.
Cleaning this area requires extra care because the needle is sharp and is attached to the brewer.
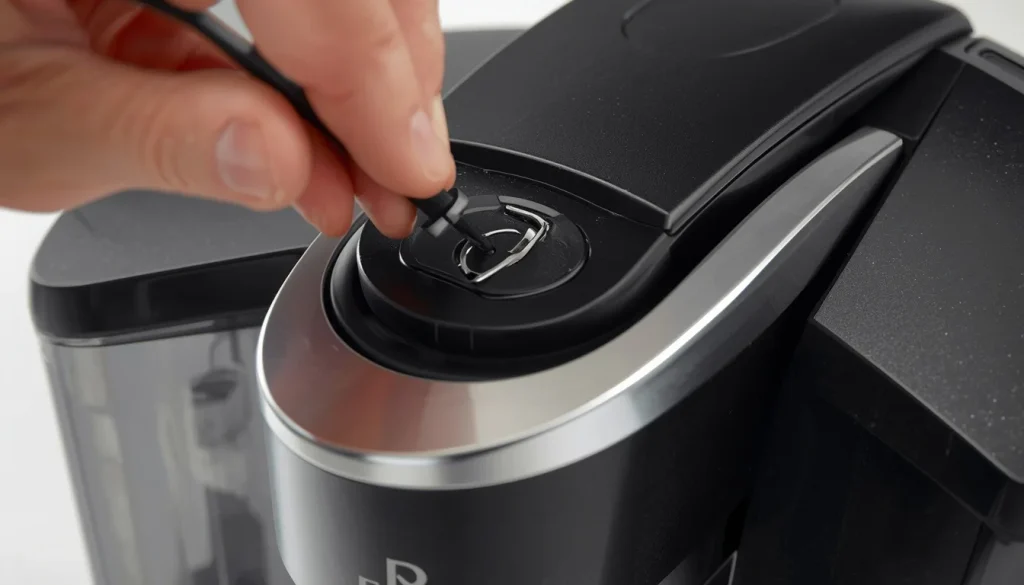
Step 1: Turn Off and Unplug the Coffee Maker
Make sure the brewer is powered off and disconnected from electricity.
Wait until it has cooled completely.
Step 2: Lift the Brewer Handle
Raise the handle to expose the brewing chamber.
Look underneath the lid to locate the entrance needle.
Do not put your fingers near the sharp needle.
Step 3: Inspect the Needle Openings
Look for visible coffee grounds or other debris around the opening.
Check whether the needle looks straight and undamaged.
If it appears bent or broken, stop cleaning and contact Keurig support.
Step 4: Use the Correct Cleaning Method for Your Model
Some Keurig user guides instruct owners to use a straightened paper clip to gently loosen coffee grounds from the entrance needle openings.
Other models have a Brewer Maintenance Accessory with its own instructions.
For example, certain K-Café models describe carefully cleaning the needle openings with a straightened paper clip. A specific Keurig 2.0 K200 Plus guide also describes the Maintenance Accessory method.
Do not mix these procedures.
Use the instructions written for your exact coffee maker. Never push a tool deeply into the needle or apply force.
Step 5: Run the Recommended Water-Only Cleaning Cycles
After cleaning, lower the handle completely and reinstall any removed parts.
Some Keurig user guides recommend running two water-only cleansing brews after entrance needle cleaning.
Do not insert a K-Cup pod during these cleaning cycles.
Follow your model’s instructions for choosing the correct brew button or cleansing mode.
For additional guidance, see Keurig’s official brewer support and needle-cleaning instructions.
Keurig Needle Not Puncturing K-Cup? Here’s What to Check
A clogged needle is one possible reason your Keurig does not puncture a K-Cup correctly.
However, it is not the only cause.
Before attempting another brew, check the following.
Check the Entrance Needle
If the top of the K-Cup has not been punctured properly, inspect the entrance needle.
Look for coffee grounds around its opening.
Clean it using the method approved for your model.
Inspect the Exit Needle
If the bottom of the pod has no proper opening, check the exit needle and removable pod holder.
Make sure the holder is assembled correctly.
Look for a Bent or Broken Needle
A damaged needle cannot always be fixed by cleaning.
Do not try to straighten it with pliers or another tool.
A bent needle may create further problems during brewing.
Stop using the brewer and contact Keurig support for advice about repair or replacement.
Check the K-Cup Pod
Not every brewing problem comes from the coffee maker.
A damaged, defective, or incompatible pod may also cause puncturing problems.
Try a new, compatible K-Cup after confirming that your brewer is in good condition.
Never reuse a pod that has already been punctured unless your model specifically supports a compatible reusable filter.
How to Test Your Keurig After Cleaning the Needles
Cleaning is only part of the job.
You also need to check whether the coffee maker is working normally again.
Run a Water-Only Cleansing Brew
Fill the reservoir with fresh water.
Place a mug under the dispenser.
Run the water-only cleaning cycle described in your user guide. Do not insert a K-Cup pod.
Some models recommend two cleansing brews after needle cleaning.
Check the Water Flow
Watch the water as it comes out of the brewer.
Look for a steady flow rather than unusual splashing or repeated interruptions.
Check for Coffee Grounds
Look inside the empty mug.
There should not be an unusual amount of loose coffee debris after a proper cleaning cycle.
A few remaining particles may mean the holder needs further cleaning.
Try a Fresh K-Cup Pod
Once the water-only test is complete, try a new, compatible K-Cup.
Check whether the machine punctures the pod and completes a normal brewing cycle.
If the problem returns, do not keep forcing the machine to brew.
Keurig Needle Still Clogged After Cleaning? Try These Checks
Sometimes the problem continues even after cleaning both needle areas.
Here are some things worth investigating before considering a repair.
1. Check for Remaining Coffee Grounds
Remove the pod holder again if your model allows it.
Inspect the funnel and exit needle area for remaining debris.
Clean the removable components using the approved method.
Avoid repeating the process with excessive force.
2. Reinstall the K-Cup Pod Holder Correctly
An incorrectly positioned holder may affect the way the K-Cup sits inside the brewer.
Check that the pod holder and funnel are properly aligned.
If they do not fit easily, check your manual rather than forcing them into place.
3. Check for Mineral Buildup
If the needle openings are clean but water still flows slowly, mineral buildup may be responsible.
Descaling removes mineral deposits from the internal water system.
Follow the recommended descaling procedure for your model.
For a more detailed explanation, read our guide on how to clean a Keurig coffee maker.
Remember, descaling is not a replacement for manually removing coffee grounds from the needle openings.
4. Check for a Damaged Needle
A bent or broken needle may not puncture the K-Cup correctly.
Cleaning cannot repair physical damage.
Do not attempt to bend the needle back into position.
Contact Keurig support to find out whether your model needs professional repair or a replacement part.
5. Contact Keurig Customer Support
If the brewer still does not work after the recommended cleaning procedure, contact Keurig.
Have your model number ready.
Explain what happens during brewing, which cleaning steps you have completed, and whether the needle looks damaged.
This information can help the support team recommend the correct next step.
If your problem is broader than a needle blockage, our guide on why a Keurig is not brewing covers other possible causes.
Does Descaling Unclog a Keurig Needle?
No, descaling and needle cleaning solve different problems.
Needle cleaning removes trapped coffee grounds and residue from the accessible needle openings.
Descaling removes mineral deposits that build up inside the brewer’s water system.
For example, if coffee grounds are blocking the exit needle, you need to clean the pod holder and its opening.
If your brewer has slow water flow because of mineral buildup, the manufacturer-recommended descaling procedure may help.
Some coffee makers need both types of maintenance.
Do not use stronger cleaning solutions or mix vinegar with commercial descaling products. Follow the recommended procedure for your exact Keurig model.
Common Mistakes to Avoid When Cleaning Keurig Needles
A little care can prevent accidental damage.
Here are some mistakes worth avoiding.
| Common Mistake | Why You Should Avoid It |
|---|---|
| Cleaning while the brewer is hot | Hot water can cause burns |
| Leaving the machine plugged in | Creates an unnecessary electrical risk |
| Touching the sharp needle | Can cause injury |
| Pushing a paper clip too deeply | May damage the needle or its openings |
| Using the wrong cleaning method | Some models require special accessories |
| Forcing the handle closed | May damage the pod holder or brewing assembly |
| Trying to straighten a broken needle | Can make the damage worse |
The safest approach is to clean only the parts and areas described in your Keurig user guide.
How to Prevent Your Keurig Needle from Getting Clogged Again
You do not need to wait for another brewing problem before cleaning your machine.
A few simple habits can help keep the needle areas clear.
Clean the Pod Holder Regularly
Coffee residue can collect inside the removable K-Cup holder.
Remove and clean it according to your model’s instructions.
Pay attention to the funnel and exit needle opening.
Remove Used K-Cup Pods After Brewing
Do not leave used pods inside the brewer for long periods.
Remove and dispose of them according to the pod and local recycling instructions.
Run a Cleansing Brew When Recommended
If you switch between coffee and certain non-coffee beverages, a water-only cleansing brew may help remove leftover residue.
Follow the recommendation in your model’s user guide.
Follow the Recommended Descaling Schedule
Mineral buildup can affect water flow and brewing performance.
Descale according to your brewer’s maintenance schedule and local water conditions.
Avoid Damaged or Previously Punctured Pods
Inspect K-Cups before use.
Do not reuse a damaged pod or one that has already been punctured unless it is an approved reusable filter designed for your machine.
Frequently Asked Questions
How Do I Know If My Keurig Needle Is Clogged?
Common signs include coffee grounds in your cup, slow brewing, uneven coffee flow, or problems puncturing a K-Cup. These symptoms can also have other causes. Inspect both the entrance needle and exit needle to identify visible debris.
How Do I Unclog a Keurig Needle Without a Cleaning Tool?
First, check your model’s cleaning instructions. Some Keurig models allow a straightened paper clip to loosen trapped grounds. Others require a specific Brewer Maintenance Accessory. Do not use an improvised tool if your manual does not recommend it.
Can I Use a Paper Clip to Clean a Keurig Needle?
Yes, some Keurig user guides recommend using a straightened paper clip for both needle areas. However, this is not a universal instruction for every model. Use it only when your brewer’s official guide allows it, and never force it into the opening.
Why Is My Keurig Not Puncturing K-Cups?
A clogged entrance or exit needle, a damaged needle, a poorly positioned pod holder, or an incompatible K-Cup may cause puncturing problems. Inspect the accessible parts carefully and stop using the brewer if a needle appears bent or broken.
Why Are There Coffee Grounds in My Keurig Coffee?
Coffee grounds may escape through the K-Cup or collect around the entrance and exit needles. Clean both needle areas and the removable pod holder according to your user guide. Also check that you are using undamaged, compatible pods.
Can a Clogged Keurig Needle Stop the Machine From Brewing?
Yes. A blockage may prevent water from passing through the K-Cup normally or stop brewed coffee from draining properly. However, a Keurig that will not brew may also have water-supply, reservoir, or internal problems.
Does Descaling Unclog a Keurig Needle?
Descaling helps remove mineral buildup inside the water system. It does not replace cleaning coffee grounds from the entrance or exit needle openings. If you have both problems, follow the correct procedures for each.
What Should I Do If My Keurig Needle Is Bent or Broken?
Stop using the brewer and contact Keurig customer support. Do not try to straighten, remove, or repair a damaged needle yourself. The correct repair option depends on the machine’s model and warranty.
How Often Should I Clean My Keurig Needles?
The required maintenance frequency depends on how often you use the brewer and what you brew. Check the manufacturer’s maintenance recommendations for your model. Clean the needle areas when you notice grounds, splashing, or other signs of residue buildup.
Final Thoughts: Keep Your Keurig Needles Clean for Better Brewing
A clogged Keurig needle can turn a simple morning coffee routine into a frustrating experience. Fortunately, you can often solve the problem by inspecting and cleaning the entrance needle, exit needle, or removable K-Cup pod holder.
Start by turning off and unplugging the machine. Let it cool, identify the affected area, and use the cleaning method approved for your model.
After cleaning, run the recommended water-only cycles and test the brewer with a fresh K-Cup.
If the problem continues, check for mineral buildup, a damaged needle, or another water-flow issue. Never force a sharp cleaning tool into the brewer or attempt to repair a broken needle yourself.
Regular cleaning and proper pod use can help reduce blockages and keep your Keurig working as expected.

“I believe great cooking starts with the right tools, trusted advice, and a little confidence in the kitchen.”
Hi, I’m Emma Carter. My love for cooking began in my grandmother’s kitchen, where I learned that every great meal starts with simple ingredients and the right cookware. Over the years, I’ve spent countless hours researching, testing, and comparing kitchen appliances, cookware, coffee makers, air fryers, and other everyday kitchen essentials.
Here at KiCook, my goal is to make your buying decisions easier with honest product reviews, practical buying guides, and easy-to-follow cooking tips. Whether you’re upgrading your kitchen or searching for the best appliance for your home, I focus on providing clear, reliable, and research-backed information you can trust.
When I’m not testing new kitchen gadgets or writing in-depth guides, you’ll usually find me trying new recipes, visiting local farmers’ markets, or enjoying a quiet cup of coffee while planning my next kitchen project.