

Learn how to use a zester to add bright citrus flavor to dishes—simply glide it over the peel and avoid the bitter pith for perfect results every time!
A zester is an incredibly handy tool in my kitchen, and knowing how to use a zester can elevate your cooking. It brings bold flavors to dishes with just a few swipes. By zesting citrus fruits, I can add a fresh and vibrant touch to cakes or pasta. To use a zester safely, I hold it firmly and apply light pressure. This technique ensures I only remove the colorful peel, avoiding the bitter white layer underneath.

Essential Info
- Adding zest from citrus fruits makes food taste stronger. Use a zester to improve cakes, pasta, and other recipes.
- Pick a good zester for your kitchen. A comfy handle and sharp blade help make zesting simple and better.
- Don’t press too hard or scrape the bitter white part. Be gentle to get tasty zest without bitterness.
Step-by-Step Guide to Using a Zester
Preparing Citrus Fruits for Zesting
Before zesting, it’s important to prepare the fruit well. First, I rinse the citrus under cold water. Then, I scrub it gently with a vegetable brush. This removes dirt or wax from the peel. Drying the fruit with a towel keeps it from slipping.
Picking the right tool also helps a lot. Here’s a quick look at common zesting tools:
| Tool | What It Does |
|---|---|
| Citrus Zester | Made for zesting; gives long, thin strips of peel. |
| Microplane | Best option; makes fine zest and works for cheese too. |
| Box Grater | Easy to find; works but harder to avoid bitter pith. |
| Vegetable Peeler | Takes more effort; peel the yellow part and chop it. |
| Paring Knife | Needs skill; cut the yellow peel and chop it finely. |
I like using a microplane because it’s easy and makes fluffy zest. If I don’t have one, a box grater works in a pinch.
Proper Technique for Zesting Citrus Fruits
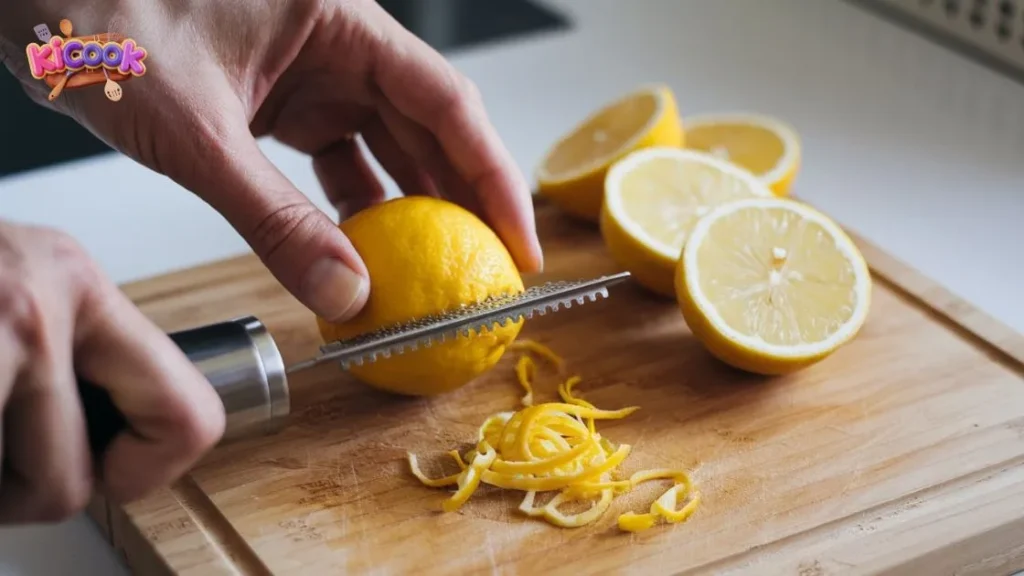
Using the right method helps me get the best zest. It also avoids wasting the fruit or getting the bitter white part. Here’s what I do:
- I hold the zester with the sharp side facing up. This catches the zest as I work.
- I hold the fruit firmly with my other hand. As I zest, I turn the fruit to cover all sides evenly.
- I try to zest the whole fruit at once. This saves time, especially when cooking for many people.
I always zest gently and in one direction. This stops the zester from cutting too deep into the peel.
Collecting and Using the Zest in Recipes
After zesting, I tap the zester to release leftover zest. I gather it on a plate or directly into my dish.
Zest adds bold flavor to both sweet and savory foods. For desserts, I mix it into cake batter or cookie dough. For savory dishes, I add it to marinades, dressings, or sauces.
Over half of people love recipes that use citrus. I’ve noticed zest not only boosts flavor but also makes dishes look fancy. Whether it’s for cocktails or soups, zesting always improves my cooking.
Alternative Uses for a Zester
Zesting Spices Like Nutmeg or Cinnamon
I found my zester works great for spices like nutmeg and cinnamon. Fresh nutmeg smells and tastes better than store-bought grated ones. I hold the nutmeg tightly and slide it over the sharp edge. This makes fine pieces that mix easily into recipes.
For cinnamon, I use sticks instead of ground cinnamon. The zester creates thin curls that look pretty on desserts or drinks. These curls also release stronger flavors when heated.
Tip: Use a cutting board to keep the zester steady. This avoids slips and helps with even grating.
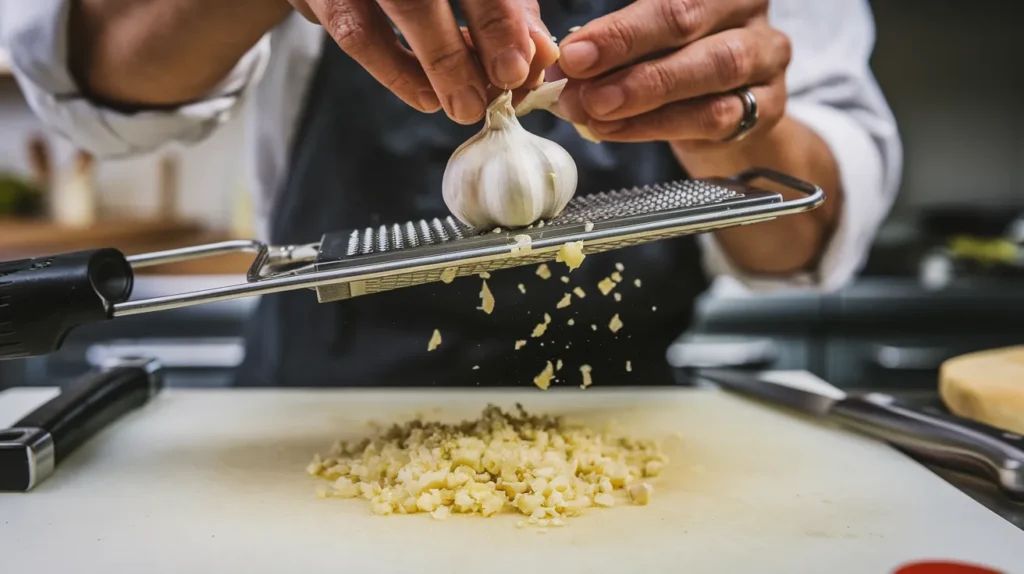
Grating Garlic or Ginger for Cooking
Garlic and ginger are must-haves in my kitchen. A zester makes preparing them fast and easy. Instead of chopping, I grate them straight into my dish. This makes tiny pieces that mix well into sauces, marinades, or stir-fries.
Here’s a quick look at popular graters for garlic and ginger:
| Grater Model | Key Features | Pros | Cons |
|---|---|---|---|
| Microplane Ginger Tool | Sharp teeth, dishwasher-safe | Grates ginger well, multi-use | Hard to clean small blade areas |
| OXO Good Grips Grater | Steel blade, soft handle | Affordable, grates finely, big surface | No juice collector, plastic may break |
I like the microplane because it makes fine garlic and ginger. This brings out more flavor and saves time compared to chopping.
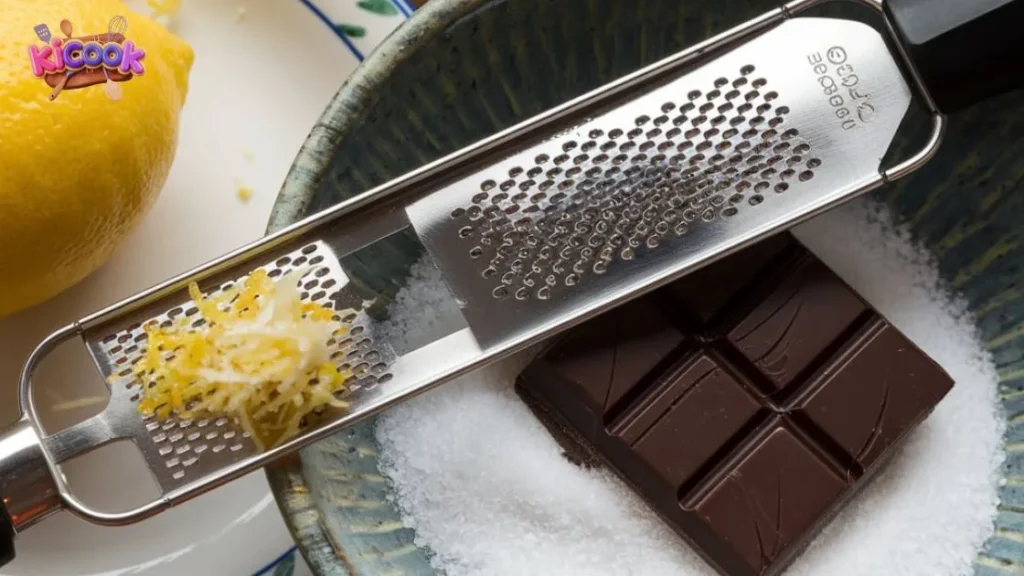
Shaving Cheese for Garnishes or Toppings
My zester isn’t just for citrus or spices—it’s great for cheese too. When I need thin Parmesan or Pecorino shavings for pasta or salads, I grab my zester. I hold the cheese firmly and slide it across the tool. This makes light shavings that melt fast or look nice as toppings.
Hard cheeses work best with a zester. Softer ones, like mozzarella, stick to the surface. To fix this, I chill the cheese a bit before grating.
Note: Grating cheese directly over food saves time and cleanup.
These extra ways to use a zester make it super useful. Whether I’m zesting spices, grating garlic, or shaving cheese, it makes cooking easier and tastier.
Tips for Choosing and Maintaining Your Zester

Selecting the Right Zester for Your Kitchen
Choosing the right zester makes a big difference in the kitchen. I always look for one with a comfortable, non-slip handle. This ensures I can grip it securely, even when my hands are wet. A sharp blade is also essential. It helps me zest citrus without cutting into the bitter pith.
When I shop for a zester, I test its versatility. A good zester works well with citrus, spices, and even chocolate. I also check reviews to see how it performs with different ingredients. Some zesters come with protective covers, which keep the blades sharp and safe.
Cleaning and Storing Your Zester Properly
Proper cleaning keeps my zester in great shape. I rinse it immediately after use with hot water and mild soap. This prevents food from hardening on the blade. If food gets stuck, I scrub it gently with a sponge. For zesters with wooden handles, I avoid the dishwasher and wash them by hand.
To store my zester, I make sure it’s completely dry. Moisture can cause rust or damage. I prefer hanging it up in a cool, dry place. This keeps it accessible and prevents bacteria from collecting. If my zester has a blade cover, I use it to protect the sharp edges.
Sharpening or Replacing Your Zester When Needed
Over time, even the best zesters can lose their sharpness. I check mine regularly by testing how well it zests citrus. If it struggles to create fine, uniform pieces, I know it’s time to sharpen or replace it.
Some zesters allow sharpening with a fine file, but not all models support this. If sharpening isn’t an option, I invest in a new one. A dull zester not only wastes time but also makes zesting harder and less effective. Keeping my zester sharp ensures I get the best results every time.
Common Mistakes to Avoid While Zesting

Applying Excessive Pressure While Zesting
When I first started zesting, I thought pressing harder would give me more zest. I quickly learned this was a mistake. Applying too much pressure can damage the fruit and make zesting harder. It also increases the risk of cutting into the bitter white pith, which ruins the flavor.
Now, I use a light touch and let the sharp blade do the work. I hold the fruit firmly and move it gently across the zester. This method keeps the zest fluffy and flavorful.
Tip: If you feel resistance while zesting, check your technique. A sharp zester and gentle pressure make all the difference.
Accidentally Zesting the Bitter Pith
The pith, or the white layer under the peel, tastes bitter. I’ve accidentally zested it before, and it ruined my dish. To avoid this, I focus on removing only the colorful outer layer of the peel.
I always check the fruit after a few swipes. If I see white spots, I stop and adjust my angle. Rotating the fruit as I zest helps me avoid overworking one area.
Note: A microplane zester makes it easier to control how much peel you remove.
Using an Inappropriate Tool for the Job
Using the wrong tool can make zesting frustrating. I’ve tried box graters and vegetable peelers, but they don’t work as well as a proper zester. They often remove too much peel or create uneven pieces.
I now stick to tools designed for zesting, like a microplane or citrus zester. These tools give me fine, even zest with minimal effort.
Reminder: Invest in a good zester. It saves time and ensures better results.
Adding zest makes my dishes taste fresh and delicious. I use my zester for citrus, spices, garlic, and cheese. Cleaning and storing it well keeps it sharp and useful. Avoiding errors like zesting the bitter white part improves flavor. Trying new zesting ideas helps me make better meals.
Frequently Asked Questions For How to use a zester?
What is the best way to clean a zester?
I rinse it under hot water immediately after use. For stuck food, I scrub gently with a sponge. Avoid dishwashers for wooden-handled zesters.
Can I zest without a zester?
Yes! Use a vegetable peeler or paring knife to remove the peel. Chop it finely for a similar effect. It takes more effort but works in a pinch.
How do I know if my zester needs replacing?
If it struggles to create fine zest or feels dull, it’s time to replace it. A sharp zester ensures better results and saves time.
Can I zest frozen citrus?
Yes! Frozen zest is great for baking—just grate while frozen.
What if I don’t have a zester?
A fine grater or vegetable peeler can work in a pinch.
How long does zest last?
Fresh zest lasts 2-3 days in the fridge or up to 6 months frozen.
“The secret to a great dish? Fresh zest—it’s like a flavor explosion!” – Food Blogger Jake Simmons
Conclusion
Learning how to use a zester is simple and opens up a world of flavor in your cooking. With the right technique, you can enhance desserts, drinks, and meals effortlessly. Keep your zester clean, practice gentle strokes, and enjoy the bright, citrusy touch in every dish!
“Good food starts with good tools—and a zester is one of the best.” – Home Cook Lisa Chen
Now that you know how to zest like a pro, grab your favorite citrus and start adding a burst of freshness to your recipes! 🍋