

How to use a rice cooker? To use a rice cooker, simply measure your rice, rinse it thoroughly, add the correct amount of water, and press the cook button. The machine will automatically switch to “keep warm” once your rice is perfectly done.
I’ll be honest, my first foray into rice cooking was a disaster. I ended up with a sticky, gummy mess at the bottom of a pot, and the top was still somehow undercooked. It was frustrating. I thought, “This can’t be that hard, can it?” That’s when I finally invested in a basic rice cooker, and friends, it changed my kitchen life. It felt like gaining a helpful, silent kitchen assistant that guaranteed perfect results every single time.
If you’ve ever felt intimidated by that gleaming appliance on your counter or are thinking about buying your first one, this guide is for you. I’ve been there, and I’m here to walk you through everything, from the absolute basics to some fun tricks that will make your rice cooker one of your most-used gadgets.
Why a Rice Cooker is a Kitchen Essential
Before we get into the “how,” let’s talk about the “why.” A rice cooker is more than just a unit asker. It’s a tool for consistency and convenience. For busy families, students, or anyone who wants a no-fuss side dish, it’s a lifesaver. You get perfectly cooked rice whether you prefer long-grain white, brown, or jasmine without having to watch a pot or guess cooking times. It frees up your stovetop and your attention for other parts of your meal.

But its talents go beyond rice. Many models come with steam trays, allowing you to cook vegetables, fish, and dumplings simultaneously. You can even make oatmeal, soups, and one-pot meals in it. It’s a true workhorse for simple, healthy cooking.
Getting to Know Your Rice Cooker
Most rice cookers, from simple $30 models to advanced fuzzy logic or induction heating versions, share the same core components. Let’s get familiar with them:
- Inner Pot: This is the removable, non-stick (usually) bowl where you put the rice and water. Never use metal utensils on it to avoid scratching.
- Main Body: The heating element is housed here.
- Control Panel: On basic models, it’s often just one “Cook” button. More advanced ones have settings for “White Rice,” “Brown Rice,” “Steam,” “Slow Cook,” etc.
- Lid: Often made of clear glass so you can peek at your progress without releasing too much steam.
- Steaming Basket: A separate tray that sits above the rice, perfect for steaming other foods.
The Foolproof Process: Cooking Basic Rice
This is the fundamental skill. Once you master this, everything else falls into place.
Step 1: Measuring the Rice
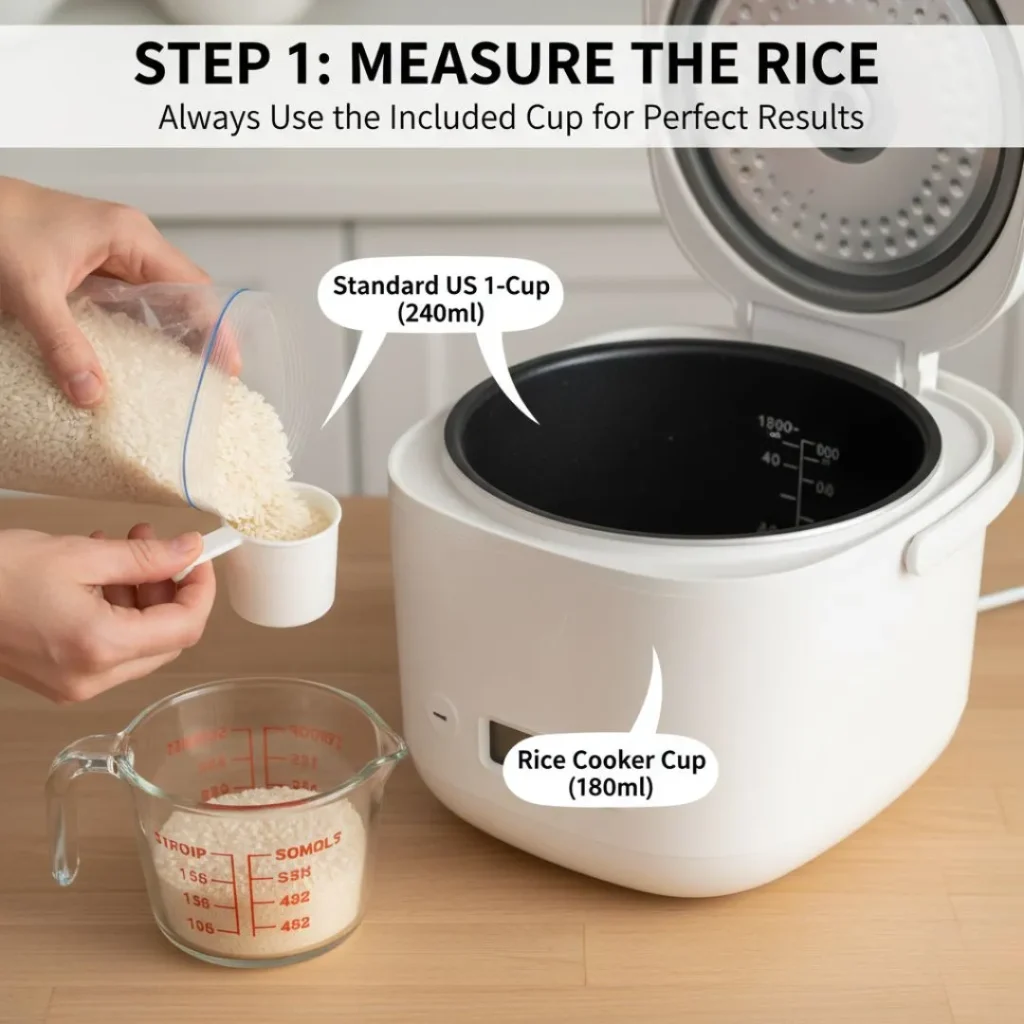
Always use the measuring cup that came with your rice cooker. It’s usually smaller than a standard US cup (about 180ml instead of 240ml). This is important because the water level lines inside the inner pot are calibrated for this specific cup.
For my family of two in Canada, I find that one cup of uncooked rice is the perfect amount. It usually yields about three cups of cooked rice, which gives us a meal and some leftovers.
Step 2: Rinsing is Crucial

This is the step I used to skip, and it was a primary reason for my gummy rice fails. Rinsing removes excess surface starch, which is what makes rice gluey.
- Place your measured rice in the inner pot.
- Add cold water and swish the rice around with your hand. The water will become cloudy.
- Carefully pour out the starchy water. I sometimes use a fine-mesh strainer for this to avoid losing grains.
- Repeat this process 2-3 times until the water runs mostly clear.
As chef and author J. Kenji López-Alt notes, “Rinsing rice is the single easiest way to make it better. It removes the loose starch that makes it gummy.” This small act makes a huge difference in achieving separate, fluffy grains.
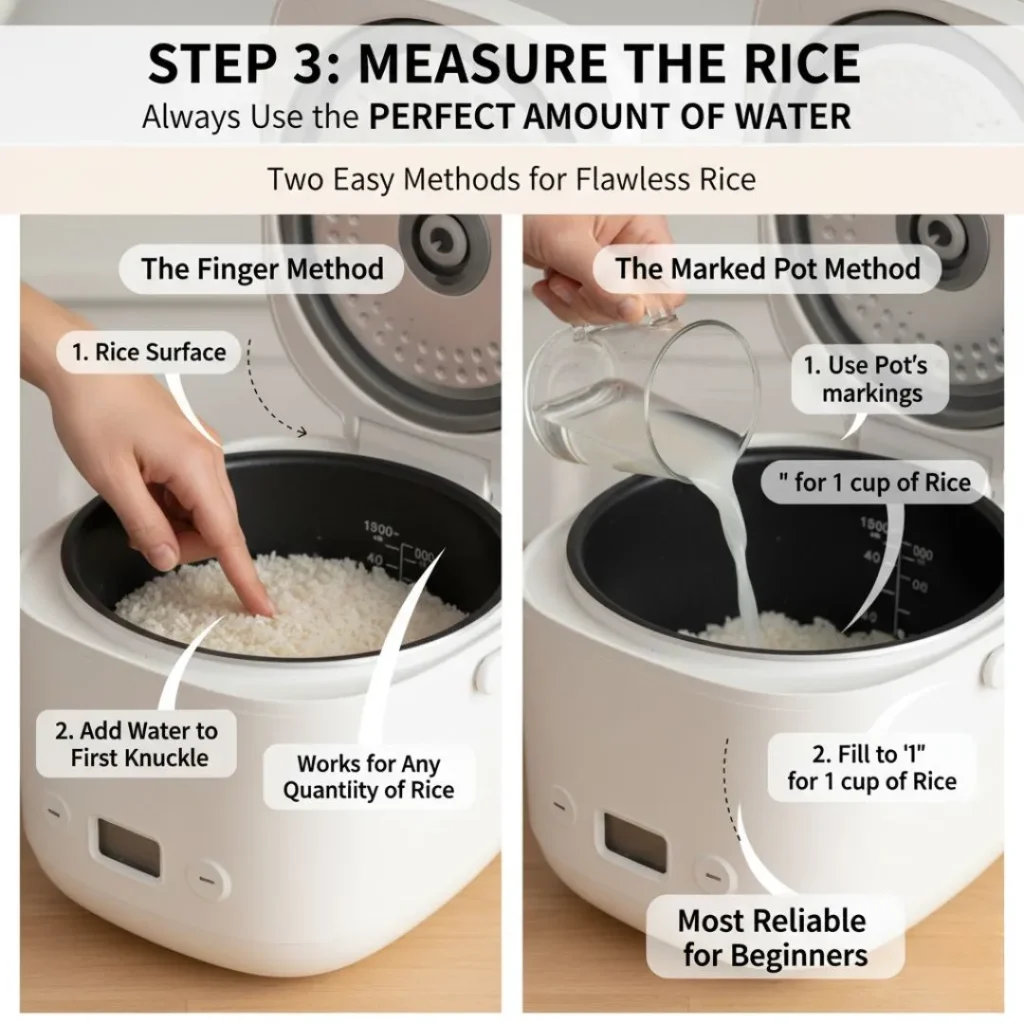
Step 3: The Golden Rule of Water
This is the part that causes the most anxiety, but your rice cooker makes it easy. After rinsing and draining your rice, add fresh, cold water to the inner pot.
- The Finger Method: This is a traditional and surprisingly accurate method. Place your fingertip just touching the surface of the rice. Add water until it reaches your first knuckle. This works for any quantity of rice.
- The Marked Pot Method: Most inner pots have water level lines marked for different types of rice. For example, for one cup of white rice, you would add water up to the “1” line. This is the most reliable method for beginners.
As a general guide, the water ratio for white rice is usually about 1:1.1 or 1:1.2 (rice to water). Brown rice requires more water, often a 1:1.5 ratio, because the bran layer is tougher. Always check your rice cooker’s manual for its specific recommendations.
Step 4: The Magic Button

Now for the easy part. Make sure the outside of the inner pot is dry and place it securely into the rice cooker. Close the lid and press the “Cook” button. You’ll hear a click, and the light will turn on. Now, walk away. Trust the process. The appliance will bring the water to a boil and then reduce the heat to a simmer until all the water is absorbed.
Step 5: Let it Rest
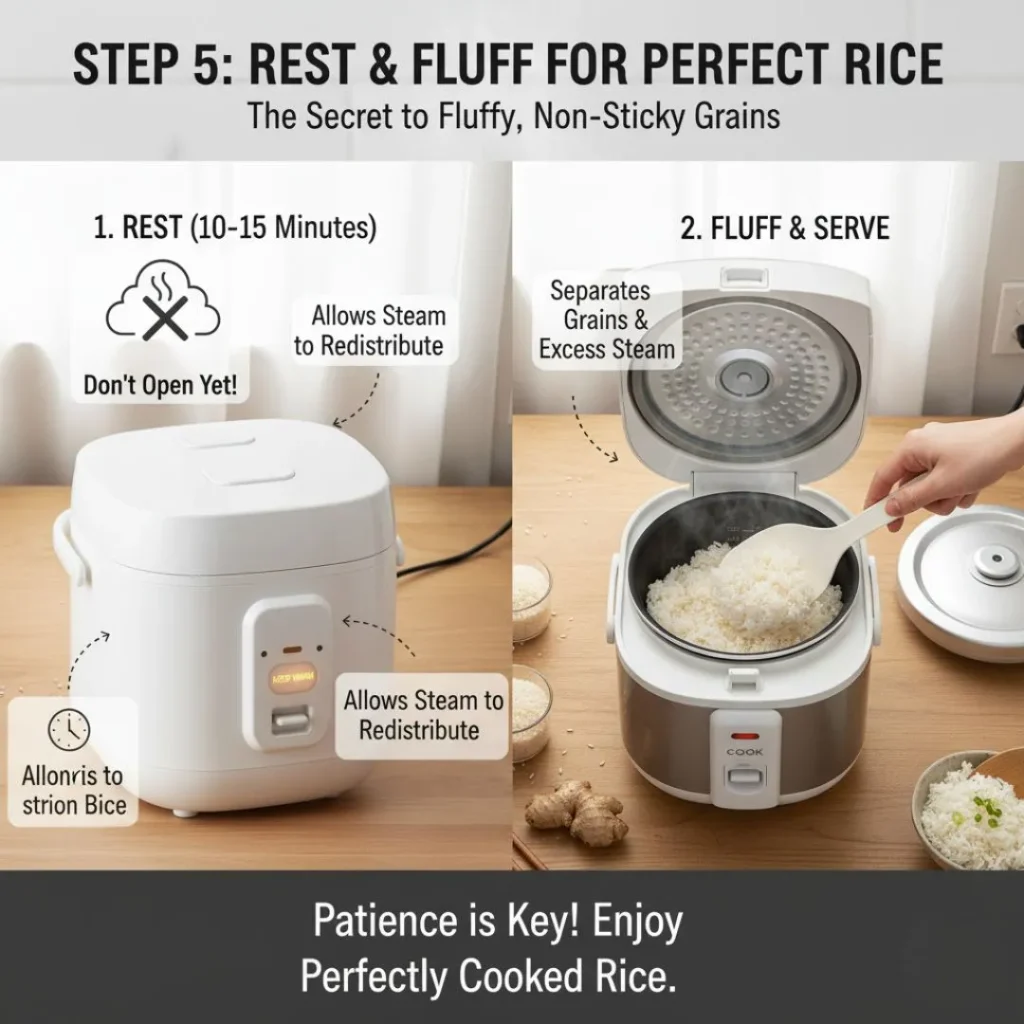
When the rice is cooked, the machine will click again and switch to the “Keep Warm” mode. This is a critical step for texture. Do not open the lid immediately! Let the rice sit on “Keep Warm” for at least 10-15 minutes. This allows the steam to redistribute evenly throughout the rice, finishing the cooking process and making it perfectly fluffy. After resting, open the lid and fluff the rice with the provided paddle or a fork. This separates the grains and releases excess steam.
Beyond Basic Rice: Exploring Other Functions
Once you’re comfortable with white rice, a whole new world opens up.
- Cooking Brown Rice or Jasmine Rice: Use the appropriate setting if your cooker has one. These settings adjust the cooking time and temperature. Brown rice takes longer, while jasmine rice might use less heat to preserve its delicate texture.
- Using the Steamer Tray: This is a fantastic feature for healthy, easy meals. While your rice is cooking underneath, place vegetables like broccoli, carrots, or green beans in the steamer tray. You can also steam fish fillets, chicken breasts, or frozen dumplings. It’s a complete meal with just one appliance.
- Making Other Grains: Your rice cooker is great for quinoa, barley, and oats. Just remember to adjust the water ratio according to the grain’s package instructions.
- One-Pot Meals: You can sauté aromatics like garlic and onion directly in the inner pot (if it has a sauté function, or you can do it on the stovetop first), then add rice, water, and other ingredients like beans, tomatoes, or broth to create a simple jambalaya or pilaf.
Solving Common Rice Cooker Problems
We’ve all faced kitchen frustrations. Here’s how to fix common rice issues:
- Problem: Rice is too wet or mushy.
- Solution: You likely used too much water. Next time, reduce the water slightly. Also, ensure you are rinsing the rice well to remove excess starch.
- Problem: Rice is undercooked or burnt on the bottom.
- Solution: This usually means not enough water. Add a bit more water next time. A burnt bottom can also occur if the “Keep Warm” function is left on for many hours after cooking.
- Problem: Rice is sticking to the pot.
- Solution: A light coating of neutral oil or a bit of butter added to the water before cooking can help prevent sticking. Also, using a non-metal paddle and fluffing the rice soon after the rest period helps.
Food writer and cookbook author Molly Stevens once said, “A rice cooker is the most reliable cook in your kitchen. It never gets distracted and always knows when the job is done.” This reliability is its greatest strength.
Frequently Asked Questions for How to Use a Rice Cooker
Do I really need to rinse my rice?
Yes, I highly recommend it. It’s the key to preventing gummy, sticky rice and is a standard practice in many cultures, especially for long-grain varieties like Basmati and Jasmine.
Can I cook a very small amount of rice, like half a cup?
You can, but results can be less consistent. Most rice cookers work best with at least one full measuring cup of dry rice. Cooking smaller amounts may require a slight adjustment to the water ratio.
How long can I leave rice on the “Keep Warm” setting?
For food safety, it’s best not to leave cooked rice at a warm temperature for more than two hours. Bacteria can grow if it’s held at an unsafe temperature for too long. After that, transfer it to the refrigerator. The USDA FoodKeeper App is a great resource for food storage guidelines.
My rice cooker doesn’t have a non-stick pot. How do I clean it?
For stainless steel or ceramic pots, let the pot soak in warm, soapy water after use. Stubborn, stuck-on rice will soften and be easier to clean. Avoid abrasive scrubbers that can scratch the surface.
A Final Word of Encouragement
Learning to use a rice cooker effectively is a simple skill that pays off for a lifetime. It removes the guesswork and delivers consistent, delicious results. It’s a humble appliance that embodies the principle of “set it and forget it,” giving you back precious time and mental energy in the kitchen.
As the renowned Japanese industrial designer Naoto Fukasawa, who has designed elegant electronics, put it, “Good design is as little design as possible. It dissolves into behavior.” A good rice cooker does just that—it becomes a seamless, helpful part of your cooking routine.
So, go ahead, dust off that rice cooker or unbox your new one. Start with a simple batch of white rice. Feel the satisfaction of hearing that click, fluffing that perfect rice, and enjoying a staple food made effortlessly well. You’ve got this.