

To clean a coffee maker, run a cycle with equal parts white vinegar and water to descale the interior, then run several cycles with fresh water to rinse. For daily care, wash the removable parts like the carafe and filter basket with warm, soapy water.
I used to think my morning coffee was just okay. It was a routine, not a ritual. Then, one day, my drip coffee maker started making a gurgling sound that didn’t sound right, and my coffee had a faint, bitter tang that I couldn’t ignore. I realized I had been neglecting a crucial part of my coffee routine: cleaning my machine. It wasn’t just about wiping down the outside; it was about what was happening on the inside.
If your coffee has started to taste a little “off,” or your machine is slower than it used to be, you’re not alone. I’ve been there. That built-up mineral scale and coffee oil residue is likely the culprit. The good news is that learning how to clean a coffee maker is straightforward, fast, and it makes a world of difference. A clean machine doesn’t just make better-tasting coffee; it also helps your appliance last longer, saving you money and ensuring your daily cup is something you look forward to.
Why Bother? The “What” and “Why” of a Clean Machine
You might be wondering if this is really necessary. I did too. But think about what your coffee maker does: it heats water and passes it through coffee grounds. Over time, two main things build up:
- Coffee Oils: These natural oils from your beans, often called “coffee residue,” are left behind after each brew. As they get older, they become sticky and rancid, giving your fresh coffee a bitter, unpleasant flavor.
- Mineral Deposits: If you live in an area with hard water (which is common in many parts of the USA, UK, and Canada), minerals like calcium and magnesium build up inside the heating element and water tubes. This is called “limescale.” It acts like insulation, making your machine work harder, heat less efficiently, and eventually leading to breakdowns.
A regular cleaning routine removes both of these, protecting your investment and your palate. As the famous chef Julia Child once said, “The only real stumbling block is fear of failure. In cooking, you’ve got to have a what-the-hell attitude.” The same applies here! Don’t be afraid to clean your appliance; the process is simple and the rewards are immediate.
Your Easy, Step-by-Step Cleaning Guide
You don’t need any fancy cleaning products. For a deep clean, you likely have everything you need already in your kitchen. Let’s break it down into two parts: a quick daily clean and a more thorough monthly descaling.
What You’ll Need:
- White vinegar or a commercial descaling solution
- Fresh, clean water
- Mild dish soap
- A soft cloth or sponge
- A soft-bristled brush (an old toothbrush works perfectly)
Part 1: The Daily & Weekly Clean (5 Minutes)
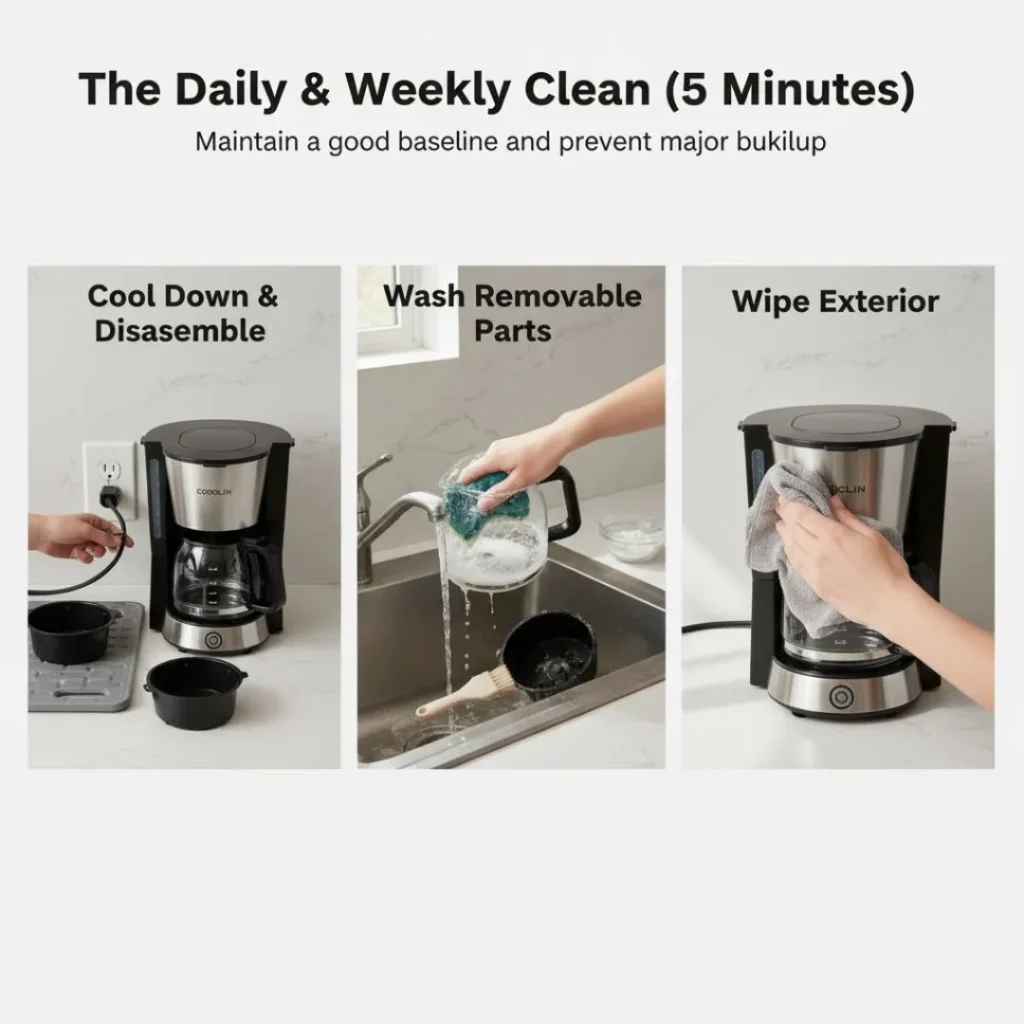
This is about maintaining a good baseline and preventing major buildup.
- Cool Down: Always make sure your coffee maker is unplugged and completely cool before you start any cleaning.
- Wash Removable Parts: After each use, take out the carafe (the glass pot), the lid, and the permanent filter or filter basket. Wash them with warm, soapy water. If you notice stains in the carafe, a paste of baking soda and water can work wonders. Rinse everything thoroughly. For the filter basket, use the soft-bristled brush to scrub away any stuck-on coffee grounds.
- Wipe the Exterior: Use a damp cloth to wipe down the outside of the machine, the warming plate, and the lid. This keeps it looking new and prevents dust from getting inside.
Doing this simple routine after your morning brew prevents old oils from spoiling your next pot.
Part 2: The Monthly Deep Clean & Descaling (30 Minutes)
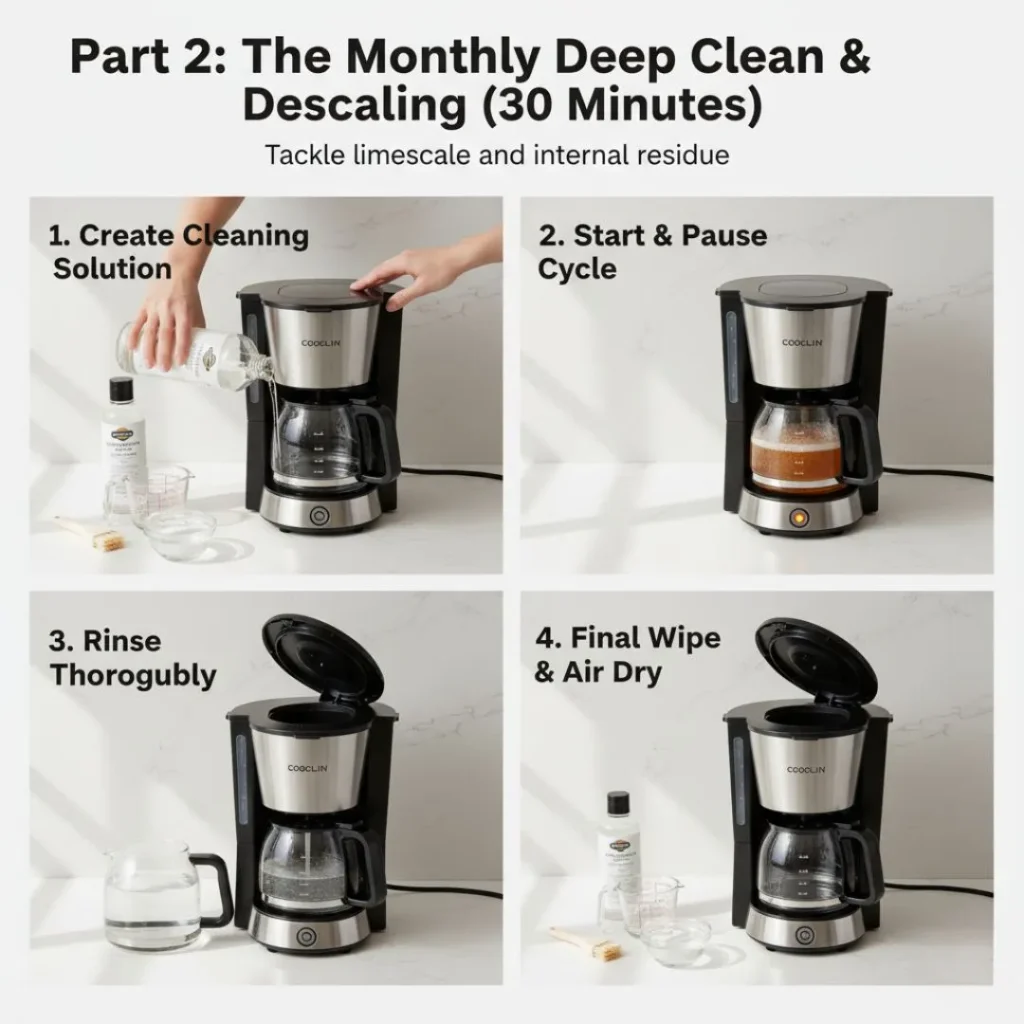
This is the main event for tackling limescale and internal residue. I do this about once a month, or more often if I use hard water or make multiple pots a day.
- Create Your Cleaning Solution: Fill the water reservoir with a mixture of equal parts white vinegar and fresh water. For a standard 12-cup machine, that would be about 2 cups of vinegar and 2 cups of water. Vinegar is a natural acid that breaks down mineral scale effectively. If you prefer, you can use a commercial descaling solution made specifically for coffee makers; just follow the package instructions.
- Start a Brew Cycle: Place the carafe back in its spot and turn on the brew cycle as if you were making a full pot of coffee. Let it run until about halfway through, then pause the cycle. Let the machine sit for 30 minutes to an hour. This “soaking” time allows the vinegar solution to dissolve the hard water deposits.
- Complete the Cycle: After the pause, restart the machine and let it finish the brewing cycle. Discard the hot vinegar water from the carafe.
- The Essential Rinse: This step is critical! You do not want vinegar-flavored coffee. Fill the reservoir with fresh, clean water. Place the clean carafe back on the warming plate and run a full brew cycle. Discard that water. Repeat this rinsing process at least two more times, or until you can no longer smell any trace of vinegar in the steam or the water in the carafe. This ensures all cleaning residue is gone.
- Final Wipe-Down: Once the final rinse cycle is done, use a damp cloth to wipe down the inside of the water reservoir and any other accessible parts. Leave the lid open to let everything air dry completely.
Frequently Asked Questions for How to Clean a Coffee Maker
How often should I descale my coffee maker?
It depends on your water hardness and how often you use the machine. A good rule of thumb is once a month. If you have very hard water, you may need to do it every two weeks. Many modern machines have a “clean” light that will remind you.
Can I use something other than vinegar?
Absolutely! Lemon juice can be used as a natural alternative, as the citric acid also breaks down minerals. For a more powerful clean, a store-bought descaler is a great option and often has a less potent smell than vinegar.
My carafe has stubborn brown stains. How do I clean it?
Try this: add a few drops of dish soap and a tablespoon of uncooked rice to the carafe. Fill it halfway with warm water and swirl vigorously. The rice acts as a gentle abrasive to scrub the stains away. Rinse well.
Can I clean a single-serve coffee maker like a Keurig the same way?
The principle is the same you need to descale the internal tank and tubes. However, the process can be different. Always check your user manual for specific instructions. For Keurig machines, they sell a specific descaling solution and the machine has a built-in descaling mode to guide you. Don’t forget to clean the pod holder and run a water-only cycle through your mug.
What about cleaning a French press or an espresso machine?
Different machines need different care. A French press should be disassembled and washed with soapy water after every use. Espresso machines require a more detailed routine, including backlashing the group head and cleaning the steam wand. For authoritative guidance on espresso machine care, the Specialty Coffee Association provides excellent resources.
As James Hoffmann, a world-renowned coffee expert, advises, “Good coffee is a pleasure, and making it should be, too.” A clean machine makes the process more enjoyable and the result more delicious.
Listen to Your Machine
Part of maintaining your coffee maker is paying attention. If you notice any of these signs, it’s time for a clean:
- The brewing process is taking longer than usual.
- Your coffee tastes sour, bitter, or just not right.
- You see visible scale flakes in your coffee pot or water reservoir.
- There’s a strange smell coming from the machine.
Addressing these issues quickly can prevent a small problem from becoming a major repair or the need for a replacement.
Conclusion: Better Coffee is a Clean Away
Cleaning my coffee maker was a small change to my routine that had a huge impact on my daily life. That faint, bitter taste is gone, replaced by the pure, rich flavor of the beans I buy. My machine runs more quietly and efficiently, and I know it’s going to serve me well for years to come.
Remember, a clean coffee maker is the foundation of a great cup of coffee. It’s a simple act of care for your appliance and for yourself. It doesn’t take much time or effort, but the reward is in every single sip. So, give your machine the attention it deserves. Your taste buds will thank you.
To close with a bit of wisdom from the great Julia Child again, “No one is born a great cook, one learns by doing.” The same is true for maintaining your kitchen tools. You learn by doing, and the doing, in this case, leads directly to a better, brighter morning.