
Cleaning your range hood is a straightforward process of degreasing and wiping down its surfaces. With some common household supplies and a bit of effort, you can remove built-up grime and restore its function.
I don’t know about you, but for the longest time, cleaning my range hood was a task I’d conveniently ignore. It was that greasy, dusty thing above my stove that I only really noticed when a splatter of sauce sizzled up onto its underside. I’d give it a quick wipe now and then, but a proper clean? That felt like a chore for a deep-cleaning marathon day that never seemed to arrive.
Then, one day, I turned on the fan and noticed the airflow was weak, and a faint, unpleasant odor of old cooking oil seemed to waft out. That was my wake-up call. I realized this wasn't just about aesthetics; a dirty range hood is an inefficient one. All that accumulated grease and dust can be a fire hazard, and it certainly isn't doing my kitchen's air quality any favors.
After a bit of research and a lot of hands-on experience, I’ve developed a simple, effective method for cleaning a range hood that I want to share with you. It’s easier than you think, and the payoff is huge: a better-smelling kitchen, a more efficient appliance, and the peace of mind that comes with a cleaner, safer home.
Why Bother? The “Why” Behind the “How”
Before we get our hands dirty, let's talk about why this is so important. I used to think it was just about looks, but I was wrong.
- Fire Safety: This is the big one. Grease is highly flammable. A thick layer of grease inside your range hood and ductwork is a serious fire risk. Keeping it clean is a key preventative measure.
- Improved Performance: A layer of gunk on the fan blades and inside the vents makes your hood work harder. A clean hood moves air more effectively, pulling steam, smoke, and cooking odors out of your kitchen.
- Better Air Quality: Your range hood filter is designed to trap grease and particles. When it's clogged, it can't do its job, and those pollutants stay in your kitchen air.
- Longer Appliance Life: Regular maintenance prevents excessive wear and tear, meaning your range hood will last for years to come.
As cleaning expert Melissa Maker once said, “Cleaning is rarely a favorite task, but the benefits of a clean space safety, health, and peace of mind are always worth the effort.” I couldn't agree more.
Gathering Your Cleaning Arsenal
You don't need fancy, expensive products. Chances are, you have most of these items already. Here’s what I use:
- Degreaser: This is your best friend. You can use a dedicated kitchen degreaser spray, or a simple, effective DIY solution of equal parts white vinegar and water, or baking soda mixed with a little dish soap to form a paste. Dish soap alone is a great gentle degreaser.
- Hot Water: Very helpful for soaking the filters.
- Microfiber Cloths: These are fantastic for wiping up grease without scratching surfaces.
- Scrub Sponges: A non-scratch sponge for the body and a more abrasive one (like a Dobie Pad) for tough grease on filters.
- A Scraper: A plastic razor blade or even an old credit card can work wonders on stubborn, baked-on grease spots.
- Gloves: To protect your hands from grease and chemicals.
- A Large Bowl or Sink: For soaking the filter.
- A Step Stool or Ladder: For safe access to the top and inside of the hood.
The Step-by-Step Cleaning Process: Let's Do This!
Ready? Put on some music, your gloves, and let's get started. This whole process usually takes me about 30-45 minutes from start to finish.
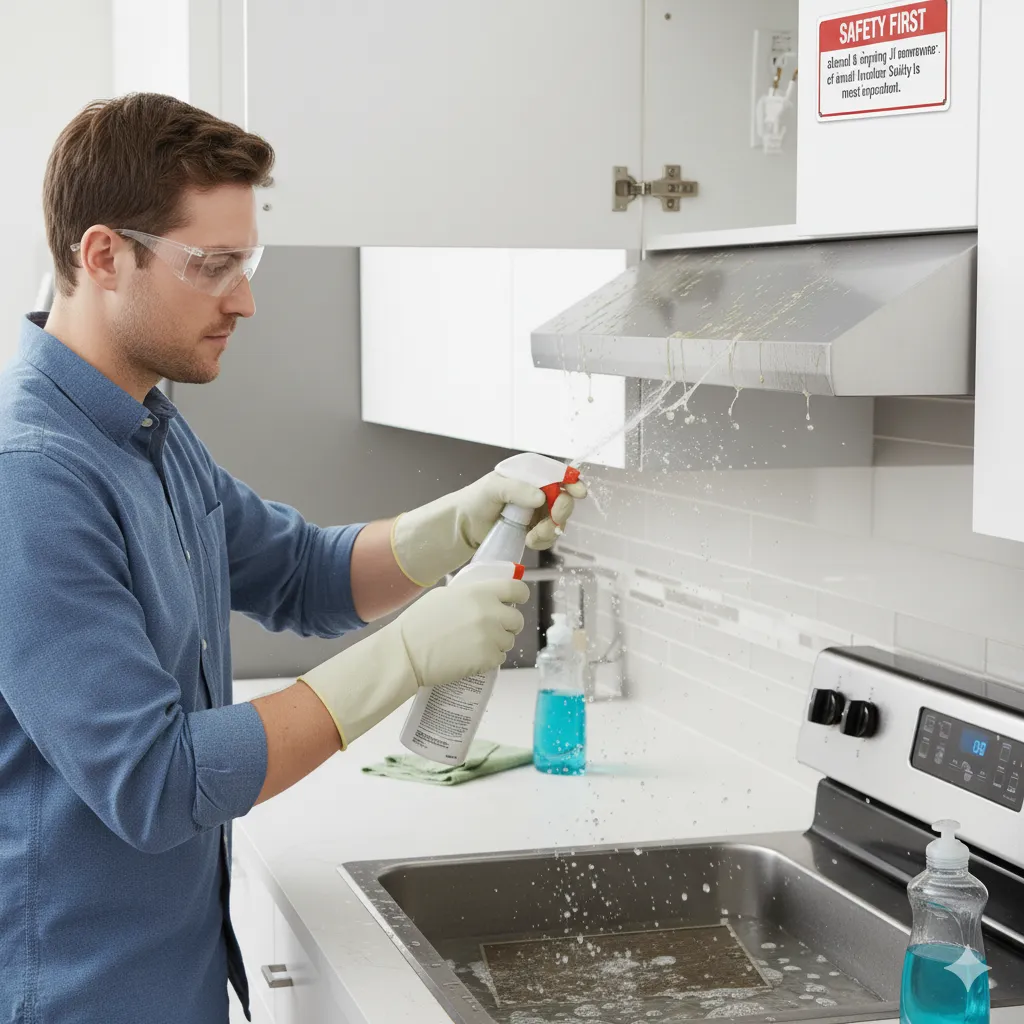
Step 1: Safety First – Unplug the Appliance!
This is non-negotiable. You will be working with water and cleaning solutions near electrical components. Find the plug for your range hood (it’s often in the cabinet above it) and unplug it. If it’s hardwired, you may need to turn off the circuit breaker. Safety is the most important part of this job.

Step 2: Remove the Filters
This is usually the easiest part. Most range hoods have a metal mesh filter or a baffle filter that slides out. There are typically a latch or a lever you push to release it. Refer to your user manual if you're unsure. Some older models might have a disposable charcoal filter behind the metal one—if you have one of those, check if it needs replacing.

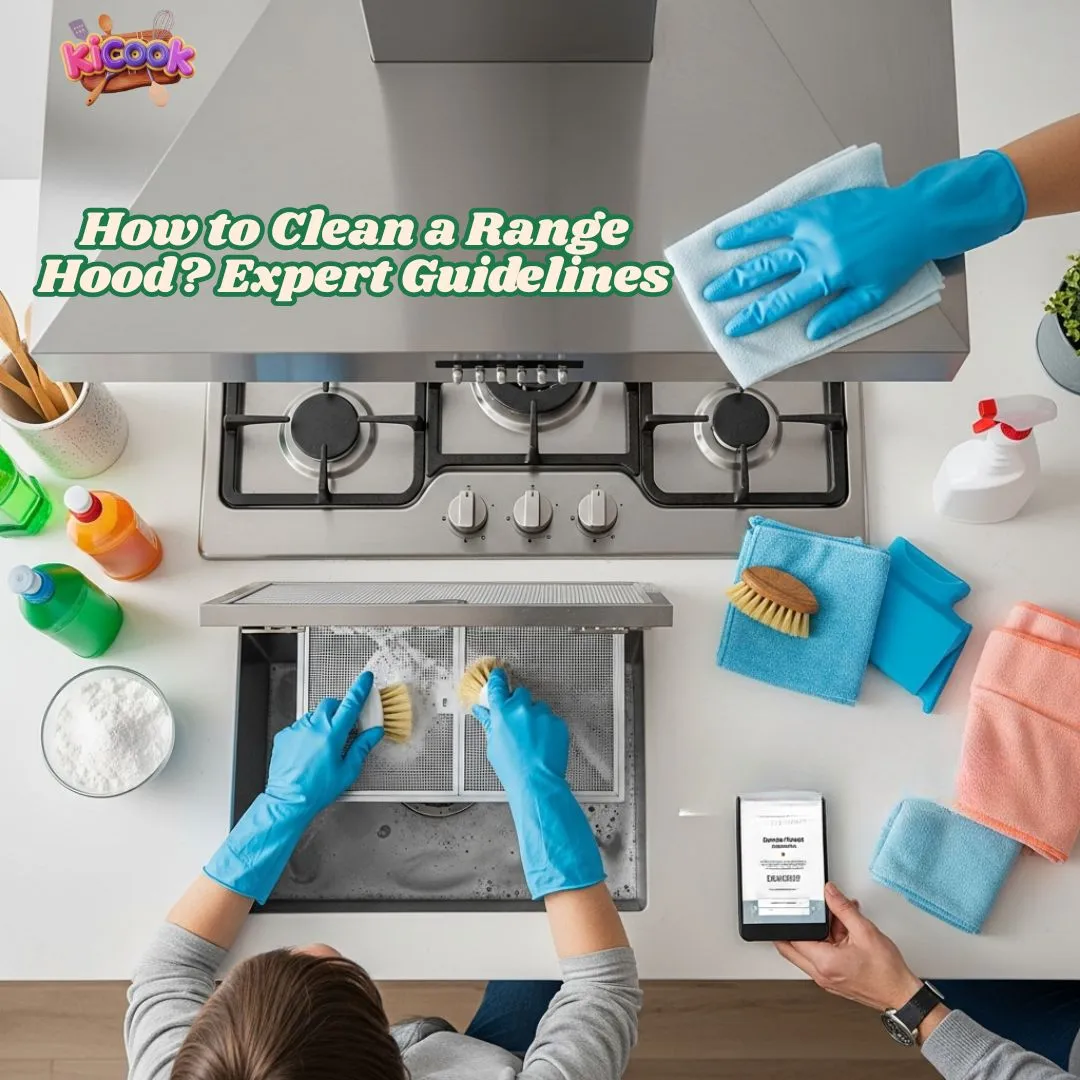
Step 3: Soak and Scrub the Filters
This is where the magic happens. Fill your sink or a large bowl with very hot water. Add a good squirt of dish soap or a cup of baking soda. For really tough grease, I sometimes add a half-cup of vinegar, which creates a fizzing action that helps break down the grime.
Submerge the filters and let them soak for at least 15-20 minutes. You’ll see the grease starting to separate and float to the top. After soaking, take your scrub sponge and gently scrub the filters. The grease should come off easily. For persistent spots, use your abrasive sponge. Rinse thoroughly with clean water and let them air dry completely before putting them back.

Pro Tip: If your filters are dishwasher-safe (check the manual!), you can place them on the top rack for a hands-free clean. Use a good detergent and consider adding a dishwasher cleaner to your machine first to ensure it’s not spraying old food particles onto your “clean” filters.
Step 4: Degrease the Hood Interior and Exterior
While the filters are soaking, it's time to tackle the hood itself. Spray your degreaser generously on all interior surfaces the inside walls, the light bulb cover (if removable), and the fan blades. Be careful not to overspray directly into the motor housing. Let the degreaser sit for 5-10 minutes to break down the grease.
Then, using your microfiber cloths, wipe everything down. For the fan blades, you might need to hold a cloth behind them to stabilize them as you wipe. For that stubborn, caked-on grease on the underside of the hood, use your plastic scraper to gently lift it off before wiping. It’s surprisingly satisfying!
Step 5: Wipe Down the Exterior
Don’t forget the outside! The entire exterior of your range hood, especially the part directly above the stove, collects a fine film of grease. Spray and wipe down the stainless steel, glass, or painted surface with your chosen cleaner. For stainless steel, wiping with the grain helps prevent streaks. A little glass cleaner can make a glass hood sparkle.

Step 6: Reassemble and Do a Final Wipe
Once the filters are completely dry, slide them back into place. Make sure they are secure. Plug the hood back in (or turn the circuit breaker on). Give the outside one last polish with a clean, dry cloth to remove any fingerprints or streaks. And you're done!

Maintaining Your Clean Range Hood
The best way to avoid a massive cleaning session is to never let the grease build up in the first place. Here’s my simple maintenance routine:
- Wipe Weekly: After every few times you cook, give the exterior of the hood a quick wipe with a damp microfiber cloth. This takes 30 seconds and prevents a sticky film from forming.
- Deep Clean Monthly: I try to clean my filters once a month. It’s a quick 15-minute task if I stay on top of it.
- Use Your Hood: It sounds obvious, but always turn on your hood when you’re cooking, even if it's just boiling water. It captures grease and steam at the source.
Mike Peterson, a home inspector with 20 years of experience, emphasizes that “The most common issue I see in kitchens isn't faulty appliances, but neglected maintenance. A simple act like cleaning your range hood filter regularly can prevent a host of problems down the line.”
Frequently Asked Questions for How to Clean a Range Hood?
How often should I clean my range hood filter?
For most home cooks, a good rule of thumb is to clean the filter once a month. If you do a lot of frying or heavy cooking, you might need to do it every two weeks.
Can I put my metal range hood filters in the dishwasher?
Many are dishwasher-safe, but always check your user manual first. When in doubt, hand-washing is the safer option to avoid damaging the filter or your dishwasher.
What’s the best homemade degreaser?
My go-to is a 50/50 mix of white vinegar and water with a tablespoon of dish soap. Baking soda paste (baking soda and a little water) is also excellent for scrubbing tough spots.
My hood is still greasy after cleaning. What did I do wrong?
You probably didn't let the degreaser sit long enough. Grease needs time to break down. Apply your degreaser, let it sit for 10-15 minutes, and then wipe. For really thick grease, you may need to repeat the process.
The fan is still noisy/weak after cleaning. What now?
If cleaning didn't solve a performance issue, the problem might be with the motor or the ductwork being blocked. It might be time to consult a professional.
As chef and home restaurateur Lidia Bastianich wisely notes, “A clean kitchen is a happy kitchen. It’s the heart of the home, and its care reflects the care you put into everything you create there.”
Conclusion
Learning how to clean a range hood properly was a small victory for me in my journey of home care. It transformed a task I dreaded into a simple, satisfying routine. It’s not a difficult job; it just requires a little know-how and the right approach. By dedicating a small amount of time to this essential appliance, you are investing in the safety, air quality, and efficiency of your kitchen.
So, don’t put it off any longer. Grab your supplies, unplug that hood, and give it the refresh it deserves. You’ll be breathing easier and cooking happier in no time. Your kitchen and your future self will thank you for it.
Disclaimer: This post contains affiliate links. If you buy through them, I may earn a small commission at no extra cost to you. This helps support the site and allows me to continue testing and sharing products I genuinely love. I only recommend products I have personally used or thoroughly researched.