
I love my morning toast. That perfect golden brown slice, slathered with butter, is a daily ritual I truly cherish. But for the longest time, I ignored the appliance that made it all possible. My toaster was a crumb-filled, slightly smoky-smelling mess. I’d just shake it over the bin every few weeks and call it a day, until one day it started taking a little longer to toast. That’s when I realized I needed to learn how to clean a toaster properly.
It wasn’t just about performance; it was about safety and making my appliance last. Since then, I’ve become a bit of a toaster-cleaning enthusiast. I’ve learned the safest, most easy and effective methods that make a huge difference. This guide is everything I wish I’d known. It’s a simple, step-by-step process that will help you keep your toaster in top shape, ensuring great toast for years to come.
Why You Absolutely Need to Clean Your Toaster
Let’s be honest, it’s an easy task to forget. But a clean toaster is a happy toaster, and here’s why making it part of your regular kitchen cleaning routine is so important:
- Fire Safety: This is the biggest reason. Accumulated crumbs and food debris at the bottom of the toaster are highly flammable. When the heating elements get hot enough, they can ignite those crumbs, creating a real fire hazard. A quick clean drastically reduces this risk.
- Better Tasting Food: Old, burnt crumbs can smoke up every time you toast, imparting a bitter, acrid flavor to your bread, bagels, and pastries. A clean toaster means you only taste your food, not last week’s crumbs.
- Appliance Longevity: Buildup of gunk and grease can make the heating elements work harder and less efficiently. This strains the internal components and can shorten your toaster’s lifespan. Proper maintenance helps protect your investment.
- It’s Just More Pleasant: A shiny, crumb-free toaster just looks better on your counter. It’s a small touch that makes your whole kitchen feel more cared for.
As the famous chef Julia Child once said, “The only real stumbling block is fear of failure. In cooking, you’ve got to have a what-the-hell attitude.”
I think that applies to cleaning appliances, too! Don’t be afraid to tackle it.
Your Step-by-Step Guide to a Deep Clean
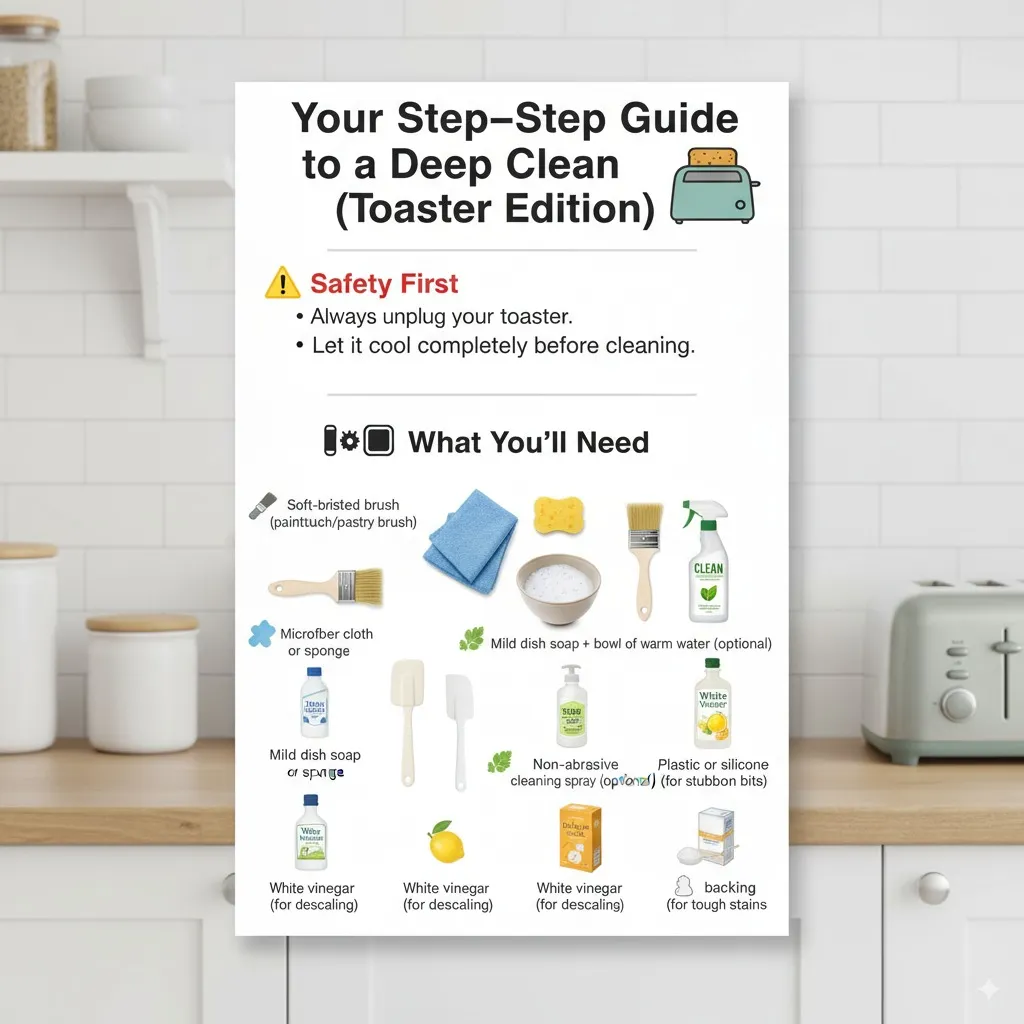
Before you start, the most important rule: Always unplug your toaster and let it cool down completely. Never, ever try to clean it while it’s plugged in or still warm. Safety first!
What You’ll Need:
- A soft-bristled brush (a clean paintbrush or pastry brush works perfectly)
- A microfiber cloth or soft sponge
- Mild dish soap
- A bowl of warm water
- A non-abrasive cleaning spray (optional)
- A plastic or silicone spatula (for stubborn bits)
- White vinegar (for descaling, if needed)
- Baking soda (for tough stains)
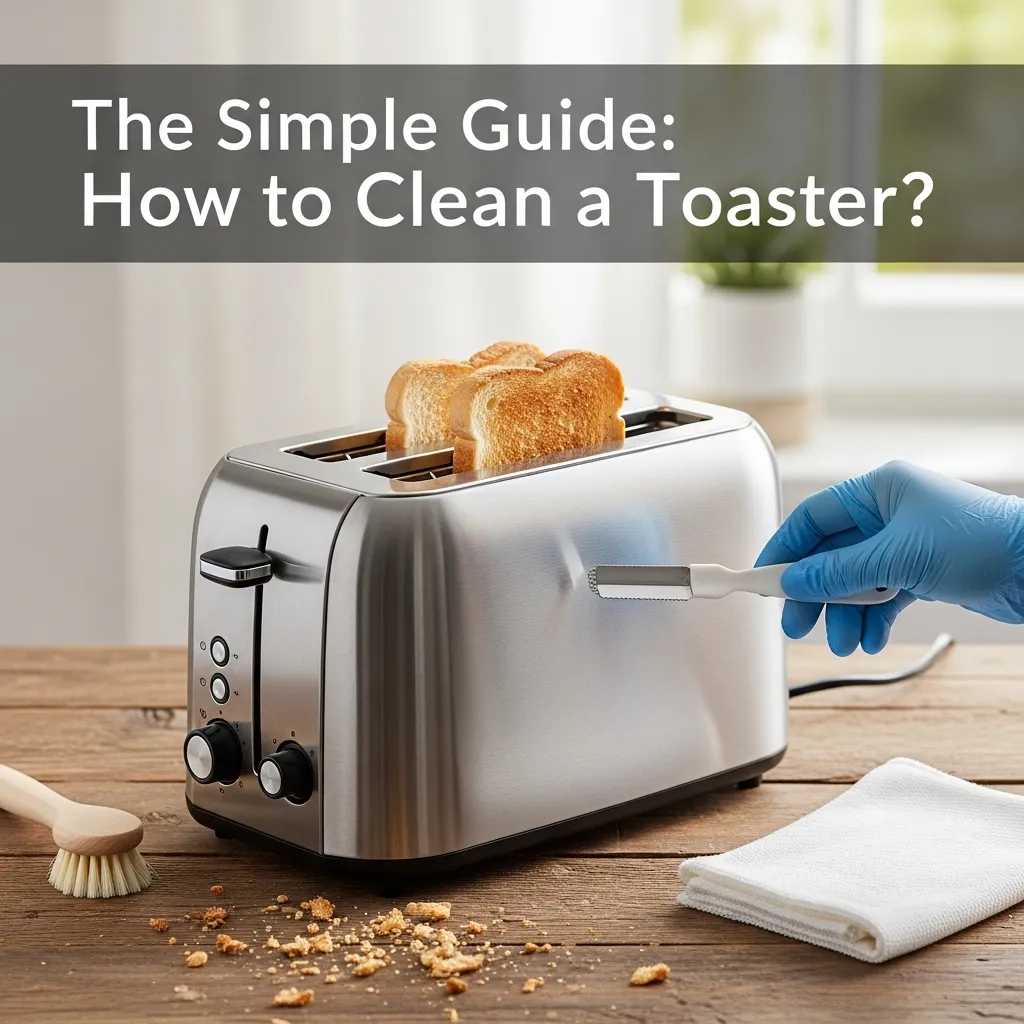
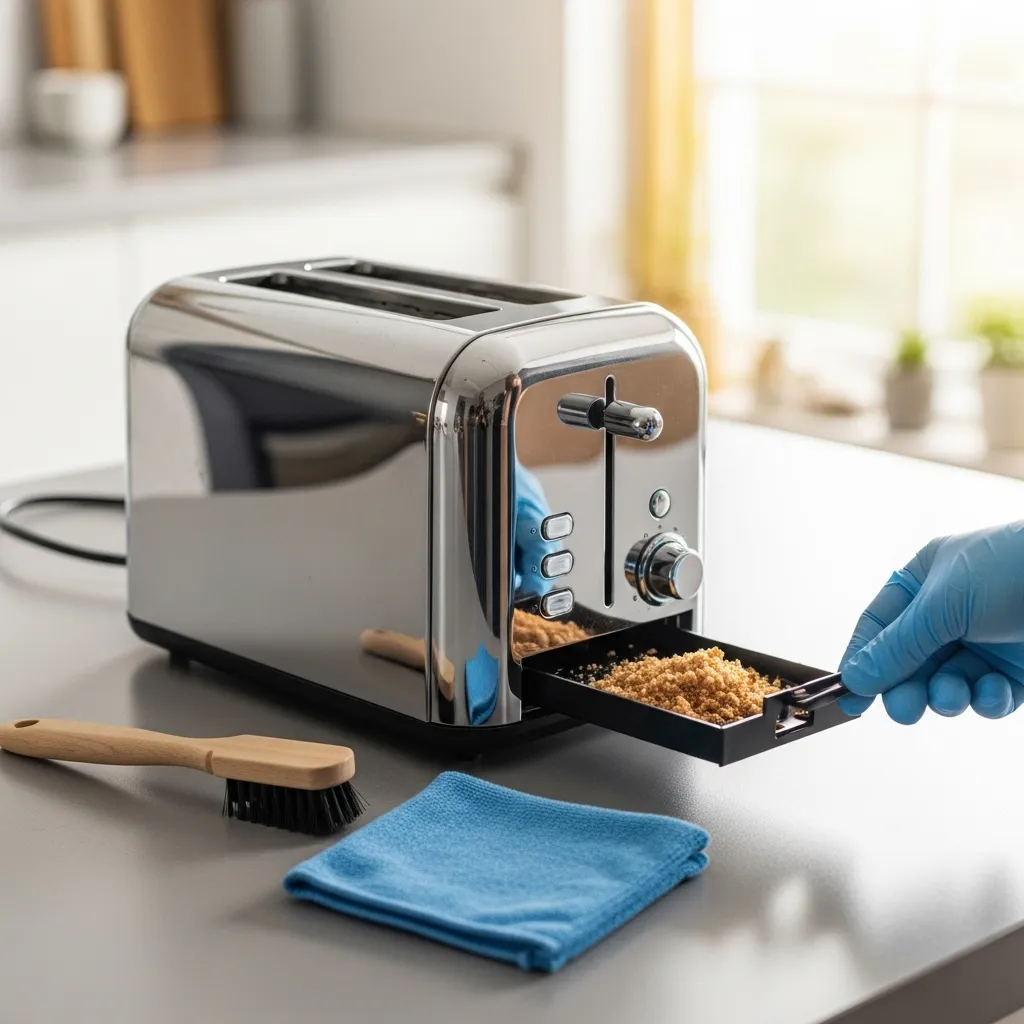
Step 1: The Great Crumb Eviction
- Carry your unplugged, cool toaster over to the trash can or a newspaper.
- Most toasters have a crumb tray at the bottom. Gently pull it out. Dump the contents into the trash.
- If your model doesn’t have a removable tray, carefully turn the toaster upside down over your trash can and gently shake it. Be gentle—you don’t want to damage the sensitive heating elements inside.
- Use your soft-bristled brush to dislodge any stubborn crumbs stuck in the corners of the tray or the toaster interior. Get into those nooks and crannies!
Step 2: Wiping Down the Interior
This is where you tackle any stuck-on gunk. Never insert any metal objects or use abrasive scrubbers inside the toaster, as this can damage the heating elements.
- Dampen your microfiber cloth with just water first. Wipe the inside walls of the toaster, being careful not to touch the heating elements more than necessary.
- For sticky spots, dip your cloth in a solution of warm water and a drop of mild dish soap. Wring it out so it’s only damp, not dripping wet.
- Gently wipe the area. For really stubborn bits, a plastic spatula can be used to very carefully scrape it off without scratching anything.
- Use a second cloth dampened with only water to wipe away any soapy residue.
Step 3: The Exterior Spa Treatment
The outside of your toaster gets greasy and dusty from kitchen air.
- Spray your non-abrasive cleaner onto your cloth (not directly onto the toaster) and wipe down the entire exterior.
- Pay special attention to the lever and buttons, as these are touchpoints that collect oils from your hands.
- For stainless steel toasters, a quick wipe with a dedicated stainless steel cleaner will keep it looking shiny and new and prevent fingerprints.
- Use a cotton swab to clean around the buttons and dials for a truly thorough job.
Step 4: Dealing with Stubborn Stains and Odors
If your toaster has developed some baked-on stains or a funky smell, baking soda is your best friend.
- Make a paste with a tablespoon of baking soda and a few drops of water.
- Using your soft cloth, apply the paste to the stained area on the crumb tray or the toaster’s interior walls (avoiding direct contact with heating elements).
- Let it sit for 10-15 minutes.
- Wipe it away with a damp cloth. The baking soda will act as a gentle abrasive to lift the stain and neutralize odors.
Pro Tips for Different Scenarios
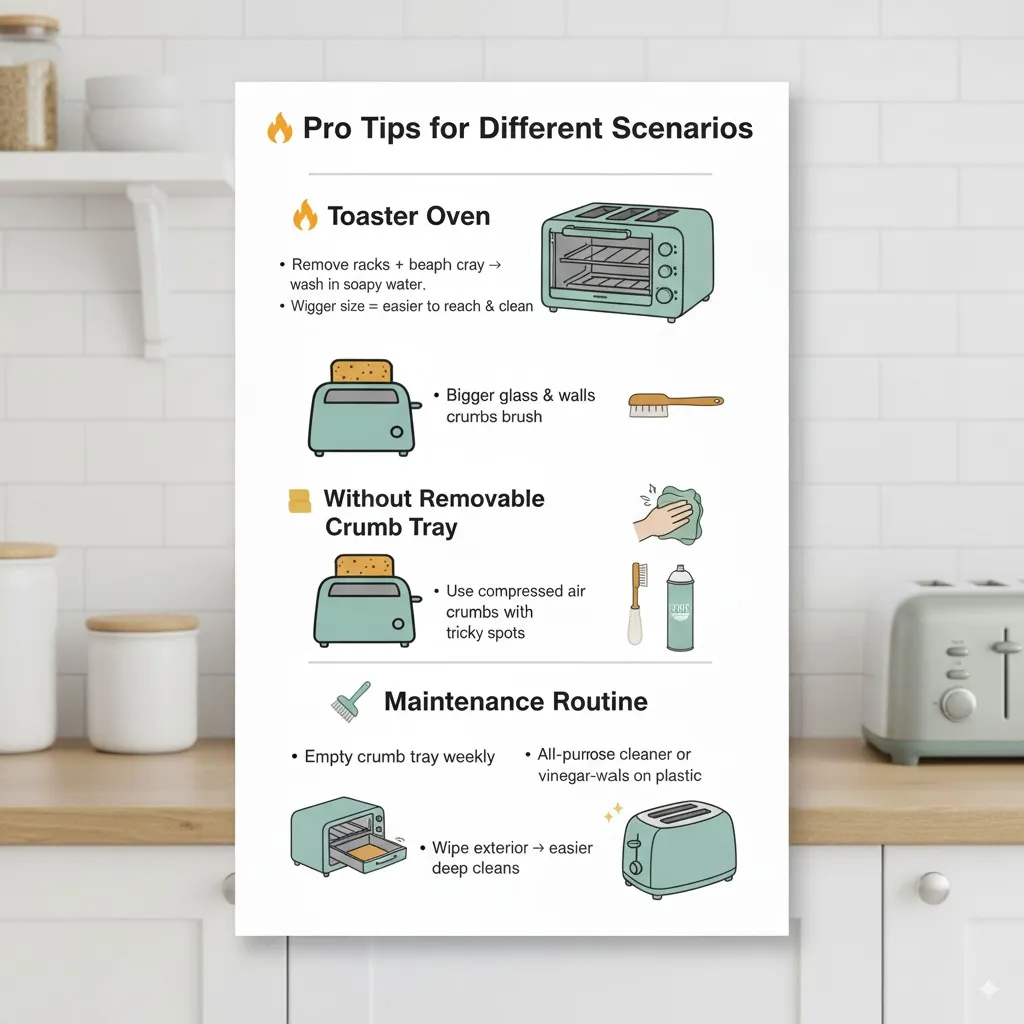
- How to clean a toaster oven: The process is similar but more involved due to the larger size and the presence of racks and a door. Remove the racks and crumb tray and wash them in warm, soapy water. Wipe down the interior glass and walls. The larger space often makes it a bit easier to reach in and clean thoroughly.
- How to clean a toaster without a removable crumb tray: Be extra careful with shaking. Use your brush to sweep as many crumbs as possible toward the opening before turning it over. A can of compressed air can be useful for blasting crumbs out of hard-to-reach places.
- How to clean the outside of a toaster: As above, a simple all-purpose cleaner or a vinegar-water solution works wonders. For plastic bodies, avoid harsh chemicals that can cause discoloration.
- Maintaining your toaster: Get into the habit of emptying the crumb tray once a week. A quick wipe-down of the exterior every few days will prevent heavy buildup and make your deep cleans much easier.
Another great piece of advice comes from home organization expert Marie Kondo: > “The objective of cleaning is not just to clean, but to feel happiness living within that environment.” A clean toaster absolutely sparks joy for me every morning!
Frequently Asked Questions
Can I use water to clean the inside of my toaster?
You must be very careful. Never pour or spray water directly into the toaster. Always use a cloth that is damp, not wet, and wring it out thoroughly. Any moisture left inside can damage the electrical components and is a safety risk.
How often should I clean my toaster?
For safety and performance, you should empty the crumb tray every week if you use it daily. A full deep clean, like the one described here, should be done every one to two months, depending on how much you use it.
My toaster smells like burning even after cleaning. What should I do?
There might be a piece of stuck food you missed. Do another inspection with a flashlight. If the smell persists after a second cleaning, it could indicate an internal electrical problem. In this case, it’s best to stop using it and consider a replacement.
Is it safe to use chemical cleaners inside the toaster?
No, it is not recommended. Harsh chemical fumes can be trapped and then released onto your food the next time you toast, which is unsafe. Stick to mild soap and water or a baking soda paste.
What’s the best way to get burnt-on stuff off the heating elements?
Honestly, you shouldn’t try. The heating elements are very delicate. Scrubbing them can damage the wires and make the toaster unsafe. If there is significant buildup on the elements themselves, it might be time for a new toaster.
Conclusion
Learning how to clean a toaster is one of those small, satisfying kitchen tasks that pays off big time. It takes less than 15 minutes, but the benefits for your safety, your toast’s taste, and your appliance’s health are immense. It’s a simple act of care for your kitchen tools.
I promise, once you get into the routine, it becomes second nature. That moment you push the lever down and don’t smell any old, smoky crumbs? Pure bliss. Here’s to many more years of perfect, delicious, and safely prepared toast!
As my own grandmother used to tell me, “Take care of your things, and they’ll take care of you.”
It’s a simple truth that applies to everything, even our humble toasters.