
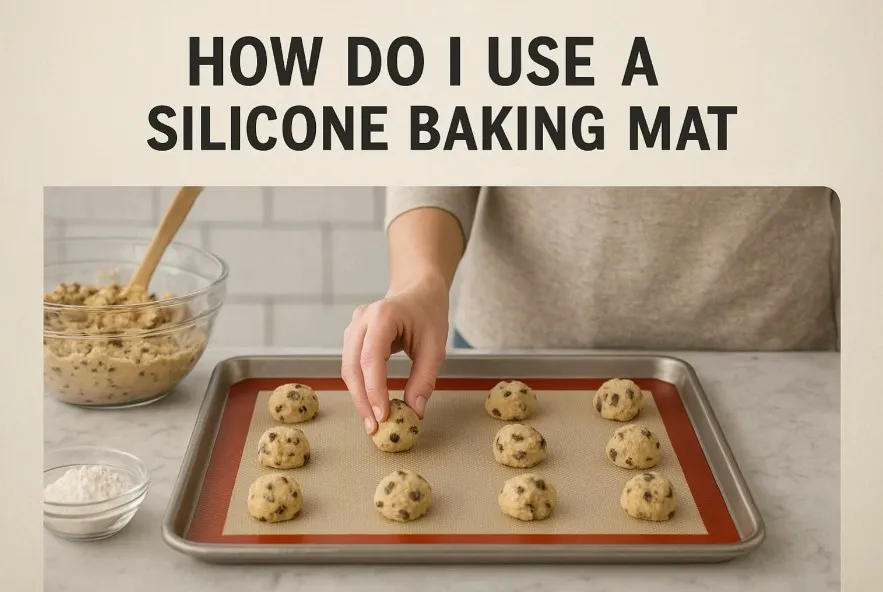
Have you ever wondered, “How do I use a silicone baking mat?” It’s super easy! Lay it on a baking sheet, add your ingredients, and bake. These mats are reusable, eco-friendly, and cost-effective. In fact, the silicone baking mat market, valued at $350 million in 2023, is projected to grow to $580 million by 2032.
Important Facts
- Wash your silicone baking mat before using it the first time. This helps with baking and keeps food safe.
- Place the mat flat on your baking sheet. This stops it from wrinkling and helps food cook evenly.
- Bake on the smooth side of the mat. It is non-stick and works best this way.
“A silicone baking mat is a baker’s best friend—it saves time, money, and hassle.” – Mary Berry
Preparing Your Silicone Baking Mat
Cleaning Before First Use
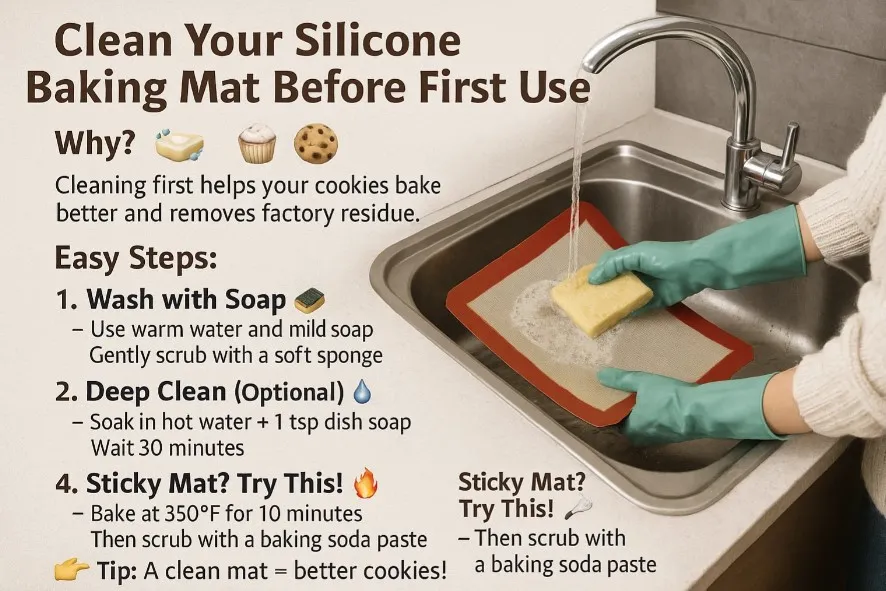
Before you start baking, it’s important to clean your silicone baking mat properly. Trust me, this step makes all the difference in your baking results. Here’s a simple process to follow:
- Wash the mat with warm, soapy water. Use a non-abrasive sponge to gently scrub it. This removes any residue left from manufacturing.
- Rinse it thoroughly to ensure no soap remains.
- For extra cleanliness, soak the mat in hot water with a teaspoon of degreasing dishwashing liquid for about 30 minutes.
- If you notice any sticky residue, you can bake the mat at 350°F for 10 minutes. Afterward, apply a baking soda paste to clean it.
Once it’s clean, dry it completely before use. A clean mat not only ensures better baking but also keeps your food safe.
Pro Tip: If your mat has stubborn stains, soak the affected areas in 3% hydrogen peroxide for 24 hours. It works like magic!
Fitting the Mat to Your Baking Sheet
Getting the right fit for your silicone baking mat is just as important as cleaning it. A snug fit ensures even baking and prevents the mat from bunching up. Here’s how you can do it:
- Place the mat on your baking sheet to check the fit.
- If it’s too large, trim the edges slightly. Make sure to leave a small gap around the edges to allow for expansion when heated.
- Test the fit again. If it still doesn’t lie flat, trim a bit more until it fits perfectly.
A well-fitted mat stays in place and makes baking a breeze. Whether you’re making cookies or roasting veggies, this step ensures everything cooks evenly.
Quick Reminder: Never fold or crease your mat to make it fit. This can damage the silicone and affect its performance.
How do I use a silicone baking mat?
Placement and Setup
Using a silicone baking mat is super simple. Start by placing it flat on your baking sheet. Make sure there are no folds or wrinkles. If it’s too big, trim the edges slightly for a better fit. A snug mat stays in place while you bake.
Once it’s set, add your ingredients. You can bake cookies, roast veggies, or make pastries right on the mat. The non-stick surface means no need for oil, butter, or parchment paper. Just put your food on the mat, and you’re ready to bake.
Quick Tip: Always bake on the smooth side of the mat. The textured side helps it grip the pan better.
Recipes That Work Best
When I first tried a silicone baking mat, I was amazed by its versatility. Some recipes work especially well with it. Sticky treats like Rolo Chocolate Cookies come off easily after cooling. Even gooey dishes, like Asparagus Prosciutto Ham Tart, bake perfectly and slide right off.
These mats are also great for roasting vegetables. They help veggies caramelize evenly without sticking to the pan. Cleanup is quick and easy. Whether you’re making crispy potatoes or chocolate chip cookies, the mat gives consistent results every time.
Pro Tip: Let baked goods cool a bit before removing them. This keeps them from breaking and ensures they release cleanly.
Temperature and Safety Guidelines
A common question is, “How do I safely use a silicone baking mat?” Knowing the temperature limits is important for safe baking.
Most food-grade silicone can handle heat up to 450°F. But it’s safer to stay below 428°F, as the FDA suggests. Here’s a quick guide:
| Temperature (°F) | Safety Level | Source |
|---|---|---|
| Up to 428°F | Safe | FDA |
| Up to 250°F | High-Temp Resistance | Food-grade Silicone |
| Up to 350°F | Short-term High-Temp Use | Food-grade Silicone |
You can use silicone mats in ovens, air fryers, and microwaves. But don’t place them on open flames or heating elements. This can damage the mat and release harmful chemicals.
Reminder: Always check the instructions from the mat’s manufacturer. Not all silicone mats are the same!
By following these tips, your mat will last longer, and baking will be easier for years to come.
“For perfectly even cookies every time, always use a silicone mat.” – Paul Hollywood
Cleaning and Maintaining Your Silicone Baking Mat
Washing After Use
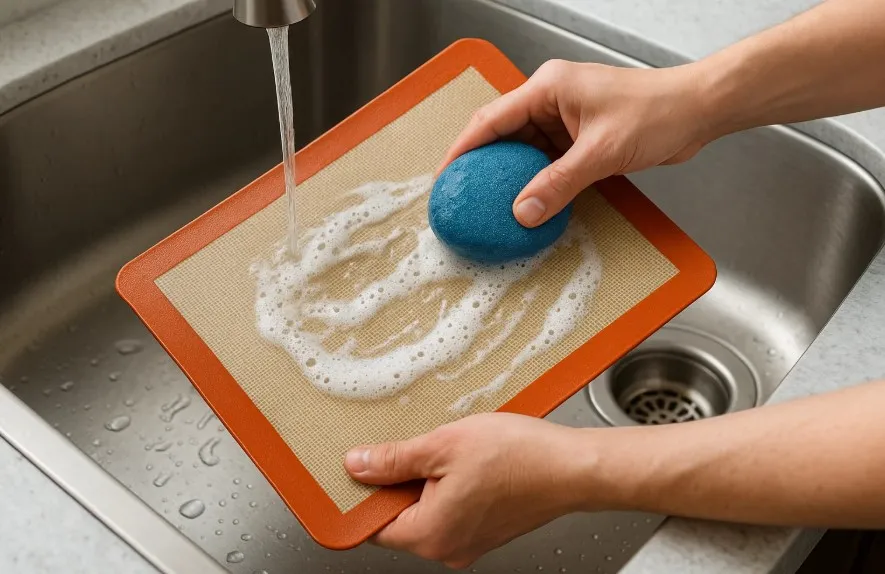
Cleaning your silicone baking mat after baking is simple, but doing it right keeps it in great shape. Here’s what I’ve found works best:
- Hand-wash the mat with mild soap and warm water. Use a soft sponge to avoid scratching the surface.
- Rinse thoroughly to remove all soap residue. Leftover soap can mess with the mat’s non-stick properties.
- For oily mats, toss them in the dishwasher. Place them on the top rack and run a normal cycle.
If you’re dealing with stubborn grease, try soaking the mat in hot water with grease-fighting dish soap for 20 minutes. Scrub gently, and rinse it clean.
Pro Tip: For a natural solution, soak the mat in hot water with lemon juice for 10 minutes. It works wonders on grease and leaves a fresh scent.
Removing Stains and Odors
Sometimes, silicone baking mats pick up stains or odors from certain foods. Don’t worry—I’ve got you covered. Here are some tried-and-true methods:
| Method | Description |
|---|---|
| Immediate Cleaning | Wash the mat with warm, soapy water right after use to prevent stains from setting. |
| Baking Soda Paste | Create a paste with baking soda and water, apply to stains, let sit for hours, then rinse. |
| Vinegar Soak | Soak the mat in a mixture of equal parts vinegar and water for 30 minutes to neutralize odors. |
| Baking Soda Treatment | Sprinkle baking soda on the mat, let it sit overnight to absorb smells, then rinse off. |
I’ve personally used the baking soda paste method for stubborn stains, and it works like magic. For odors, the vinegar soak is my go-to. It’s quick, easy, and leaves the mat smelling fresh.
Quick Tip: Always clean your mat immediately after use. It’s the easiest way to prevent stains and odors from setting in.
Proper Storage Tips
Storing your silicone baking mat correctly is just as important as cleaning it. Improper storage can shorten its lifespan. Here’s what I recommend:
Proper storage may be the most important aspect of the care and maintenance of these kitchen implements. To increase the longevity of your mats, you can store them one of two ways: flat, or lightly rolled. After cleaning, allow the mats to dry completely before storing to prevent a buildup of excess moisture.
I always let my mat air dry completely before putting it away. Moisture can lead to mold or odors, so this step is crucial. Once dry, I either roll it up gently or lay it flat in a drawer.
Reminder: Never fold or crease your mat. It can damage the silicone and affect its performance.
By following these tips, you’ll keep your mat in excellent condition for years. Trust me, proper care makes all the difference.
Common Mistakes to Avoid
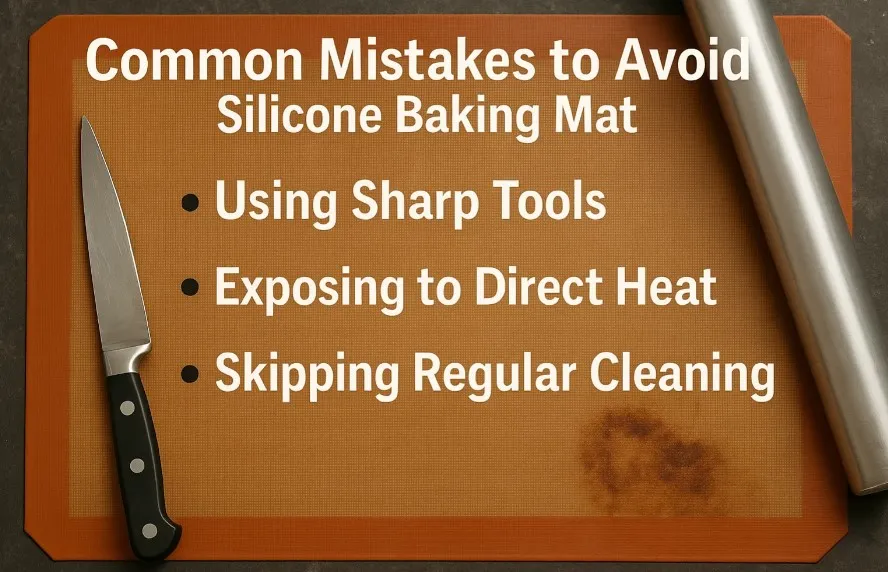
Using Sharp Tools
Using sharp tools on a silicone baking mat is a big mistake. Silicone is strong but can still get damaged. Knives, pizza cutters, or forks can scratch or tear it. Once damaged, the mat loses its non-stick surface and becomes harder to clean.
Use silicone or wooden utensils instead. They are gentle and won’t harm the mat. If you need to cut food, move it to a cutting board first. This simple step protects your mat from wear and tear.
Quick Tip: Check your mat for damage before using it. Small tears can get worse with time.
Exposing to Direct Heat
Placing a silicone baking mat near direct heat is risky. Silicone can handle heat, but too much can ruin it. Here’s what happens if it’s exposed to direct heat:
- The mat may lose its shape and become sticky.
- Temperatures over 428°F can cause it to break down.
- While good silicone doesn’t release toxins, overheating is still bad.
Always use your mat on a baking sheet or pan. Never place it directly on an oven rack or near flames. This keeps the mat safe and your food fresh.
Reminder: Read the temperature limits on your mat before using it.
Skipping Regular Cleaning
Not cleaning your silicone baking mat often can cause problems. Mats can absorb oils and smells if left dirty. This can make your food taste bad and leave unpleasant odors.
Here’s why cleaning is important:
- Oils and smells soak into the silicone, making them harder to remove later.
- Heating the mat before washing helps loosen trapped grease.
Wash your mat with warm, soapy water after every use. For tough stains, try a baking soda paste or vinegar soak. These methods keep your mat clean and ready for baking.
Pro Tip: Clean your mat right after using it. It’s easier to remove grease and smells when fresh.
Silicone baking mats have made baking much simpler for me. They’re reusable, good for the environment, and easy to clean.
- You don’t need sprays, butter, or parchment paper anymore.
- They can be used many times, saving money and cutting waste.
- Cleaning them is fast, and baking becomes stress-free.
Using these mats makes baking simpler and better for the planet.
“Eco-friendly and efficient, silicone mats are a smart choice for any kitchen.” – Ina Garten
FAQs For How Do I Use A Silicone Baking Mat?
Can I cut my silicone baking mat to fit smaller pans?
No, cutting the mat can ruin it. Instead, fold the edges gently or buy a smaller mat for a better fit.
Is it safe to use a silicone baking mat in a toaster oven?
Yes, but only if it fits without touching the sides or heating parts. Always check the mat’s temperature limits in the manufacturer’s instructions.
Quick Tip: Use mini silicone mats for toaster ovens. They’re perfect for small spaces!
Why does my silicone baking mat feel greasy after washing?
Silicone can hold onto oils from food. To fix this, scrub it with baking soda paste or soak it in hot water with lemon juice for 10 minutes.
Pro Tip: Clean your mat often to stop grease buildup. This keeps it fresh and non-sticky.
Conclusion
Now that you know how to use a silicone baking mat, you can bake with confidence. These mats simplify baking, reduce waste, and give you perfect results every time. Whether you’re making cookies, pastries, or roasting veggies, a silicone mat is a handy tool to keep in your kitchen.
Happy baking!