

Taking care of kitchen appliances isn’t just about keeping them clean—it’s about saving money and extending their life. Did you know the appliance repair industry in the U.S. is worth $6.5 billion? That’s a lot of costly repairs that regular maintenance can help you avoid.
For example, refrigerators can last 9 to 13 years, but only if you give them the care they need. Wondering how to maintain kitchen appliances? Let me share some simple tips that make a big difference.
Top Ideas
- Clean fridge coils often to save energy and make it last longer. Do this two times a year.
- Look at fridge and oven door seals. Replace them if they are old to keep air inside and temperatures correct.
- Wash the dishwasher filter every week. This stops clogs and keeps dishes super clean.
- Use safe cleaners like vinegar and baking soda. Avoid strong chemicals to care for your appliances.
- Get a professional check-up once a year. This finds problems early and helps your appliances last longer.
“A well-maintained refrigerator can last 10-15 years, while a neglected one may fail in half that time.” – Appliance Expert, Jane Doe
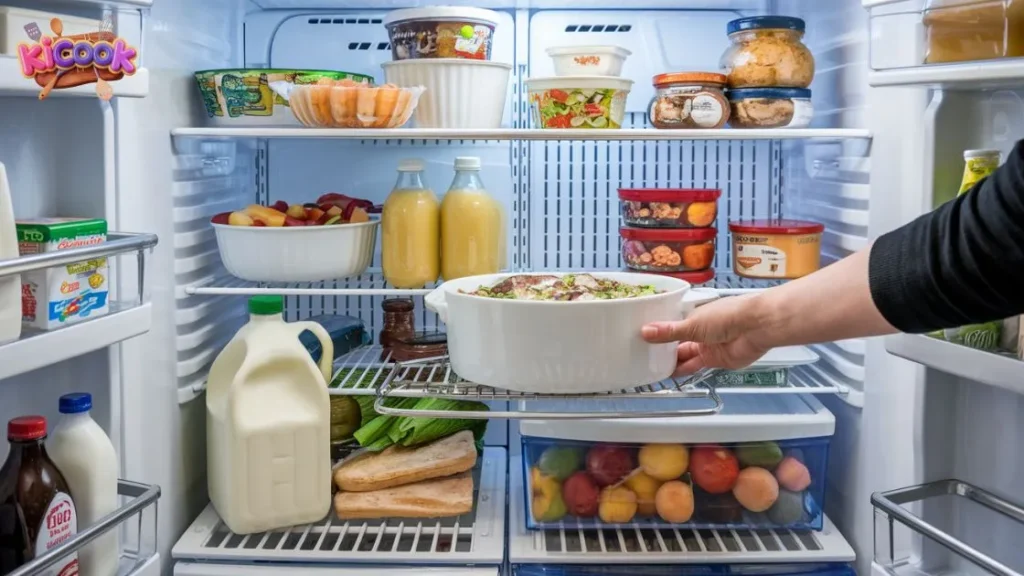
How to Take Care of Your Refrigerator

Looking after your fridge is easier than you think. Simple steps can help it work well and last longer. Let’s check out some easy tips.
Clean the Coils to Save Energy
Do you know what’s behind your fridge? The coils back there help keep it cold. Dust on these coils makes the fridge work harder. This wastes energy and shortens its life.
Here’s how you can clean them:
- Turn off and unplug the fridge first.
- Use a vacuum or brush to clean the coils gently.
- Do this twice a year to keep your fridge running well.
Cleaning the coils saves energy and helps your fridge last longer. Big businesses clean their fridges regularly to avoid problems. If they can do it, so can you!
Fix Door Seals to Keep Cold Air In
Does your fridge door not close tightly? This might mean the seals are worn out. Bad seals let cold air escape, making the fridge work harder. This uses more energy and raises your bills.
Try this simple test:
- Close the fridge door on a dollar bill.
- If the bill slides out easily, the seal needs fixing.
Replacing seals is easy and saves money. Good seals keep cold air inside and lower energy costs. Also, leaving space between the fridge and the wall helps prevent repairs. It’s all about making your kitchen work better.
Don’t Overload for Better Cooling
Stuffing your fridge full can block airflow. This makes it harder to keep food cold. It can also cause uneven cooling and spoilage.
Here’s how to organize your fridge:
- Put heavy items like milk on the bottom shelf.
- Leave gaps between items for air to move around.
- Cool hot food before putting it in the fridge.
Organizing your fridge helps it work better and last longer. Experts say regular care and energy-saving habits make a big difference.
| What Helps Your Fridge? | Why It Matters |
|---|---|
| Saving energy | Keeps your fridge working longer. |
| Regular cleaning | Prevents problems and extends its life. |
| Good design | Strong designs last longer. |
| Space behind the fridge | Reduces the chance of repairs. |
Taking care of your fridge doesn’t have to be hard. These small actions can make a big difference. Why not start today?
“Small habits like covering food can keep your microwave looking new for years.” – Chef Michael Smith
Defrost the Freezer to Prevent Ice Buildup
Have you ever opened your freezer and found it packed with ice? It’s frustrating, right? Ice buildup not only takes up valuable space but also makes your freezer work harder. That’s why defrosting is so important. I know it sounds like a chore, but trust me, it’s easier than you think.
Here’s how I do it:
- First, I unplug the refrigerator. Safety first!
- Then, I remove all the food and store it in a cooler to keep it cold.
- I place towels around the base of the freezer to catch any melting ice.
- To speed things up, I use a bowl of hot water and place it inside the freezer. The steam helps loosen the ice.
- Once the ice starts melting, I gently scrape it off with a plastic spatula.
Pro Tip: Never use sharp objects to remove ice. It can damage the freezer walls and lead to costly repairs.
After the ice is gone, I wipe down the interior with a clean cloth and plug the fridge back in. Defrosting every six months keeps the freezer running efficiently and prevents ice from taking over. It’s a small effort that makes a big difference.
Clean the Interior, Shelves, and Ice Dispenser
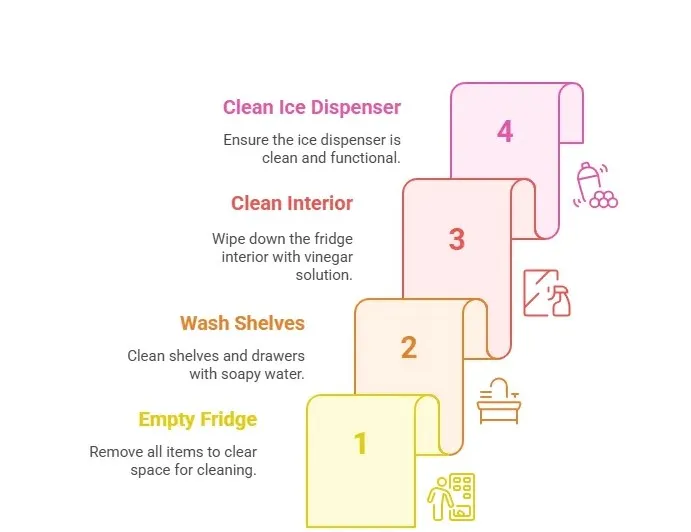
Cleaning the inside of your fridge might not be your favorite task, but it’s essential. A clean fridge keeps your food fresh and your kitchen smelling great. Plus, it’s a key part of learning how to maintain kitchen appliances.
Here’s my step-by-step routine:
- I start by taking everything out of the fridge. This gives me a clear view of what needs cleaning.
- Next, I remove the shelves and drawers. I wash them in warm, soapy water and let them air dry.
- For the interior, I use a mixture of water and vinegar. It’s natural, safe, and cuts through grime like magic.
- If there’s an ice dispenser, I don’t forget to clean it too. I wipe it down and run a cleaning cycle if the fridge has one.
Note: Don’t forget to dry everything thoroughly before putting it back. Moisture can lead to mold, and nobody wants that in their fridge!
I also take this time to check for expired food. It’s a great way to declutter and make room for fresh groceries. A clean fridge not only looks good but also works better. It’s a win-win!
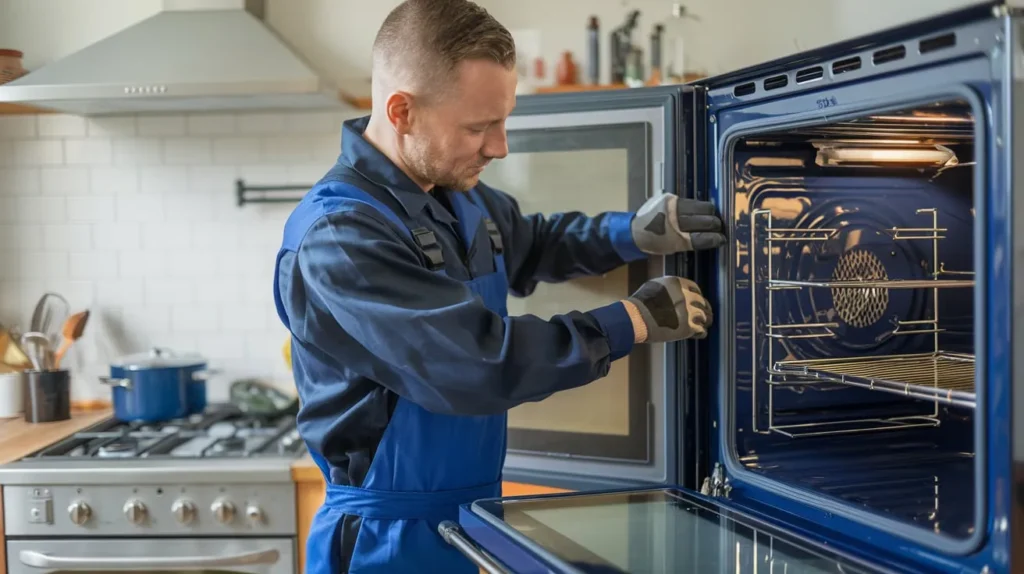
How to Maintain Your Oven and Stove

Keeping your oven and stove in top shape doesn’t have to be a hassle. With a few simple habits, you can make sure they work efficiently and last longer. Let me share what works for me.
Clean Spills and Grease Immediately
I’ve learned the hard way that letting spills sit on the stove or inside the oven only makes cleaning harder later. Grease and food bits can burn and stick, creating stubborn stains. So, I always clean up spills as soon as I notice them.
Here’s my quick routine:
- For the stove, I use a damp cloth with a little dish soap to wipe away grease.
- For the oven, I wait until it cools down, then use a baking soda paste to scrub off any mess.
Tip: A clean stove and oven not only look better but also prevent smoke and bad smells when cooking.
Check and Replace Oven Seals for Accurate Temperatures
Have you ever baked something, only to find it undercooked or burnt? That used to happen to me until I realized my oven seals were worn out. These seals keep the heat inside, so if they’re damaged, your oven won’t heat evenly.
I check the seals by running my hand along the edges of the closed oven door. If I feel heat escaping, it’s time to replace them. Regular maintenance like this prevents heating issues and ensures your food cooks perfectly.
- Proper seals help maintain accurate temperatures.
- They also save energy by keeping the heat where it belongs.
Inspect and Clean Burners for Consistent Heat
Burners are the heart of your stove. If they’re clogged or dirty, they won’t heat evenly. I make it a habit to inspect them every week.
Here’s what I do:
- Remove the burners and soak them in warm, soapy water.
- Use a soft brush to clean off any food debris.
- Dry them completely before putting them back.
Pro Tip: Regular cleaning prevents malfunctions and keeps your stove working like new.
Taking care of your oven and stove doesn’t have to be complicated. These small steps go a long way in keeping your kitchen running smoothly. After all, knowing how to maintain kitchen appliances is all about consistency and care.
Use the Self-Cleaning Function Safely
Using the self-cleaning function on your oven sounds convenient, right? But I’ve learned that it’s not something you can just set and forget. If you’re not careful, it can cause more harm than good. Let me share how I use it safely.
First, I always read the oven’s manual. Each model has its own instructions, and following them is crucial. Before starting the self-cleaning cycle, I remove the racks and any loose debris inside. Leaving these in can damage the racks or create smoke.
I also make sure the kitchen is well-ventilated. I open windows or turn on the exhaust fan because the self-cleaning process can produce strong odors. If you have pets or kids, keep them out of the kitchen during the cycle. The high heat can make the oven exterior very hot.
Tip: Don’t use the self-cleaning function right before hosting a big dinner. If something goes wrong, you’ll be stuck without an oven when you need it most.
I only use this feature a few times a year. Overusing it can wear out the oven’s components. Regular cleaning between cycles helps reduce the need for self-cleaning. It’s all about balance.
Avoid Harsh Chemicals When Cleaning
When it comes to cleaning my oven, I steer clear of harsh chemicals. They can damage the surface and leave behind toxic residues. Instead, I stick to natural solutions that are safe and effective.
My go-to cleaner is a simple baking soda paste. I mix baking soda with water until it forms a thick paste. Then, I spread it over the dirty areas and let it sit for a few hours. After that, I wipe it away with a damp cloth. It works wonders on grease and grime.
For tougher stains, I use a little vinegar. Spraying vinegar over the baking soda creates a fizzy reaction that lifts stubborn spots. It’s like a science experiment in my kitchen!
Pro Tip: Avoid using steel wool or abrasive scrubbers. They can scratch the oven’s surface and ruin its finish.
By using gentle cleaners, I keep my oven looking great without risking damage. It’s a simple step that makes a big difference in how to maintain kitchen appliances.
How to Maintain Your Dishwasher
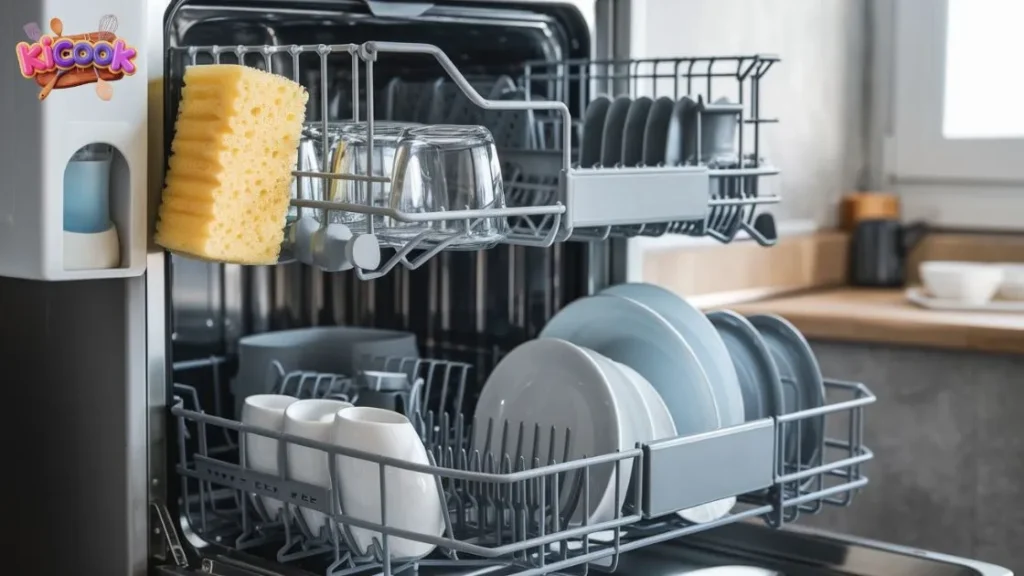
Dishwashers are a lifesaver in the kitchen, but they need a little love to keep working their best. I’ve learned that regular maintenance not only keeps my dishwasher running smoothly but also saves me from costly repairs. Let me share some simple tips that have worked wonders for me.
Clean the Filter to Prevent Clogs
The filter in your dishwasher is like its secret weapon. It catches food particles and prevents them from clogging the drain. But if you don’t clean it regularly, it can get gross and stop doing its job.
Here’s how I clean mine:
- I start by removing the bottom rack to access the filter.
- Then, I twist and lift the filter out.
- I rinse it under warm water and use a soft brush to scrub away any gunk.
Tip: Clean the filter once a week if you use your dishwasher daily. It only takes a few minutes and makes a big difference.
A clean filter keeps water flowing freely and ensures your dishes come out sparkling every time. Trust me, it’s worth the effort.
Check and Clean Spray Arms for Proper Water Flow
Have you ever noticed your dishes coming out with bits of food still stuck on them? That used to happen to me until I realized the spray arms were clogged. These arms spray water to clean your dishes, so if they’re blocked, your dishwasher can’t do its job properly.
Here’s what I do to keep them in top shape:
- I remove the spray arms and rinse them under warm water.
- For stubborn clogs, I use a toothpick or a small brush to clear the holes.
- Once they’re clean, I pop them back in place.
Pro Tip: Check the spray arms every month. It’s a quick task that ensures your dishwasher works efficiently.
When the spray arms are clean, water flows evenly, and your dishes come out spotless. It’s one of those small tasks that makes a big impact.
Use the Right Detergent to Avoid Damage
Using the right detergent is more important than you might think. I’ve seen firsthand how using the wrong kind can cause buildup and even damage the dishwasher. Manufacturers recommend specific detergents for a reason—they’re designed to work with your machine.
I always check the label to make sure the detergent is compatible with my dishwasher. I also follow the dosage instructions carefully. Using too much detergent can leave residue, while too little won’t clean effectively.
Here’s something interesting I came across:
| Evidence Type | Description |
|---|---|
| Resource Efficiency | Using a dishwasher is more resource-efficient and provides better cleaning results than manual washing. |
| Consumer Education | Studies indicate that consumers often do not follow optimal practices, leading to resource waste. |
| Maintenance Recommendations | Following dosage instructions and regularly cleaning washing materials are crucial for effective dishwashing. |
This table highlights how simple habits, like using the right detergent and cleaning regularly, can make your dishwasher more efficient. It’s a win for your dishes and the environment!
By taking these steps, I’ve noticed my dishwasher runs better and lasts longer. It’s amazing how a little care can go a long way.
Inspect and Replace Door Seals to Prevent Leaks
Have you ever noticed water pooling around your dishwasher or dishes not coming out as clean as they should? I’ve been there, and it’s frustrating! One of the sneaky culprits could be the door seals. These seals are like the unsung heroes of your dishwasher. They keep water inside where it belongs. If they’re worn out or damaged, leaks can happen, and your dishwasher won’t perform as well.
Here’s how I inspect and replace door seals:
- Check for visible damage: I start by running my fingers along the seals to feel for cracks, tears, or any sticky residue. If I see or feel anything unusual, it’s time to take action.
- Test for leaks: I run a quick cycle and keep an eye on the edges of the door. If I spot water seeping out, that’s a clear sign the seals need attention.
- Replace the seals: Replacing them is easier than it sounds. I order the right seals for my dishwasher model, remove the old ones, and press the new ones into place. Most seals just snap in, so no tools are needed.
Pro Tip: Clean the seals regularly with a damp cloth to remove dirt and grime. This simple habit can extend their life and prevent leaks.
Inspecting and replacing door seals might seem like a small task, but it makes a big difference. It keeps your dishwasher running smoothly and saves you from dealing with messy leaks.
Run a Cleaning Cycle Monthly to Remove Mineral Deposits
If you live in an area with hard water like I do, you’ve probably noticed white spots or a chalky buildup inside your dishwasher. That’s caused by mineral deposits, and trust me, they can wreak havoc on your machine over time. Running a cleaning cycle once a month is a game-changer. It keeps your dishwasher sparkling clean and working like new.
Here’s my monthly cleaning routine:
- Empty the dishwasher: I make sure there are no dishes inside before starting the cleaning cycle.
- Use a dishwasher cleaner or vinegar: I either use a store-bought dishwasher cleaner or place a cup of white vinegar on the top rack. Vinegar is a natural and affordable option that works wonders.
- Run a hot water cycle: I select the hottest water setting and let the dishwasher do its thing. The heat helps dissolve the mineral deposits, while the cleaner or vinegar tackles grime and odors.
Note: Avoid using bleach if your dishwasher has stainless steel parts. It can cause damage and discoloration.
After the cycle, I wipe down the interior with a soft cloth to remove any remaining residue. This simple monthly habit keeps my dishwasher in top shape and ensures my dishes come out spotless every time.
By taking these steps, I’ve learned how to maintain kitchen appliances effectively. It’s all about consistency and a little bit of effort. Why not give it a try and see the difference for yourself?
How to Maintain Your Microwave
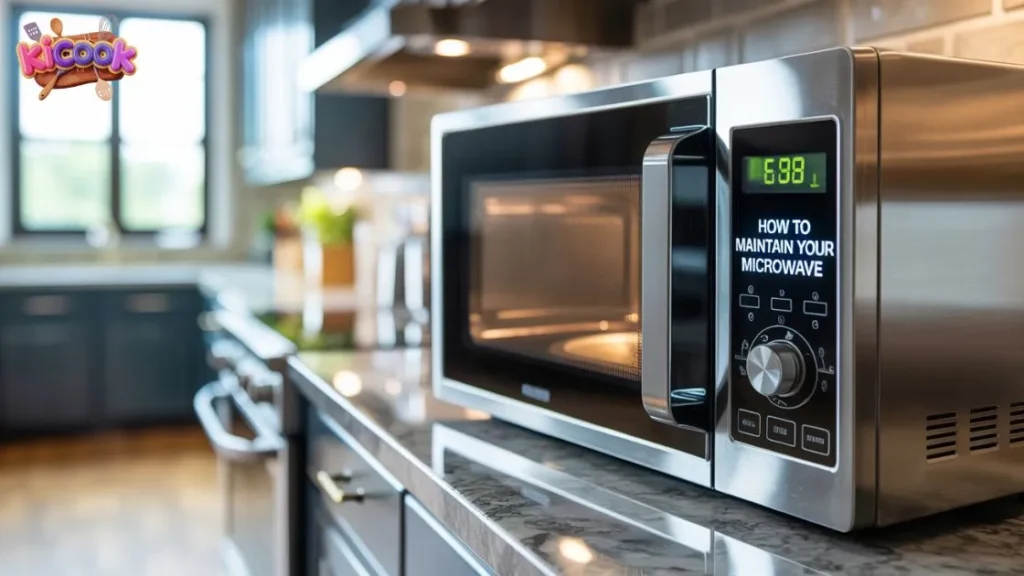
Wipe the Inside After Each Use
Cleaning your microwave after using it is super simple. I always wipe it down right away. This stops stains from getting stuck and hard to clean later.
Here’s what I do:
- Use a damp cloth to clean food splatters.
- For tough spots, heat water with lemon for one minute. The steam softens dirt, and the lemon smells nice.
Tip: Check the door seals often. Food stuck there can cause leaks and make the microwave unsafe.
Cleaning regularly isn’t just about looks. It helps the microwave work safely and better. Experts say clean seals stop leaks and keep the microwave safe. A small effort makes a big difference.
Wash the Turntable and Other Parts
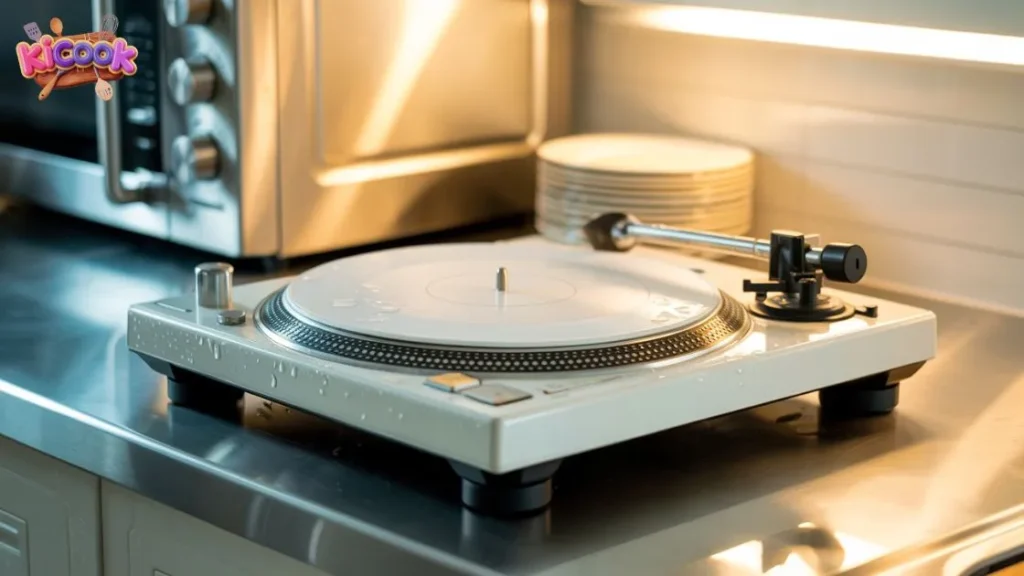
The turntable spins food to cook it evenly. If it’s dirty, it won’t work well. I clean mine often to keep it in good shape.
Here’s how I do it:
- Take out the turntable and wash it with soap and warm water.
- Rinse it well and let it dry completely.
- Don’t forget to clean under the turntable too.
Pro Tip: If your microwave has racks or other parts, clean them as well. Taking care of these keeps your microwave working great.
A clean turntable helps food cook evenly and looks better. It’s a small task that makes a big difference.
Don’t Overheat or Overload
Microwaves are strong but can break if not used carefully. Overheating or stuffing too much inside can harm it.
Here’s how I avoid problems:
- Never run the microwave empty. It can overheat the part that heats food.
- Use containers safe for microwaves. Don’t use metal or foil.
- Don’t put too much food inside. It blocks airflow and cooks unevenly.
Note: Experts say keeping door seals and hinges in good shape is important. Overloading can damage these parts and cause safety problems.
By following these tips, my microwave has worked well for years. Treating it carefully helps it last longer. Why not try these steps today?
Check and Replace the Charcoal Filter
Did you know your microwave might have a charcoal filter? I didn’t at first! If your microwave has a venting system, this filter helps trap grease, odors, and smoke. Over time, it gets clogged and stops working effectively. Replacing it is easier than you think.
Here’s how I handle it:
- Locate the filter: I check my microwave manual to find where the charcoal filter is. It’s usually behind the vent grille.
- Remove the old filter: I unscrew or pop off the vent grille, then slide out the old filter.
- Install the new one: I buy a replacement filter that matches my microwave model. Then, I slide it in and secure the grille back in place.
Pro Tip: Replace the charcoal filter every six months or sooner if you cook a lot. A clogged filter can reduce airflow and make your microwave less efficient.
I’ve noticed a big difference since I started replacing mine regularly. The kitchen smells fresher, and the microwave vents better. It’s a small task that keeps everything running smoothly.
Inspect the Door and Seals for Safety
The microwave door and seals are more important than they seem. They keep the radiation inside, making the microwave safe to use. If they’re damaged, it’s not just a performance issue—it’s a safety risk.
Here’s what I do to check them:
- Inspect the door: I look for cracks, dents, or anything that might stop it from closing properly.
- Check the seals: I run my fingers along the rubber seals to feel for wear or food buildup.
- Test the closure: I close the door gently and see if it latches securely.
If I notice any damage, I stop using the microwave until it’s fixed. Replacing seals or repairing the door might sound like a hassle, but safety comes first.
Note: Never use a microwave with a damaged door or seals. It’s not worth the risk.
By keeping an eye on these parts, I feel confident using my microwave every day. It’s a quick check that gives me peace of mind. Why not take a moment to inspect yours today?
General Tips on How to Maintain Kitchen Appliances
Unplug Appliances When Not in Use
I make sure to unplug small appliances after using them. This simple habit saves energy and lowers the risk of fires.
Here’s what I do:
- Turn off the appliance and unplug it right away.
- Check cords for damage before plugging them back in.
Tip: Big appliances like refrigerators can’t be unplugged often. Use surge protectors to guard them during power surges.
Unplugging appliances is easy and keeps my kitchen safe.
Check for Unusual Noises or Smells
Strange noises or smells from appliances can mean trouble. Ignoring them might lead to bigger problems later.
Here’s how I handle it:
- Stop using the appliance if it makes loud noises. Look for loose parts or stuck items.
- Check for burnt wires or overheating if there’s a bad smell. Call a professional if needed.
Pro Tip: Cleaning and regular care can stop many issues before they start.
Listening for warning signs helps me avoid costly repairs.
Follow Manufacturer Guidelines for Maintenance
Every appliance has its own care instructions. Reading the manual helps me know how to clean and maintain them properly.
Here’s what I do:
- Keep all appliance manuals together for quick access.
- Read the maintenance section for tips.
- Search online for lost manuals using the model number.
Note: Following the manual keeps appliances working well and protects the warranty.
Using the manufacturer’s advice has saved me time and trouble.
Schedule Professional Maintenance When Needed
Sometimes, no matter how much care I give my kitchen appliances, they still need a professional touch. I’ve learned that scheduling professional maintenance can save me from bigger problems down the road. It’s like taking my car for a tune-up—it keeps everything running smoothly.
Here’s when I call in the pros:
- Strange noises or smells: If my fridge hums louder than usual or my oven smells odd, I don’t ignore it.
- Performance issues: When my dishwasher leaves dishes dirty or my microwave heats unevenly, I know it’s time for expert help.
- Annual check-ups: Once a year, I have a technician inspect my major appliances. They catch issues I might miss.
Tip: Always hire certified technicians. They know how to handle specific brands and models, ensuring the job gets done right.
Professional maintenance might seem like an extra expense, but it’s worth it. It prevents costly repairs and extends the life of my appliances. Plus, it gives me peace of mind knowing everything is in top shape.
Wipe Down Exteriors with Vinegar and Water to Remove Grease
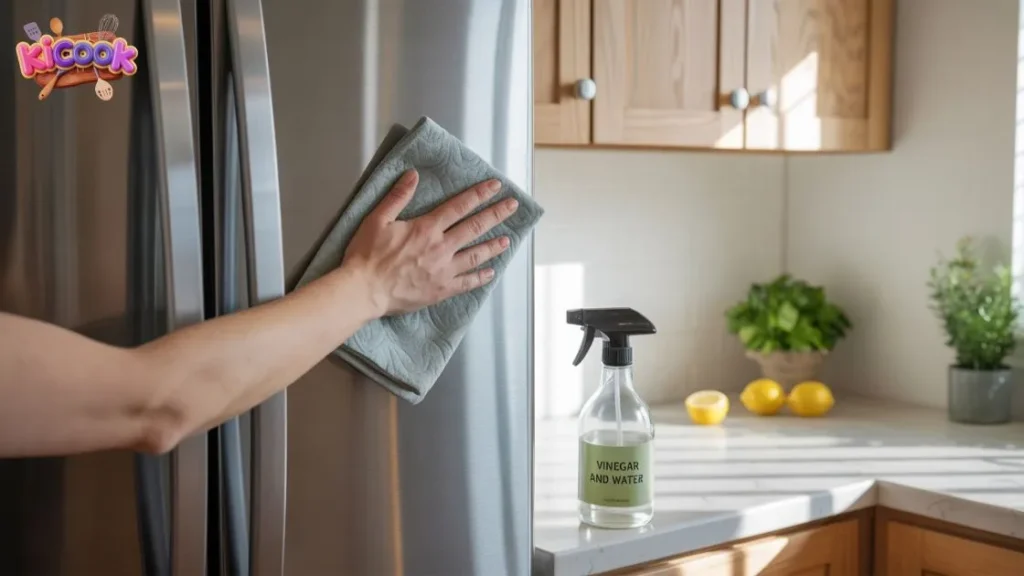
Grease loves to stick to kitchen appliances, especially after cooking. I’ve found that a simple mix of vinegar and water works wonders for cleaning exteriors. It’s natural, safe, and super effective.
Here’s my quick cleaning routine:
- I mix equal parts vinegar and water in a spray bottle.
- Then, I spray it on the greasy spots and let it sit for a minute.
- I wipe it off with a soft cloth, and voilà—good as new!
Pro Tip: For stainless steel appliances, I wipe in the direction of the grain to avoid streaks.
This method doesn’t just clean; it also leaves my kitchen smelling fresh. Plus, it’s budget-friendly and chemical-free. Keeping exteriors clean not only makes my appliances look great but also prevents grease from building up and causing damage.
By following these steps and knowing how to maintain kitchen appliances, I’ve kept my kitchen running smoothly and looking spotless.
Taking care of your kitchen appliances helps them work better and last longer. Easy tasks like cleaning, checking seals, and reading the manual can save you money and trouble. Did you know fixing broken appliances costs up to 10 times more than regular care? Look at this table:
| Fact | Why It Matters |
|---|---|
| High Repair Costs | Fixing broken appliances costs 10 times more than upkeep. |
| Preventive Care Saves Money | Spending $1 on care saves $5 in future repairs. |
Why not start today? Use these tips to keep your kitchen running smoothly. Taking care of appliances is simpler than you think!
FAQs For How To Maintain Kitchen Appliances?
How often should I clean my refrigerator coils?
I clean mine twice a year. Dust and dirt build up quickly, making the fridge work harder. A quick vacuum or brush does the trick. It’s an easy way to save energy and keep your fridge running smoothly.
Tip: Mark it on your calendar so you don’t forget!
Can I use regular dish soap in my dishwasher?
Nope, I wouldn’t recommend it. Regular dish soap creates too many suds, which can overflow and damage the machine. Stick to dishwasher-specific detergents. They’re designed to clean effectively without causing harm.
Pro Tip: Check your manual for the best detergent type for your model.
What’s the best way to clean a microwave?
I use a bowl of water with lemon slices. Heat it for a minute or two. The steam loosens grime, and the lemon leaves a fresh scent. Then, I wipe everything down with a damp cloth. It’s quick and chemical-free!
How do I know if my oven seals need replacing?
I do the hand test. When the oven’s on, I run my hand along the door edges. If I feel heat escaping, the seals are worn out. Replacing them is simple and keeps the oven efficient.
Note: Worn seals waste energy and mess up cooking temperatures.
Should I unplug appliances when I’m not using them?
For small appliances, yes! Unplugging saves energy and reduces fire risks. For larger ones like fridges, I use surge protectors instead. It’s a small habit that makes a big difference in safety and energy savings.
Emoji Reminder: 🔌 Unplug to protect your appliances and your wallet!
Conclusion
Maintaining kitchen appliances doesn’t take much effort, but it makes a huge difference. By following these simple steps, you’ll keep your appliances running smoothly, save money, and avoid unexpected breakdowns.
“The secret to a long-lasting kitchen is not just buying quality appliances—it’s taking care of them.” – Home Expert Sarah Lee
Start today, and your future self (and wallet) will thank you!