Quick Answer: If your Philips espresso machine has no coffee coming out, check the water tank, AquaClean filter, and water system first. Trapped air, a blocked brew group, a clogged coffee spout, or limescale buildup can stop normal brewing. Start with the simple checks, clean accessible parts, and follow the troubleshooting steps for your exact Philips model.
Have you selected your favorite coffee and pressed the brewing button, but nothing comes out of your Philips espresso machine? Perhaps you can hear the pump running, the grinder is working, or the machine starts its usual brewing process. But your cup remains empty.
This problem can be frustrating, especially when the machine was working perfectly before.
The good news is that a Philips espresso machine that stops dispensing coffee does not always need professional repair. Sometimes, trapped air, a poorly fitted water filter, or coffee residue inside the brewing system is responsible.
Other times, the problem may come from limescale, an incorrect coffee setting, or a blocked coffee outlet.
In this guide, you will learn how to identify the cause and fix the problem safely. The instructions cover common Philips fully automatic machines, including the 1200, 2200, 3200, 4300, and 5400 Series. There is also a separate section for Philips Barista Brew models because their brewing systems work differently.
Why Is Your Philips Espresso Machine Not Dispensing Coffee?
Several things can prevent a Philips espresso machine from making coffee.
The most common causes include:
- Trapped air inside the water system.
- An incorrectly installed or clogged AquaClean filter.
- A dirty or blocked brew group.
- A clogged coffee dispensing spout.
- Coffee powder blocking the pre-ground coffee compartment.
- Limescale buildup inside the machine.
- An incorrect grinder setting or insufficient coffee beans.
- An error caused by a missing or incorrectly fitted component.
Before trying every fix, pay attention to what your machine is doing.
For example, if the machine makes a loud noise but produces no water, trapped air or a water-flow restriction may be responsible. If hot water comes out normally but coffee does not, the problem may be somewhere in the coffee brewing path.
This small difference can help you avoid unnecessary cleaning and maintenance.
First, Identify Your Philips Espresso Machine Problem
Your machine’s symptoms can provide useful clues about the cause.
| What You Notice | Possible Cause | What to Check First |
|---|---|---|
| No coffee comes out at all | Air or water-flow problem | Water tank and filter |
| Machine makes noise but no coffee | Trapped air or restricted water flow | Water system |
| Only a few drops come out | Partial blockage or incorrect grind | Coffee outlet and grinder |
| Hot water works but coffee does not | Blocked coffee pathway | Brew group and coffee spout |
| Grinder works but no coffee is made | Blocked coffee chute or brewing problem | Pre-ground coffee compartment |
| Coffee grounds are discarded | Overfilled brew group or insufficient beans | Coffee dose and bean hopper |
| Warning lights keep flashing | Missing part, blockage, or system error | Display indicators and removable parts |
These are possible causes, not guaranteed diagnoses. Your Philips model may have different indicators and troubleshooting procedures.
9 Fixes for a Philips Espresso Machine With No Coffee Coming Out
Try the following fixes in order. Start with the water supply before moving to the internal brewing components.
Fix 1: Check the Water Tank and Make Sure It Is Properly Installed
This is one of the easiest problems to overlook.
Your Philips espresso machine needs a proper water supply to prepare coffee. If the tank is empty, incorrectly positioned, or not fully inserted, the machine may struggle to draw water.
Sometimes, the pump makes noise, but little or no water reaches the brewing system.
Here is what you should do:
- Turn off the espresso machine.
- Remove the water tank if your model has a removable one.
- Check whether it contains enough clean water.
- Look for visible dirt around the tank connection.
- Refill the tank without going above the maximum level.
- Reinstall it carefully.
- Make sure it sits firmly in the correct position.
After checking the tank, switch on the machine and see whether the water system works normally.
If your model has a hot-water function, check whether it can dispense hot water.
What if hot water also fails to come out?
This may indicate trapped air, a filter problem, or a restricted water supply. Move to the next fix rather than repeatedly pressing the coffee button.
Fix 2: Remove Trapped Air From the Philips Espresso Machine
Trapped air is a common reason why a Philips espresso machine makes a loud noise but does not produce coffee.
Air can enter the water system when:
- The water tank becomes completely empty.
- You install a new water filter.
- The machine has not been used for a long time.
- The AquaClean filter has not been prepared correctly.
- The water tank has not been installed properly.
When air gets inside the water circuit, the pump may struggle to move water through the machine.
How to remove trapped air:
For compatible Philips fully automatic models, Philips recommends the following troubleshooting method:
- Switch off your espresso machine.
- Empty the water tank.
- Remove the AquaClean filter or another removable water filter.
- Fill the water tank with fresh water.
- Reinstall the tank without the filter.
- Switch on the machine.
- Wait until the machine is ready.
- Place a suitable container under the hot-water outlet.
- Select the hot-water function and dispense 2–3 cups of water, following your model’s instructions.
Once water flows normally, check whether the machine can prepare coffee again.
Important: Hot water may be released during this procedure. Keep your hands away from the outlet and use a suitable container.
Philips explains this procedure in its official guide, There Is No Coffee Coming Out of My Philips Espresso Machine.
If the pump remains unusually loud and no water comes out, stop repeated attempts and contact Philips support.
Fix 3: Check and Prepare the AquaClean Water Filter
Do you use an AquaClean filter in your Philips espresso machine?
A poorly prepared or clogged filter can restrict water flow. This may prevent the machine from dispensing coffee normally.
AquaClean filters need to be prepared correctly before installation. Otherwise, air bubbles inside the filter may enter the water circuit.
How to prepare an AquaClean filter:
- Remove the filter from the water tank.
- Shake it gently for approximately five seconds.
- Hold it upside down inside a container filled with water.
- Keep it submerged until air bubbles stop coming out.
- Place it back into the water tank.
- Fill the tank with fresh water.
- Reinstall the tank correctly.
- Follow the filter activation or installation instructions shown by your machine.
If you have been using the same filter for a long time, check its replacement instructions. Philips warns that an AquaClean filter used for more than three months may become clogged in its troubleshooting guidance. However, always follow the filter indicator and instructions for your particular model.
A useful test: If the machine starts working after you remove the filter and restore water flow, the filter or its installation may be responsible.
Do not continue using the machine without a required filter if your model’s instructions say one must be installed.
Fix 4: Clean, Lubricate, and Reinstall the Brew Group
The brew group is one of the most important parts of a fully automatic Philips espresso machine.
It moves and presses the ground coffee during brewing. Over time, coffee residue and oils can collect around its moving parts.
A dirty or blocked brew group may prevent the machine from preparing coffee correctly.
How to clean the brew group:
- Switch off the espresso machine.
- Wait approximately 15–20 seconds, or until the machine has completely stopped operating.
- Open the service door.
- Remove the water tank if required for access.
- Find the brew group and follow the release instructions for your model.
- Remove it carefully. Do not force it.
- Rinse the removable brew group thoroughly under lukewarm running water.
- Clean away visible coffee residue.
- Allow the brew group to air-dry.
- Reinstall it and make sure it locks into the correct position.
Do not use dish soap or other cleaning chemicals on the brew group unless your model’s instructions specifically allow them.
Does your brew group need lubrication?
Some Philips machines require regular brew group lubrication to keep their moving parts working smoothly.
Use only the lubricant recommended for your machine. Follow the owner’s manual for the correct lubrication points and maintenance schedule.
Do not apply lubricant to random parts of the brewing system.
If the brew group does not fit back into position, stop and check the machine’s instructions. Forcing it can damage the mechanism.
Fix 5: Clean the Blocked Coffee Dispensing Spout
Sometimes the machine prepares coffee internally, but the coffee cannot flow through the dispensing outlet.
This may happen because dried coffee residue and oils collect around the dispensing spout.
You may notice:
- Coffee coming out slowly.
- Coffee flowing from only one side of a dual outlet.
- A few drops appearing instead of a normal stream.
- The machine completing its cycle without delivering the expected amount.
How to clean the coffee dispensing spout:
- Turn off the machine and allow hot parts to cool.
- Check the visible coffee outlet for dried residue.
- Use the cleaning brush or tool recommended for your model.
- Clean the accessible openings gently.
- Remove loosened coffee residue.
- Wipe the surrounding area with a clean, damp cloth.
- Let the area dry before testing the machine.
Some Philips instructions allow a pipe cleaner or needle for specific dispensing outlets. Use a pointed tool only when your model’s manual specifically permits it.
Never force a sharp metal object deep inside the machine.
Once the spout is clean, try preparing a small coffee and check whether the flow has improved.
Fix 6: Unclog the Pre-Ground Coffee Compartment
Does your Philips espresso machine grind coffee beans but fail to produce a cup?
Or does it discard ground coffee into the waste container without brewing?
A blocked pre-ground coffee compartment may be the reason.
Coffee powder can collect inside the compartment and form a blockage. When this happens, the brewing system may not receive the coffee properly.
Using too much pre-ground coffee can also overfill the brew group and cause the brewing process to be cancelled.
How to clean the pre-ground coffee compartment:
- Switch off the machine.
- Wait until it has completely stopped operating.
- Open the service door.
- Remove the brew group according to your model’s instructions.
- Open the pre-ground coffee compartment lid.
- If your manual permits this method, insert the handle of a spoon into the compartment.
- Move it gently up and down to loosen the blocked coffee powder.
- Remove any loose residue you can safely reach.
- Reinstall the brew group correctly.
- Close the service door and test the machine.
Do not pour water into the coffee compartment.
Are you using the pre-ground coffee function?
Make sure the machine is switched on and ready before adding coffee powder.
Philips instructs users of compatible fully automatic machines to use one level scoop with the supplied spoon. Adding more than the recommended amount can overfill the brew group and cause the machine to discard the coffee without brewing.
For further instructions, see Philips Support’s guide to a machine that discards coffee powder without brewing.
Fix 7: Check the Coffee Beans, Grinder, and Coffee Settings
Your Philips espresso machine may have enough water but still fail to prepare coffee because of a problem with the coffee supply.
This is especially worth checking when the grinder operates but no finished coffee reaches your cup.
Start with the simple checks.
1. Check the coffee beans
Make sure the bean hopper contains enough coffee beans.
If the beans run out during preparation, some fully automatic Philips machines may cancel brewing and discard the ground coffee.
2. Check the bean hopper lid
Make sure the hopper lid is fitted correctly.
Also, look for visible debris or foreign objects around the bean supply area.
3. Check the grinder setting
If the grind is too fine, water may struggle to pass through the coffee during brewing.
On compatible fully automatic Philips machines, try a slightly coarser grind setting if your manual recommends it.
Make small adjustments rather than changing several settings at once. Follow the grinder adjustment instructions for your model.
4. Check the coffee strength and dose
If the machine has different coffee strength settings, choose a normal setting for testing.
Avoid assuming that a higher strength setting will solve a water-flow problem.
For a more useful test, prepare one small coffee after checking the beans and grinder.
If the grinder makes unusual noises, stops unexpectedly, or appears jammed, do not reach into it. Follow the cleaning instructions or contact Philips support.
Fix 8: Descale Your Philips Espresso Machine
Limescale is another possible reason why a Philips espresso machine stops dispensing coffee.
It forms when minerals in water collect inside the machine over time.
As deposits build up, they can restrict the internal water pathways. This may cause slow brewing, irregular water flow, or other performance problems.
Look for these signs:
- The machine displays a descaling warning.
- Coffee comes out more slowly than before.
- The hot-water function has reduced flow.
- The machine struggles to complete brewing.
- Normal water flow does not return after cleaning accessible parts.
How to descale your Philips espresso machine:
- Check your exact model’s descaling instructions.
- Make sure you have the recommended Philips descaling product.
- Prepare the machine as instructed.
- Start the correct descaling programme.
- Follow the machine’s displayed instructions.
- Complete the required fresh-water rinsing steps.
- Check whether the descale indicator has cleared.
The exact process can differ between Philips models.
Do not interrupt the programme unless the instructions tell you to do so. Avoid using vinegar or strong household cleaning mixtures unless Philips specifically approves them for your machine.
Also, do not repeat the full descaling process unnecessarily. First check whether the previous cycle was completed correctly.
If your machine is still experiencing slow water flow after descaling, our guide on Coffee Maker Still Slow After Descaling covers additional reasons that may affect water delivery.
Fix 9: Check Warning Lights, Drip Tray, and Brew Group Position
Philips espresso machines use warning lights and indicators to show when maintenance or attention is needed.
If your machine is not dispensing coffee, check the display before trying another brewing cycle.
Possible warnings include:
Water tank indicator
The tank may be empty or incorrectly positioned. Refill and reinstall it.
Coffee grounds container indicator
The grounds container may be full or incorrectly installed. Empty and refit it according to the model’s instructions.
General warning light
The drip tray, coffee grounds container, or another removable part may not be fitted correctly. Check the machine’s displayed message or manual.
Flashing brew group warning
The brew group may be missing, blocked, or incorrectly installed. Check its position and follow the cleaning procedure.
AquaClean indicator
The filter may require installation, replacement, or activation.
Calc/Clean indicator
The machine may need descaling.
Multiple flashing warning lights
This may indicate a system problem, overheating, or another fault. Check the manual for the specific light combination.
Do not assume that every flashing light means the same thing across all Philips models.
If the machine displays a persistent error after you have checked the removable components, contact Philips support before attempting an internal repair.
Special Troubleshooting for Philips Barista Brew Models
The Philips Barista Brew uses a portafilter and filter basket. Its troubleshooting steps are different from those of fully automatic machines such as the Philips 1200, 2200, and 3200 Series.
If you own a Philips Barista Brew and no coffee comes out, check the following.
Check Whether the Portafilter Basket Is Blocked
Coffee residue can build up inside the filter basket and restrict water flow.
Remove the portafilter after the machine is safe to handle.
Inspect the filter basket for visible coffee residue. Clean it according to the owner’s manual.
Philips recommends testing with another filter basket when you suspect a blockage. If the replacement basket works, clean the original one using the approved procedure.
Check the Coffee Grind Size
Coffee that is ground too finely can restrict water flow through the basket.
If the machine only produces a few drops or no coffee, the grind may be too fine.
For compatible Barista Brew models, Philips recommends making the grind coarser by adjusting the grinder toward a higher setting.
Change the setting gradually and test again.
Use the Correct Amount of Ground Coffee
Too much coffee in the filter basket can make it difficult for water to pass through.
For the Barista Brew models covered by Philips’ support instructions, the recommended starting amounts are:
| Basket Type | Recommended Coffee Amount |
|---|---|
| Single cup | 12–14 grams |
| Double cup | 18–20 grams |
These amounts apply to the relevant Barista Brew models covered by Philips’ guidance. Check your own basket and manual before using the same measurements on another espresso machine.
Clean the Portafilter Coffee Dispensing Spouts
Coffee residue may also block the portafilter’s dispensing outlets.
Remove the portafilter and clean the spouts with the cleaning tool supplied or recommended for your model.
Philips provides additional instructions in its official guide, My Philips Barista Brew Espresso Machine Is Not Making Coffee.
What If Your Philips Espresso Machine Still Does Not Make Coffee?
If you have checked the water tank, filter, brew group, coffee spout, and other accessible components but nothing works, the machine may have a deeper problem.
Possible causes include:
- A failing water pump.
- An internal water pathway blockage.
- A damaged valve or seal.
- A faulty brewing mechanism.
- An electrical or control system fault.
Pay attention to warning signs such as persistent pump noise, water leakage, repeated error messages, or unusual overheating.
Do not open the machine’s electrical housing or try to repair internal pressurized components yourself.
When should you contact Philips support?
Contact the manufacturer or an authorised repair service when:
- No water comes out from either the coffee outlet or hot-water outlet.
- The pump continues making an unusual noise.
- The machine displays an error that does not clear.
- Water leaks from inside the machine.
- The brew group cannot be installed correctly.
- The same problem returns after proper cleaning and maintenance.
Check your warranty before paying for a repair. Using an authorised service centre can also help protect your machine from unsuitable replacement parts or incorrect repairs.
How to Prevent Your Philips Espresso Machine From Getting Blocked
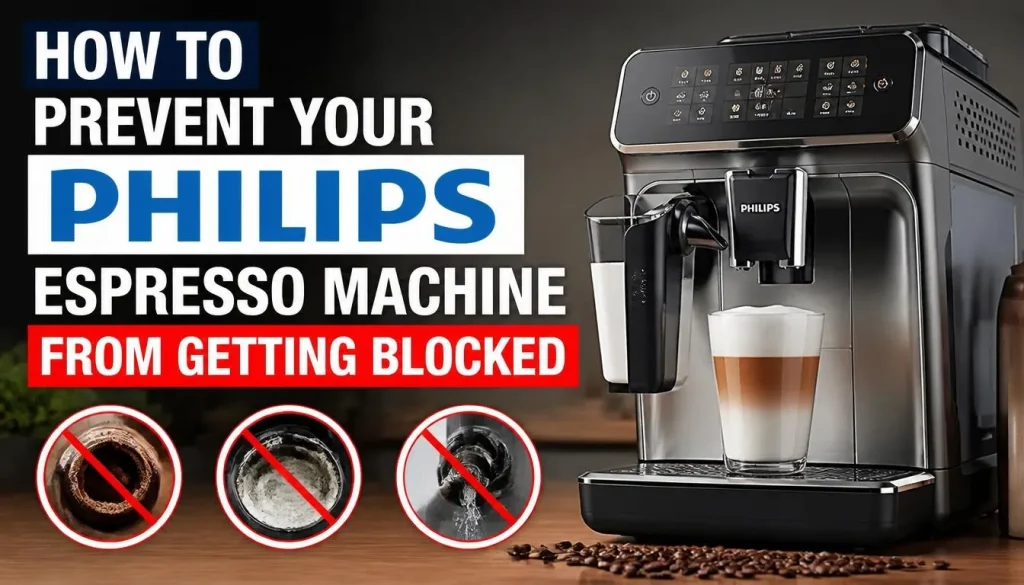
A little regular maintenance can help reduce the risk of water-flow and brewing problems.
Clean the Brew Group Regularly
If your Philips model has a removable brew group, rinse it according to the manufacturer’s recommended schedule.
Philips recommends regular cleaning to remove accumulated coffee residue.
Allow the brew group to air-dry before reinstalling it.
Maintain the AquaClean Filter
Prepare new filters correctly and replace them when the machine or filter instructions require it.
An incorrectly installed or clogged filter can affect water flow.
Descale When Required
Pay attention to the Calc/Clean indicator.
Use the correct descaling product and complete the required rinsing procedure.
The maintenance schedule may vary according to your machine, water hardness, and usage.
Use the Correct Coffee Beans and Grind Settings
Use suitable coffee beans and adjust the grinder carefully.
Avoid changing multiple settings at the same time. This makes it easier to identify what improves or affects brewing.
Keep the Coffee Dispensing Area Clean
Coffee residue and oils can collect around dispensing outlets.
Clean the accessible areas regularly using the tools and methods recommended for your model.
Remember that removing coffee oils and removing limescale are different cleaning tasks. Descaling alone does not replace regular cleaning.
Check the Machine Before Brewing
Make sure the water tank is filled, the coffee bean hopper has enough beans, and removable components are fitted correctly.
These simple checks can prevent avoidable interruptions during brewing.
Frequently Asked Questions About Philips Espresso Machine No Coffee Coming Out
1. Why Is My Philips Espresso Machine Running but Not Dispensing Coffee?
Your Philips espresso machine may run without dispensing coffee because of trapped air, a clogged AquaClean filter, a blocked brew group, or restricted water flow. Start by checking the reservoir and filter. Then test the hot-water function if your model has one.
2. Why Is My Philips Espresso Machine Only Dispensing a Few Drops?
A machine that produces only a few drops may have a water-flow restriction, a clogged coffee outlet, or an unsuitable grind setting. On a new machine, a small amount during the first few brewing cycles may be normal. If the problem continues, check the water system and follow your model’s troubleshooting instructions.
3. Why Does My Philips Coffee Machine Discard Coffee Grounds Without Brewing?
This can happen when the brew group is dirty, the pre-ground coffee compartment is blocked, or too much ground coffee has been added. Insufficient coffee beans can also cause some Philips fully automatic machines to cancel brewing. Check the bean hopper and clean the accessible brewing components.
4. Why Does My Philips Espresso Machine Grind Beans but Produce No Coffee?
The machine may grind beans but fail to brew because the coffee chute is blocked, the brew group is dirty, or a brewing error has occurred. Check the grounds container and pre-ground coffee compartment. Then inspect and clean the brew group if your model allows it.
5. Can a Clogged AquaClean Filter Stop Coffee From Coming Out?
Yes. An incorrectly installed or clogged AquaClean filter can restrict water flow. Remove and prepare the filter according to Philips’ instructions. If necessary, test water flow with the filter removed using the approved troubleshooting procedure for your model.
6. Why Does My Philips Machine Make Noise but No Water Comes Out?
Trapped air is one possible cause. A poorly fitted water tank, clogged filter, or internal water restriction may also affect water flow. Check the tank and follow the manufacturer’s priming procedure. Stop using the pump repeatedly if no water comes out.
7. How Do I Reset My Philips Espresso Machine When It Stops Brewing?
There is no single reset procedure for every Philips espresso machine. Some models may require a normal power restart, while others need a specific troubleshooting sequence. Check the error indicators and follow the instructions for your exact model rather than trying random button combinations.
8. Is It Normal for a New Philips Espresso Machine to Dispense Only a Few Drops?
Philips explains that a small amount of coffee during the first use can be normal. After preparing a few more cups, the expected coffee amount should become available. If the machine continues dispensing only a few drops, investigate the water supply and brewing system.
9. How Do I Know If My Philips Espresso Machine’s Brew Group Is Blocked?
A blocked brew group may cause brewing interruptions, discarded coffee grounds, unusual operating behaviour, or no coffee dispensing. If your model has a removable brew group, switch off the machine, wait until it stops operating, and clean the unit according to the owner’s manual.
Final Thoughts
A Philips espresso machine with no coffee coming out can have several possible problems. The issue may be as simple as an incorrectly installed water tank or as complicated as an internal pump or brewing system fault.
Start with the water supply and AquaClean filter. If that does not help, check for trapped air, clean the brew group, and inspect the coffee dispensing spout and pre-ground coffee compartment.
Also, remember that fully automatic Philips machines and Barista Brew models have different brewing systems. Always use the instructions that match your machine.
Do not open sealed components or continue running a pump when no water is flowing.
With the right troubleshooting steps and regular maintenance, you may be able to restore normal coffee dispensing without an unnecessary repair.

“I believe great cooking starts with the right tools, trusted advice, and a little confidence in the kitchen.”
Hi, I’m Emma Carter. My love for cooking began in my grandmother’s kitchen, where I learned that every great meal starts with simple ingredients and the right cookware. Over the years, I’ve spent countless hours researching, testing, and comparing kitchen appliances, cookware, coffee makers, air fryers, and other everyday kitchen essentials.
Here at KiCook, my goal is to make your buying decisions easier with honest product reviews, practical buying guides, and easy-to-follow cooking tips. Whether you’re upgrading your kitchen or searching for the best appliance for your home, I focus on providing clear, reliable, and research-backed information you can trust.
When I’m not testing new kitchen gadgets or writing in-depth guides, you’ll usually find me trying new recipes, visiting local farmers’ markets, or enjoying a quiet cup of coffee while planning my next kitchen project.