

Quick Answer: If your coffee maker smells moldy or musty, the cause may be stale water, old coffee grounds, oily residue, or damp parts where mold can grow. Empty the reservoir, clean the removable parts with warm, soapy water when the manufacturer allows it, and follow the correct cleaning instructions for the internal brewing system. If you find visible mold that you cannot remove safely, stop using the machine until the problem is resolved.
A fresh cup of coffee should smell rich and pleasant. So, when you open your coffee maker and notice a damp, earthy, or musty smell, something may be wrong.
The good news is that you may not need to replace your coffee maker. In many cases, leftover coffee, dirty removable parts, or stale water can explain the smell. However, mold can also develop in damp areas, especially when coffee grounds and other residue remain inside the machine.
In this guide, I’ll explain the common causes, show you how to clean your coffee maker safely, and help you decide what to do if the musty smell keeps coming back.
Why Does My Coffee Maker Smell Moldy or Musty?

A moldy smell does not always mean that your coffee maker contains mold. Several different problems can create a similar odor.
Here are the most common places to check.
1. Stale Water in the Reservoir
Water left sitting in the reservoir for a long time can develop an unpleasant, stale smell, particularly if the reservoir is dirty.
This problem is more likely if you use your coffee maker occasionally or leave water in it between brewing sessions.
What to check: Empty the reservoir and inspect its bottom, corners, lid, and other accessible areas. Look for visible residue, slime, or unusual discoloration.
2. Mold or Mildew in Damp Areas
Coffee makers contain several areas that can stay damp after brewing. If moisture remains trapped with coffee residue, mold may develop under the right conditions.
Possible areas include the reservoir lid, drip tray, reusable filter, and removable brewing components.
If your machine smells like a damp basement, inspect these areas before assuming the entire machine needs replacing.
3. Old Coffee Grounds and Coffee Oils
Coffee grounds and natural coffee oils can stick to the filter basket, carafe, and brewing components.
Over time, these leftovers may develop a stale or unpleasant smell. Wet grounds can also become difficult to remove if you leave them inside the machine.
If the odor is stronger around the basket or used coffee filter, start there.
4. A Dirty Reservoir Lid or Reusable Filter
The inside of a reservoir may look clean while residue remains underneath its lid. Reusable filters can also trap fine coffee particles in their mesh.
These areas are easy to overlook during ordinary cleaning.
Remove only the parts your manufacturer allows you to remove. Clean them according to the instructions and rinse them thoroughly.
5. Coffee Grounds Behind the Brew Unit
Some automatic and bean-to-cup coffee machines have a removable brew unit. Coffee grounds may collect behind it, where moisture and warmth can contribute to mold growth.
Miele specifically identifies accumulated coffee grounds behind the brew unit as a possible cause of unusual smells. Its official coffee-machine troubleshooting guide explains how to clean the brew unit in compatible machines.
Not every coffee maker has this component, so check your model before following those instructions.
How to Tell Where the Musty Smell Is Coming From
Before cleaning, take a moment to identify where the smell seems strongest. This can help you avoid unnecessary work.
| What you notice | Possible cause | What to check first |
|---|---|---|
| Musty smell when opening the lid | Stale water or residue | Reservoir and lid |
| Bad smell around the filter basket | Old grounds or coffee oils | Basket and reusable filter |
| Sour, stale smell from the carafe | Leftover coffee | Carafe, lid, and spout |
| Smell after long storage | Stale water or damp residue | Reservoir and removable parts |
| Smell from an automatic coffee machine | Residue in the brew unit | Removable brew unit, if fitted |
| Cleaning-product smell after descaling | Incomplete rinsing | Follow the manufacturer’s rinse instructions |
These clues are not a guaranteed diagnosis. If the odor comes from an inaccessible area, you may need help from the manufacturer.
Is It Safe to Drink Coffee From a Moldy-Smelling Coffee Maker?
It is best to stop brewing coffee until you have identified and addressed an unexplained musty smell.
A bad smell alone cannot confirm that mold is present. However, if you can see mold, slime, or unusual growth inside the reservoir or on another part that touches water or coffee, do not use the machine until that contamination has been dealt with safely.
Wash removable parts according to the manufacturer’s instructions. If you cannot clean a contaminated area completely, or you suspect growth inside a sealed component, contact the manufacturer before using the machine again.
Do not assume that running hot water through the coffee maker will solve the problem. A normal brewing cycle may not remove residue from every part.
How to Fix a Coffee Maker That Smells Moldy or Musty: 7 Easy Fixes

Follow these steps in order. The exact procedure will depend on whether you own a drip coffee maker, a Keurig, an espresso machine, or another type.
Fix 1: Empty the Water Reservoir
Start with the simplest step.
- Switch off the coffee maker.
- Unplug it before cleaning if the manufacturer’s instructions call for it.
- Let hot parts cool completely.
- Empty the reservoir and discard any leftover water.
- Inspect the inside and underside of the lid for visible residue.
If your machine has a removable water filter, check the manual to see whether it must be removed before cleaning the reservoir.
Do not pour cleaning products into the reservoir at this stage. First, identify the source of the smell and determine which cleaning method your model supports.
Fix 2: Wash the Removable Parts
Remove the parts your manual identifies as washable. These may include the carafe, lid, filter basket, reusable filter, and drip tray.
For suitable parts, use warm water and mild dish soap. A soft sponge or non-abrasive cloth can help remove coffee oils and stuck-on residue.
Pay attention to corners, grooves, and the underside of lids. Rinse every part thoroughly.
Before using a dishwasher, check whether the individual parts are dishwasher-safe. Some coffee maker reservoirs and lids must be washed by hand.
For Keurig machines, follow the official Keurig cleaning instructions. The instructions cover components such as the water reservoir, reservoir lid, and drip tray, with important differences between parts and models.
Fix 3: Clean the Reservoir and Lid Carefully
A reservoir can hold residue in places that are difficult to see from above.
If the reservoir is removable, clean it using the method approved by your manufacturer. Use a soft, non-abrasive cloth where recommended, and rinse thoroughly.
Do not use a hard brush that could scratch the surface. Avoid forcing tools into small openings or attempting to dismantle the reservoir.
If the reservoir has visible mold that you cannot remove completely, consider replacing the affected part or contacting the manufacturer.
The general US EPA guidance on basic mold cleanup recommends cleaning suitable hard surfaces with detergent and water and drying them completely. For coffee makers, apply that principle only where the manufacturer permits it.
Fix 4: Remove Old Coffee Grounds and Hidden Residue
A coffee maker can smell bad even when the reservoir is clean.
Inspect the filter basket, reusable filter, carafe spout, and accessible brewing areas for old grounds or coffee oils.
If you own a bean-to-cup machine, check whether it has a removable brew unit. If the manufacturer allows removal, clean it using the exact procedure provided for your model.
Some machines require a special cleaning tablet to remove coffee oils. Others need their brew units washed by hand with water.
Do not use dish soap on a brew unit if the manufacturer specifically advises against it. Do not open sealed electrical or mechanical compartments to search for mold.
Fix 5: Clean the Internal Brewing System Correctly
Cleaning the removable parts may not be enough if residue remains inside the brewing system.
Check your owner’s manual for the correct internal cleaning procedure. Depending on the machine, you may need an approved cleaning tablet, a dedicated cleaning cycle, or another manufacturer-recommended method.
Remember that ordinary cleaning and descaling have different purposes.
- Cleaning removes coffee grounds, oils, and everyday residue.
- Descaling removes mineral deposits that collect inside the water system.
A descaling cycle does not automatically remove every trace of old coffee or mold.
If you need help understanding the difference or planning routine maintenance, read our guide on how often to clean your coffee maker.
Fix 6: Rinse the Machine With Fresh Water
If you used an approved cleaner or descaling solution, complete the rinse procedure in the manual.
Some machines require more than one fresh-water cycle. Others have a dedicated rinse setting.
Do not guess how many cycles are necessary. Follow the instructions for your exact model.
If the machine still smells strongly of cleaning solution after the recommended rinse, do not brew coffee for drinking yet. Check the instructions again or contact the manufacturer.
Never mix vinegar, bleach, descaling solutions, or other cleaning products. Mixing cleaners can create dangerous reactions.
Fix 7: Let the Parts Dry Completely
Drying matters just as much as cleaning.
After washing, allow removable parts to dry as directed by the manufacturer. Keep the reservoir and lid free from trapped moisture when the machine is not in use.
Do not automatically close a wet reservoir or store damp removable parts in a sealed space.
Never use a hair dryer, heater, or another improvised heat source to speed up drying. Excessive heat can damage some plastic components.
Once the machine has been cleaned, rinsed, and reassembled correctly, follow the manufacturer’s instructions for returning it to service.
Why Does My Coffee Maker Still Smell Bad After Cleaning?
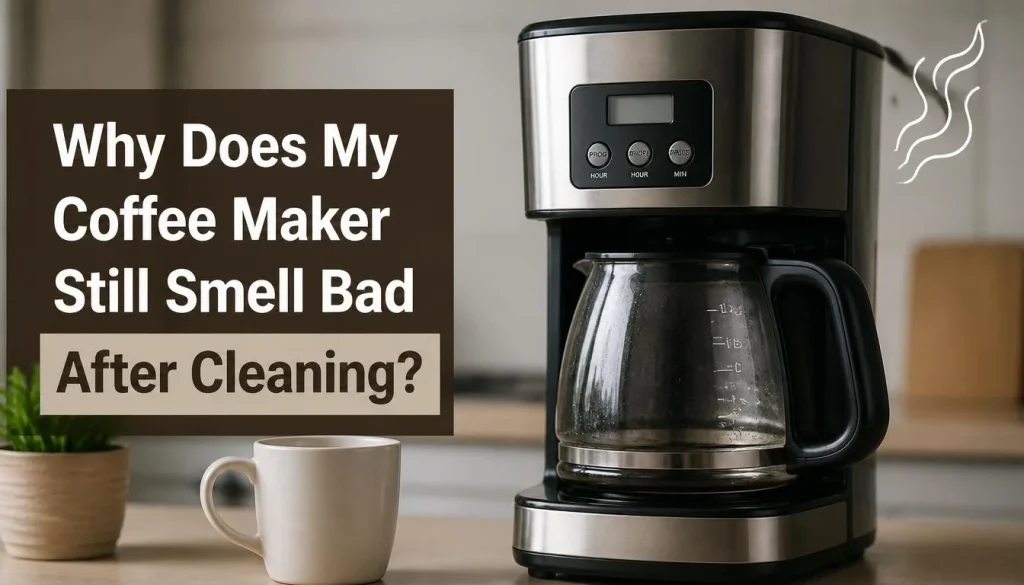
If your coffee maker smells musty even after cleaning, do not repeat the same procedure endlessly. Check whether you missed a possible source.
Inspect Areas You May Have Missed
Check the underside of the reservoir lid, the reusable filter, the drip tray, and the carafe spout.
For a bean-to-cup machine, inspect the removable brew unit if your model has one.
Clean each accessible area according to the manufacturer’s instructions.
Check for Leftover Cleaning Solution
If the smell started after descaling, it might come from the cleaning product rather than mold.
Read the product instructions and perform the required rinse cycles. Avoid adding another cleaner to mask the smell.
Our guide on how often to descale a coffee maker explains why descaling should follow the requirements of your machine rather than a one-size-fits-all schedule.
Stop If the Smell Appears to Come From Inside the Machine
A persistent odor may point to residue in an area you cannot safely reach. Visible mold in a sealed or inaccessible component also needs careful attention.
Contact the manufacturer or an authorized repair service. If the machine has electrical damage, an electrical burning smell, smoke, or leaking water near electrical components, stop using it.
Why Does My Coffee Maker Smell Musty After Sitting Unused?
If you have not used your coffee maker for weeks or months, check it before brewing your next cup.
Water may have remained in the reservoir, and damp grounds or residue may have been left inside. These conditions can contribute to unpleasant odors.
To prepare the machine for use:
- Empty the reservoir and discard old coffee.
- Inspect the reservoir, lid, carafe, basket, and other removable parts.
- Clean those parts according to the manual.
- Check accessible brewing areas for residue.
- Follow the manufacturer’s recommended rinse or restart procedure.
If you find visible mold or the smell remains after proper cleaning, do not use the machine until you have resolved the problem.
Does Descaling Remove Mold From a Coffee Maker?
No. Descaling and mold cleanup are not the same task.
Descaling targets mineral deposits, such as limescale, inside the water system. Mold and ordinary coffee residue may require different cleaning methods.
If your machine smells moldy, begin by checking and cleaning the accessible parts that may contain stale water or coffee residue. Descale only when needed and use the product recommended for your model.
If mold is visible in an inaccessible area, a descaling cycle alone is not a reliable solution. Contact the manufacturer for advice.
How to Prevent Your Coffee Maker From Smelling Moldy Again

Once the smell is gone, a few simple habits can help prevent it from returning.
Empty Leftover Coffee and Grounds
Do not leave used grounds or old coffee in the machine for long periods. Empty the basket and discard used filters after brewing.
Use Fresh Water
Avoid keeping the same water in the reservoir for extended periods. Empty and refresh it according to your machine’s instructions, especially if you use the coffee maker infrequently.
Clean Coffee-Contact Parts Regularly
Wash the carafe, basket, reusable filter, and other removable parts according to the recommended schedule.
For a practical routine, follow our coffee maker cleaning schedule.
Let Removable Parts Dry
Follow the manufacturer’s instructions for drying and storing the reservoir and other washable components. Do not trap moisture inside removable parts.
Clean the Brew Unit if Your Machine Has One
Some bean-to-cup machines collect damp coffee grounds behind their brew units. Check the manual for the correct cleaning frequency and method.
Follow the Correct Descaling Schedule
Do not confuse descaling with regular cleaning. Use the recommended descaling product and maintenance schedule for your machine.
If you notice unusual sounds or restricted water flow as well as a bad smell, our guide to coffee maker gurgling or sputtering may help you investigate the other symptoms.
When Should You Replace or Service Your Coffee Maker?
Cleaning is often enough when the smell comes from accessible parts and the manufacturer’s instructions allow those parts to be cleaned.
However, professional help may be necessary if:
- Mold or contamination appears in an inaccessible area.
- The smell remains after correct cleaning and rinsing.
- A reservoir or other part is cracked or damaged.
- Unusual debris continues to appear in the coffee.
- The machine develops an electrical burning smell, smoke, or a leak near electrical components.
Do not replace a working machine just because it smells bad once. First, identify the cause. But do not keep using a machine that you cannot clean safely.
Frequently Asked Questions
Why Does My Coffee Maker Smell Like Mold?
Possible causes include stale water, old coffee grounds, coffee oil buildup, damp removable parts, or mold growth. Check the reservoir, lid, filter basket, carafe, and accessible brewing components before deciding on the correct cleaning method.
How Do I Get a Musty Smell Out of a Coffee Maker?
Empty the reservoir, wash the removable parts with the approved cleaning method, remove old coffee residue, and follow the manual for cleaning the internal brewing system. Complete the recommended rinse cycles and let the parts dry as directed.
Can Mold Grow Inside a Coffee Maker Water Reservoir?
Yes. Mold can grow when suitable moisture and other conditions are present. Inspect the reservoir and lid regularly. If you find visible mold, stop using the machine until you have cleaned the affected parts safely.
Is It Safe to Drink Coffee if the Machine Smells Musty?
It is best to stop brewing until you identify and address the unusual odor. A musty smell does not prove that mold is present, but visible mold or unresolved contamination needs attention before the machine is used again.
Why Does My Coffee Maker Smell Bad After Descaling?
The smell may come from leftover descaling solution or another source of residue. Follow the manufacturer’s rinse instructions and do not add another cleaner to mask the smell. If the odor persists, contact the manufacturer.
Should I Use Vinegar to Remove Mold From a Coffee Maker?
Do not assume vinegar is safe or effective for every coffee maker. Some manufacturers allow it for certain models, while others recommend specific descaling products. Check the manual before using vinegar, and never mix it with bleach or other cleaning products.
Why Does My Keurig Water Reservoir Smell Moldy?
The smell may come from stale water, residue under the reservoir lid, or another dirty component. Follow the cleaning instructions for your exact Keurig model, rinse the reservoir thoroughly, and check other removable parts such as the drip tray and pod holder.
What Should I Do if My Coffee Maker Smells Moldy After Sitting Unused?
Empty old water, inspect the removable parts, and clean the machine according to the manual before brewing. If you find visible mold that cannot be removed safely or the smell remains afterward, stop using the machine and contact the manufacturer.
Does a Coffee Maker Need Cleaning Even if I Use Filtered Water?
Yes. Filtered water does not remove coffee oils, old grounds, or all residue from the machine. Continue cleaning the removable parts and follow the manufacturer’s maintenance and descaling instructions.
Final Thoughts
A coffee maker that smells moldy or musty does not always need to be replaced. Stale water, old coffee grounds, and residue on removable parts can cause unpleasant odors, while damp and contaminated internal areas may need more careful attention.
Start by emptying the reservoir and inspecting the parts you can safely remove. Clean them using the manufacturer’s recommended method, rinse the machine properly, and allow the parts to dry as directed.
If the smell remains, look for an overlooked source rather than repeatedly running cleaning cycles. And if you suspect mold in an inaccessible area, do not keep brewing coffee until the problem has been resolved.
A simple cleaning routine can help your coffee maker stay fresh, reduce unpleasant odors, and make your morning coffee more enjoyable.

“I believe great cooking starts with the right tools, trusted advice, and a little confidence in the kitchen.”
Hi, I’m Emma Carter. My love for cooking began in my grandmother’s kitchen, where I learned that every great meal starts with simple ingredients and the right cookware. Over the years, I’ve spent countless hours researching, testing, and comparing kitchen appliances, cookware, coffee makers, air fryers, and other everyday kitchen essentials.
Here at KiCook, my goal is to make your buying decisions easier with honest product reviews, practical buying guides, and easy-to-follow cooking tips. Whether you’re upgrading your kitchen or searching for the best appliance for your home, I focus on providing clear, reliable, and research-backed information you can trust.
When I’m not testing new kitchen gadgets or writing in-depth guides, you’ll usually find me trying new recipes, visiting local farmers’ markets, or enjoying a quiet cup of coffee while planning my next kitchen project.