

Finding sediment in a coffee cup from a coffee maker can be frustrating, especially when the machine appears to be brewing normally. You pour a fresh cup, take a few sips, and then notice a layer of brown grit, tiny coffee grounds, black specks, or even pale flakes sitting at the bottom.
In most cases, the problem is easier to fix than it looks.
Fine coffee grounds, an incorrectly fitted filter, an overflowing brew basket, a clogged pod needle, or a dirty coffee maker can all allow particles to reach your cup. Permanent metal filters also naturally allow more fine coffee particles through than paper filters.
The fastest place to start is with the grind and filter. Try a slightly coarser grind, inspect the filter carefully, and make sure the brew basket is not overloaded. Manufacturer guidance from Hamilton Beach on coffee filters and grind size also notes that paper filters trap more sediment, while permanent filters work better with a coarser grind.
If that does not solve the problem, the steps below will help you identify exactly where the sediment is coming from.
Why Is There Sediment in My Coffee Cup?
Sediment usually reaches your coffee because very small particles are getting past the filtration system or because coffee grounds are spilling around the filter instead of passing through it correctly.
The most common causes are:
- Coffee ground too finely
- A grinder producing excessive coffee fines
- A permanent or metal filter
- A collapsed or incorrectly positioned paper filter
- Too much coffee in the brew basket
- A brew basket that is overflowing
- A clogged filter holder or basket drain
- A carafe or drip-stop mechanism positioned incorrectly
- A dirty coffee maker
- Mineral buildup inside the brewer
- A damaged or clogged coffee pod system
- Sediment already present in the water supply
The appearance of the particles can give you a useful clue before you start taking the machine apart.
What Are the Particles in Your Coffee?
Not everything at the bottom of a cup is the same type of sediment.
| What You See | Most Likely Cause | What to Try First |
|---|---|---|
| Fine brown sediment | Coffee grind is too fine | Use a slightly coarser grind |
| Gritty coffee or coffee dust | Excessive coffee fines | Adjust the grinder |
| Large coffee grounds | Filter failure or basket overflow | Inspect the filter and coffee dose |
| Grounds at the bottom of the carafe | Collapsed or misplaced filter | Reseat or replace the filter |
| Black specks | Coffee grounds, filter particles, or residue | Run a water-only cycle |
| White or chalky flakes | Mineral scale | Clean or descale the machine |
| Sediment only with a metal filter | Fine particles passing through mesh | Use a coarser grind |
| Particles during a water-only brew | Water or machine contamination | Inspect and clean the brewer |
A small amount of fine brown material from a permanent filter may simply be coffee fines. Large grounds, unidentified debris, or particles that appear even when no coffee is being brewed deserve more investigation.
1. Your Coffee Grind Is Too Fine
A grind that is too fine is one of the most common reasons for sediment in brewed coffee.
Coffee makers depend on the filter to separate brewed liquid from the grounds. When the particles are extremely small, some of them may pass through tiny openings in a reusable mesh filter.
Fine grounds can also slow water flow through the coffee bed. If water cannot drain quickly enough, the filter basket may fill too high and overflow.
Ninja specifically notes in its troubleshooting guidance that sediment can occur when finely ground coffee is used with a permanent filter. The company recommends trying a slightly coarser grind or using an appropriate paper filter. See Ninja’s coffee brewer troubleshooting guidance
For most automatic drip machines, start around a medium grind rather than an espresso-fine texture.
You do not need to make a dramatic change. Move your grinder one or two settings coarser, brew another pot, and compare the bottom of the cup.
If the sediment drops noticeably, you have probably found the cause.
2. Your Grinder Is Producing Too Many Coffee Fines
Even when your overall grind looks correct, your grinder may be producing a large amount of very small particles known as coffee fines.
Fines are the dusty particles mixed in with the larger coffee grounds. They extract quickly and can pass through some reusable filters.
This is why two batches of coffee labelled “medium grind” can behave differently.
An uneven grinder may create a mixture of larger chunks and powder-like particles. The larger pieces look correct, while the fines end up at the bottom of your coffee cup.
If you grind whole beans at home, examine the grounds before brewing. If there is a visible layer of coffee dust, try a coarser setting.
If you are considering a brewer with an integrated grinder, grind consistency should also be part of your buying decision. Kicook’s coffee maker section includes guides for choosing machines based on different brewing needs.
3. You Are Using a Permanent or Metal Coffee Filter
Reusable filters are convenient, but they behave differently from paper filters.
A metal or permanent filter allows more coffee oils and microscopic particles into the finished drink. Some people actually prefer the fuller body this produces.
The tradeoff is that you may notice more sediment at the bottom of the cup.
Hamilton Beach explains that paper filters trap more sediment, while permanent filters generally perform better with a coarser grind. Read Hamilton Beach’s filter guidance
If you use a permanent filter and want a cleaner cup, try a slightly coarser grind first.
Do not automatically place a paper filter inside a permanent filter. Some coffee makers allow this, while others specifically warn against combining the two because it can restrict water flow and cause the basket to back up.
Check the owner’s manual for your specific model before using both filters together.
4. The Paper Filter Collapsed or Was Not Seated Correctly
Sometimes the grind is perfectly fine. The real problem is the paper filter.
A paper filter can:
- Fold inward
- Collapse during brewing
- Sit crooked in the basket
- Tear along the side
- Be too small for the filter basket
- Allow grounds to spill over the edge
When this happens, water can bypass part of the filter and carry loose grounds directly into the carafe.
Before every brew, make sure the filter sits flat against the sides of the basket and does not extend into an awkward position where the showerhead could push it over.
If the filter repeatedly collapses, confirm that you are using the correct filter shape and size for the machine.
5. You Are Using Too Much Ground Coffee
More coffee does not always mean better coffee.
Overfilling the brew basket leaves less space for the grounds to expand as hot water saturates them. The coffee bed can swell toward the top of the basket and eventually overflow.
Once that happens, grounds may travel around the filter and end up in the carafe.
Hamilton Beach, for example, warns in its FlexBrew troubleshooting information that excessive grounds and coffee ground too finely can contribute to brew-basket overflow. See Hamilton Beach’s FlexBrew troubleshooting information
If sediment appeared after you started brewing stronger coffee, reduce the amount of grounds and test again.
Use the manufacturer’s recommended maximum rather than filling the basket based only on taste preference.
You can always make coffee taste stronger by adjusting the coffee-to-water ratio within the safe capacity of the brewer.
6. The Brew Basket Is Overflowing
An overflowing brew basket usually leaves more than a few fine particles behind. You may see larger grounds floating in the carafe or scattered across the top of the filter.
Several things can cause an overflow:
- Coffee ground too finely
- Too much coffee
- A collapsed paper filter
- A clogged basket outlet
- A permanent filter that drains too slowly
- A carafe that is not correctly positioned
After brewing, look at the coffee bed.
If grounds are stuck high along the basket walls or above the normal filter line, overflow is a strong possibility.
Clean the basket, reduce the coffee dose, and use a slightly coarser grind before the next brew.
If your current machine regularly struggles with basket overflow or inconsistent brewing, you may also want to compare the features of a basic drip coffee maker on Kicook to see how different brewer designs handle everyday drip coffee.
7. The Brew Basket Drain or Filter Holder Is Clogged
Coffee oils and fine grounds can collect in narrow openings underneath the filter basket.
The basket may look clean from above while the small drain path underneath is partially blocked.
A restricted drain slows the flow of brewed coffee. Water continues entering the basket faster than it can escape, increasing the chance of an overflow.
Remove the filter basket if your machine allows it.
Wash it with warm water and mild dish soap, then inspect the bottom opening and any movable valves. Remove visible coffee residue without forcing sharp objects into parts that were not designed to be disassembled.
Also check your owner’s manual before removing valves, springs, seals, or other small components.
8. The Carafe or Drip-Stop Mechanism Is Not Positioned Correctly
Many drip coffee makers have a pause-and-pour or drip-stop valve underneath the brew basket.
When the carafe is inserted correctly, the lid or rim pushes the valve open so brewed coffee can drain into the pot.
If the carafe is slightly out of position, the valve may stay partly closed.
Coffee then backs up inside the filter basket.
This can eventually cause water and grounds to spill over the sides.
Make sure the carafe:
- Sits completely on the warming plate or base
- Is pushed into its normal brewing position
- Has the correct lid attached
- Is compatible with the brewer
If you recently replaced the carafe with a third-party version, compare its lid height and shape with the original.
A small difference can interfere with the drip-stop valve.
9. Your Coffee Maker Needs Cleaning
Coffee makers collect oils, loose grounds, and mineral deposits over time.
That buildup can restrict water flow and leave debris in places where fresh coffee passes through.
Start by cleaning removable components:
- Filter basket
- Permanent filter
- Carafe
- Reservoir, if removable
- Lid
- Pod holder
- Drip tray
Use the cleaning procedure recommended by your manufacturer.
Cleaning and descaling are not exactly the same thing. Regular cleaning removes coffee oils and loose residue, while descaling targets mineral deposits inside the water pathway.
Cuisinart, for example, recommends rinsing the carafe and filter basket before performing its machine-cleaning cycle. See Cuisinart’s coffee maker cleaning guide
Avoid assuming that one universal vinegar recipe is suitable for every machine. Follow the instructions for your specific model, especially if it has a dedicated cleaning or descaling program.
10. Mineral Buildup May Be Causing White Flakes
If the particles are pale, chalky, or white rather than brown, you may not be looking at coffee grounds at all.
Hard water contains dissolved minerals that can accumulate inside appliances as scale.
Small pieces of scale may loosen and appear in hot water or coffee.
This is particularly likely if you also notice:
- White residue in the reservoir
- Chalky deposits around water outlets
- Slower brewing
- Unusual noises
- A descale warning light
Run a brew cycle without coffee.
If white particles still appear, the coffee grounds are probably not the source.
Follow the manufacturer’s descaling instructions.
People living in hard-water areas may also benefit from choosing a brewer designed with easier maintenance or filtration. Kicook has a separate guide to coffee makers for hard water that covers this issue in more detail.
How to Find Where the Sediment Is Coming From

Instead of changing several things at once, troubleshoot the machine in a simple order.
That way, you will know what actually solved the problem.
Step 1: Check Your Source Water
Fill a clean white cup directly from the water source you normally use for coffee.
Look closely at the bottom.
If particles are already present, the coffee maker may not be responsible.
Try filtered water or another clean water source and compare.
Step 2: Run a Water-Only Brew
Remove the coffee and filter and run plain water through the machine if your model allows it.
Use a clean white mug or glass container so particles are easy to see.
If the water comes out clean, the problem is probably related to your coffee, grinder, filter, or brew basket.
If particles still appear, concentrate on the reservoir, water filter, internal water path, or mineral buildup.
Step 3: Inspect the Sediment
Brown, powdery particles usually point toward coffee fines.
Large brown pieces suggest filter failure or overflow.
White particles are more consistent with mineral buildup.
Black particles require closer inspection because they can come from coffee grounds, a filter component, or residue elsewhere in the machine.
Step 4: Check the Filter
Examine the filter for:
- Tears
- Holes
- Bent mesh
- Incorrect positioning
- Collapsed sides
- Wrong size
Replace a damaged filter before troubleshooting anything more complicated.
Step 5: Try a Coarser Grind
Move your grinder one or two settings coarser.
If you buy pre-ground coffee, try a product intended for automatic drip brewing rather than espresso.
Brew another cup and compare the amount of sediment.
Step 6: Reduce the Coffee Dose
Remove some grounds, especially if the basket looked unusually full after brewing.
Keep the amount within the manufacturer’s stated capacity.
Step 7: Clean and Retest
Wash the removable brewing parts, clear visible coffee residue, and perform any recommended cleaning cycle.
Then run another water-only test followed by a normal brew.
By changing one variable at a time, you can usually identify the cause without replacing the coffee maker.
How to Fix Sediment Based on Your Coffee Maker Type
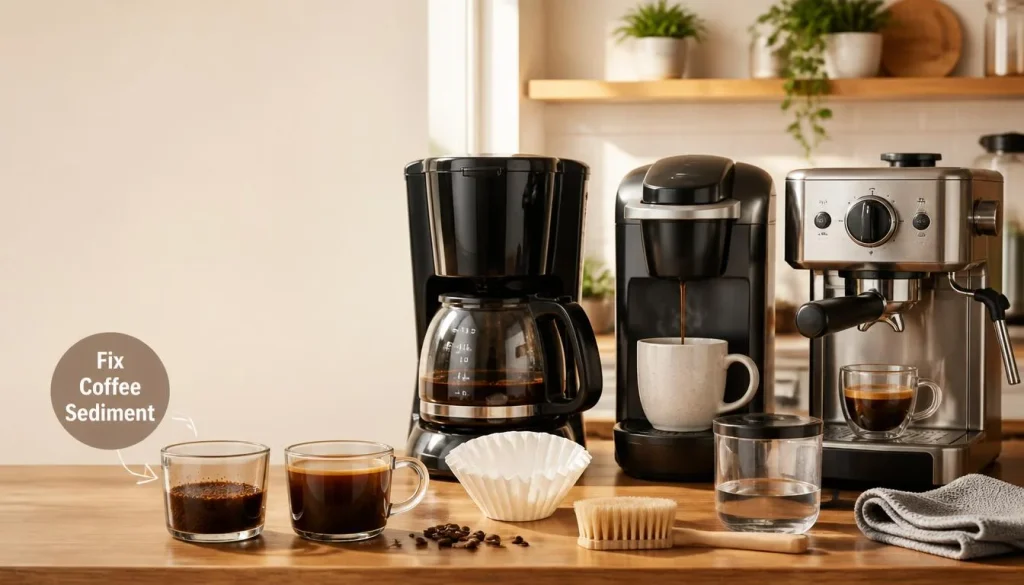
Different coffee makers develop sediment for different reasons.
Drip Coffee Maker
For a standard drip machine, check these items first:
- Grind size
- Paper or permanent filter
- Amount of coffee
- Filter basket position
- Carafe position
- Basket drainage
- Machine cleanliness
A medium grind and correctly positioned filter solve many cases.
If you are comparing machines because your current brewer has recurring issues, Kicook’s guide to basic drip coffee makers may also help you understand what features matter in a simple drip brewer.
Coffee Maker With a Permanent Filter
A small amount of fine sediment can be more noticeable with reusable metal filters.
Try:
- Grinding slightly coarser
- Cleaning the mesh thoroughly
- Checking for bent or damaged sections
- Reducing very fine coffee particles
- Using a manufacturer-approved paper filter instead, if supported
Do not assume that adding a paper filter on top of the permanent filter is safe for every brewer.
Ninja explicitly warns with some models that combining a paper filter and permanent filter can cause water or coffee to back up in the basket. Check Ninja’s relevant brewer guidance
Grind-and-Brew Coffee Maker
If the machine grinds beans automatically, focus on grind consistency.
Try a coarser grinder setting and make sure the grinder is clean.
Coffee dust left inside the grinder chute can also fall into later batches.
If sediment suddenly appeared after changing beans or grind settings, return to your previous setting and test again before assuming the brewer is defective.
Keurig or Pod Coffee Maker
Grounds in a Keurig cup usually point toward the pod, pod holder, or brewing needles.
Inspect the pod for damage first.
If the pod looks normal, check for coffee grounds around the entrance and exit needles.
Keurig’s own troubleshooting documentation states that grounds can collect in the entrance or exit needles and recommends cleaning them carefully. See Keurig’s official troubleshooting guide for grounds in coffee
Keurig also recommends running water-only cycles after needle cleaning on applicable models.
For a detailed walkthrough of routine maintenance, needle cleaning, and descaling, see Kicook’s step-by-step guide to cleaning a Keurig coffee maker.
Why Are There Grounds in My Keurig or Pod Coffee Maker?
Single-serve brewers deserve extra attention because the filtering happens inside the pod rather than in a conventional filter basket.
Common causes include:
A Damaged Pod
A torn or poorly sealed pod can release coffee grounds during brewing.
Discard visibly damaged pods rather than trying to use them.
A Clogged Exit Needle
Coffee particles can build up around the needle that carries brewed coffee out of the pod.
Keurig advises carefully cleaning affected needles and warns that the needles are sharp. View Keurig’s official needle-cleaning instructions
Always unplug or power down the machine as directed by the manufacturer before performing maintenance.
An Overfilled Reusable Pod
Reusable pods need empty space for water to pass through the coffee.
Packing the pod tightly or filling it above its recommended level can cause poor flow and grounds in the cup.
Coffee Ground Too Finely for a Reusable Pod
Reusable pod screens may allow very fine particles through.
Try a slightly coarser grind and avoid packing the grounds down firmly.
How to Prevent Sediment in Coffee
Once the machine is working normally again, a few habits can keep the problem from returning.
Use the correct grind size. Automatic drip brewers usually perform better with a medium grind, while reusable filters may benefit from going slightly coarser.
Use the correct filter. Make sure paper filters match the shape and size recommended for your basket.
Do not overfill the brew basket. Extra grounds can restrict drainage and increase the risk of overflow.
Clean removable brewing parts regularly. Coffee oils become sticky as they build up.
Check reusable filters for damage. A torn or warped screen cannot filter consistently.
Descale according to your owner’s manual. This is especially important in hard-water areas.
Keep pod needles clean. Single-serve machines have narrow openings that can collect coffee particles.
Run an occasional water-only cycle. It is a quick way to notice residue before it becomes a bigger problem.
Is Coffee Sediment Safe to Drink?
If the sediment is simply very fine coffee grounds that passed through a reusable filter, accidentally drinking a small amount is generally different from finding unexplained machine debris.
Coffee brewed with metal filters naturally contains more fine particles than coffee brewed through tightly woven paper.
The important question is whether you can confidently identify what you are seeing.
If the material looks like normal brown coffee fines and disappears when you change the grind or filter, the filtration system was probably the cause.
However, stop using the machine until you investigate if you see:
- Plastic-like fragments
- Rubber pieces
- Unknown black debris
- Heavy white flakes
- Slimy material
- Rust-coloured particles
- Debris during repeated water-only cycles
- Unusual smells from the reservoir or brewed water
Do not assume that every dark particle is simply coffee.
When Should You Stop Using or Service the Coffee Maker?
Most sediment problems can be fixed at home, but some signs suggest that normal cleaning is no longer enough.
Consider professional service, replacement parts, or replacing the brewer if:
- A reusable filter is torn or permanently warped
- The brew basket is cracked
- Internal seals appear damaged
- The machine repeatedly overflows after correct setup
- Unknown particles continue after thorough cleaning
- Debris appears during water-only cycles
- The brewer leaks internally
- Plastic or rubber fragments appear in the cup
- The machine has electrical or overheating problems
If the sediment started suddenly after a component broke or after the machine began making unusual noises, do not keep brewing simply to see whether the problem disappears.
Frequently Asked Questions About Sediment in Coffee Cup From Coffee Maker
Why is there sediment at the bottom of my coffee cup?
Fine coffee grounds are the most common cause. They may pass through a permanent metal filter when the grind is too fine. Try a slightly coarser grind and inspect the filter for damage or incorrect positioning.
Why is my coffee maker leaving grounds in my coffee?
Grounds can enter the coffee when the filter collapses, the basket overflows, the grind is too fine, or the filter is damaged. Pod machines can also release grounds when their needles become clogged.
Why are there coffee grounds at the bottom of my carafe?
Check the paper filter first. A folded, torn, undersized, or collapsed filter can allow grounds to bypass the filtration area and fall directly into the carafe.
Why is my coffee filter letting grounds through?
The coffee may be ground too finely for the filter. This is particularly common with reusable mesh filters. Try a coarser grind and replace the filter if the mesh is damaged.
Can a paper coffee filter collapse while brewing?
Yes. A paper filter can fold inward or collapse if it is incorrectly positioned, the wrong size, or disturbed by water flow. Make sure it sits evenly inside the basket before starting the brew.
Does a permanent coffee filter cause more sediment?
It can. Permanent filters generally allow more fine particles and oils through than paper filters. A slightly coarser grind usually reduces the amount of sediment.
How do I stop coffee fines from getting into my cup?
Start by grinding slightly coarser. You can also try a paper filter if your brewer supports one and clean or replace any reusable filter that has become damaged.
Why is my coffee filter basket overflowing?
The most common causes are excessive coffee, coffee ground too finely, a clogged basket outlet, an incorrectly fitted filter, or a carafe that is not opening the drip-stop valve correctly.
Why are there grounds in my Keurig coffee?
Coffee grounds may collect in the entrance or exit needles, or a K-Cup may be damaged. Clean the pod holder and needles according to the manufacturer’s instructions and run water-only cycles afterward.
Why are there black specks in coffee from my coffee maker?
Black specks may be coffee grounds, residue from the brewing system, or particles from another component. Run a water-only brew. If the specks remain without coffee in the machine, inspect and clean the brewer before using it again.
Why are there white flakes in my coffee?
White or chalky flakes may be mineral scale rather than coffee sediment. Run plain water through the machine and inspect the reservoir for scale. Follow your manufacturer’s descaling instructions if mineral buildup is present.
Should I use a paper filter with a reusable coffee filter?
Only if your coffee maker manufacturer specifically allows it. Some machines warn against combining paper and permanent filters because restricted water flow can cause the brew basket to back up or overflow.
Final Thoughts
Sediment in coffee from a coffee maker usually comes down to one of four things: the coffee is ground too finely, the filter is not doing its job, the brew basket is overflowing, or the machine needs cleaning.
Start with the easiest fix. Use a slightly coarser grind and inspect the filter.
If that does not work, brew plain water through the machine. A clean water-only brew tells you that the problem is probably on the coffee side of the system. Particles in plain water point you toward the reservoir, scale, filter system, or internal components.
Most importantly, pay attention to what the sediment actually looks like. Fine brown coffee particles and unexplained machine debris are not the same problem, and treating them differently can save you from replacing a perfectly good coffee maker.

“I believe great cooking starts with the right tools, trusted advice, and a little confidence in the kitchen.”
Hi, I’m Emma Carter. My love for cooking began in my grandmother’s kitchen, where I learned that every great meal starts with simple ingredients and the right cookware. Over the years, I’ve spent countless hours researching, testing, and comparing kitchen appliances, cookware, coffee makers, air fryers, and other everyday kitchen essentials.
Here at KiCook, my goal is to make your buying decisions easier with honest product reviews, practical buying guides, and easy-to-follow cooking tips. Whether you’re upgrading your kitchen or searching for the best appliance for your home, I focus on providing clear, reliable, and research-backed information you can trust.
When I’m not testing new kitchen gadgets or writing in-depth guides, you’ll usually find me trying new recipes, visiting local farmers’ markets, or enjoying a quiet cup of coffee while planning my next kitchen project.